Zero Point Tip-of-the-Year

Hello Harp Techs, as your skill level in harmonica mechanics increases, you will feel compelled to find new techniques to accomplish certain harp tech tasks. For me, I am always in pursuit of a “better way” to set the Zero Point of the harmonica reed, so when I found a narrow enough parallel brass lined plier at www.micromark.com (part #86632) I had to order the tool and take-it-to-the bench. The pliers arrived yesterday. The initial results were good, but similar to most new skills, will require patient practice.
TIP: before proceeding, please review my forum on the subject of Zero Point at: https://www.bluesharmonica.com/reed_gapping_establishing_zero_point_question

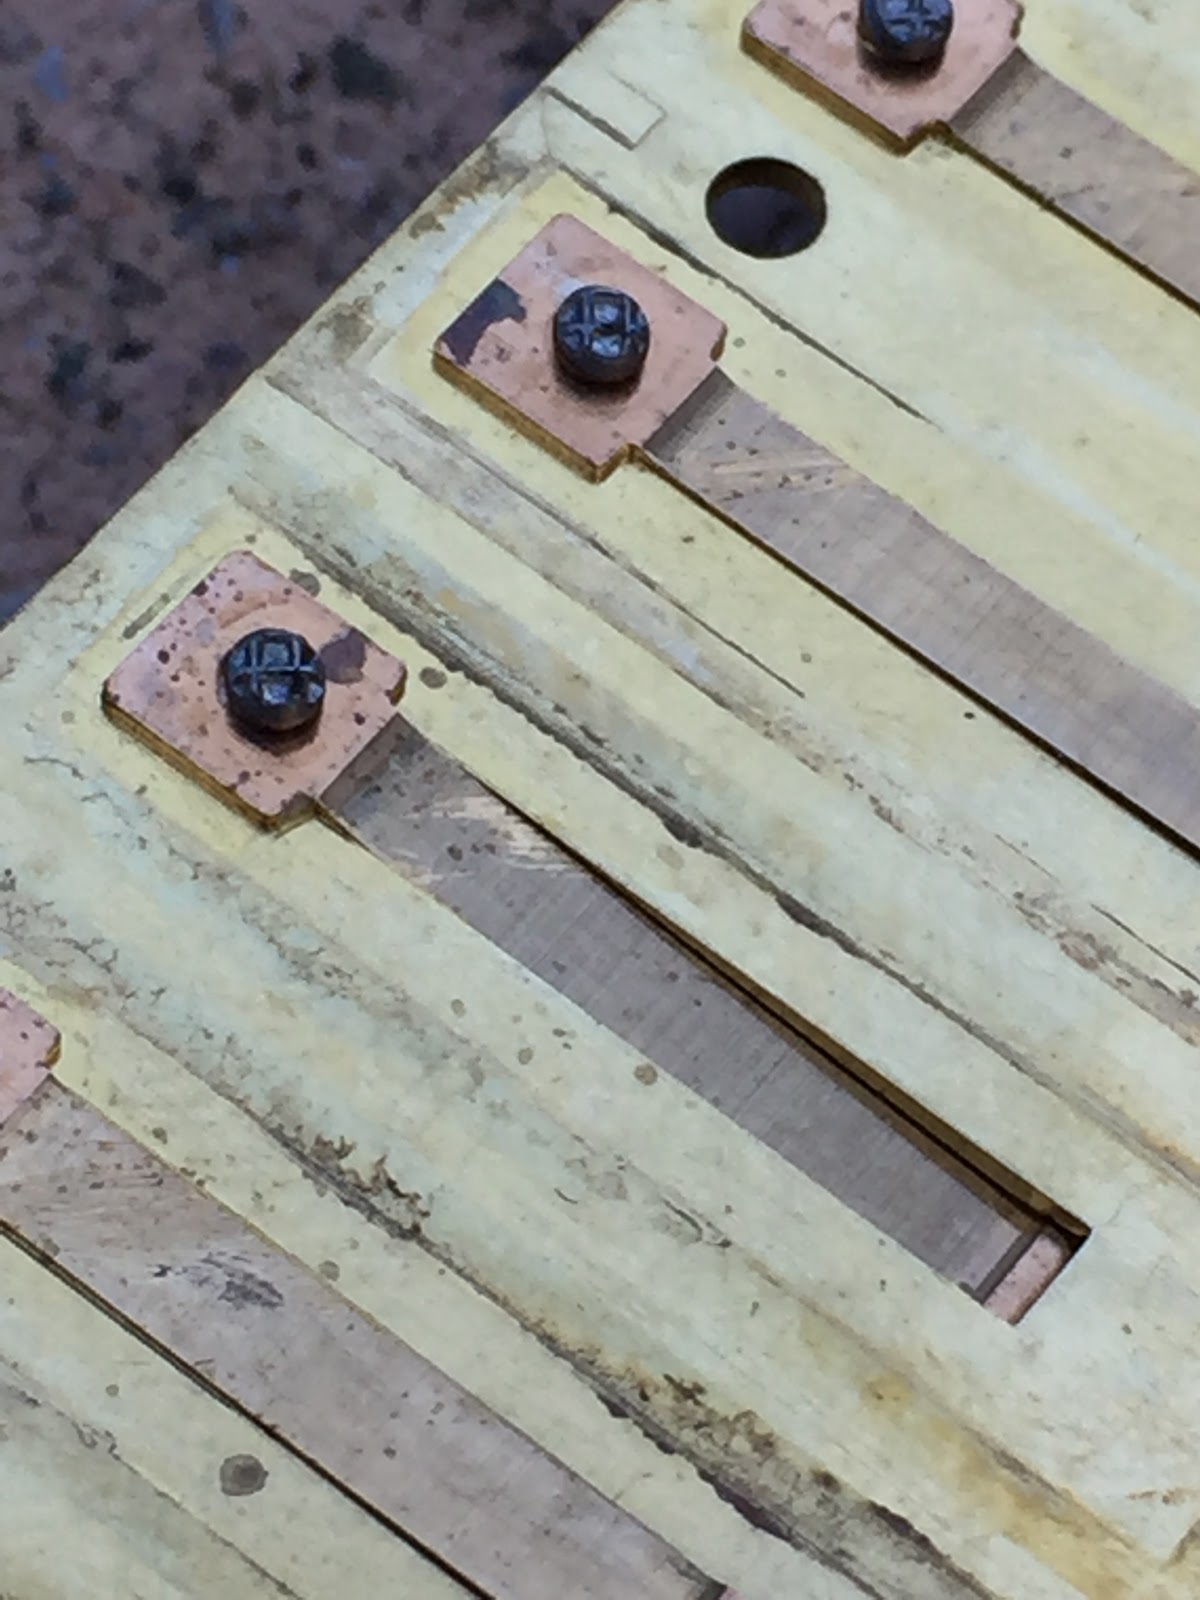
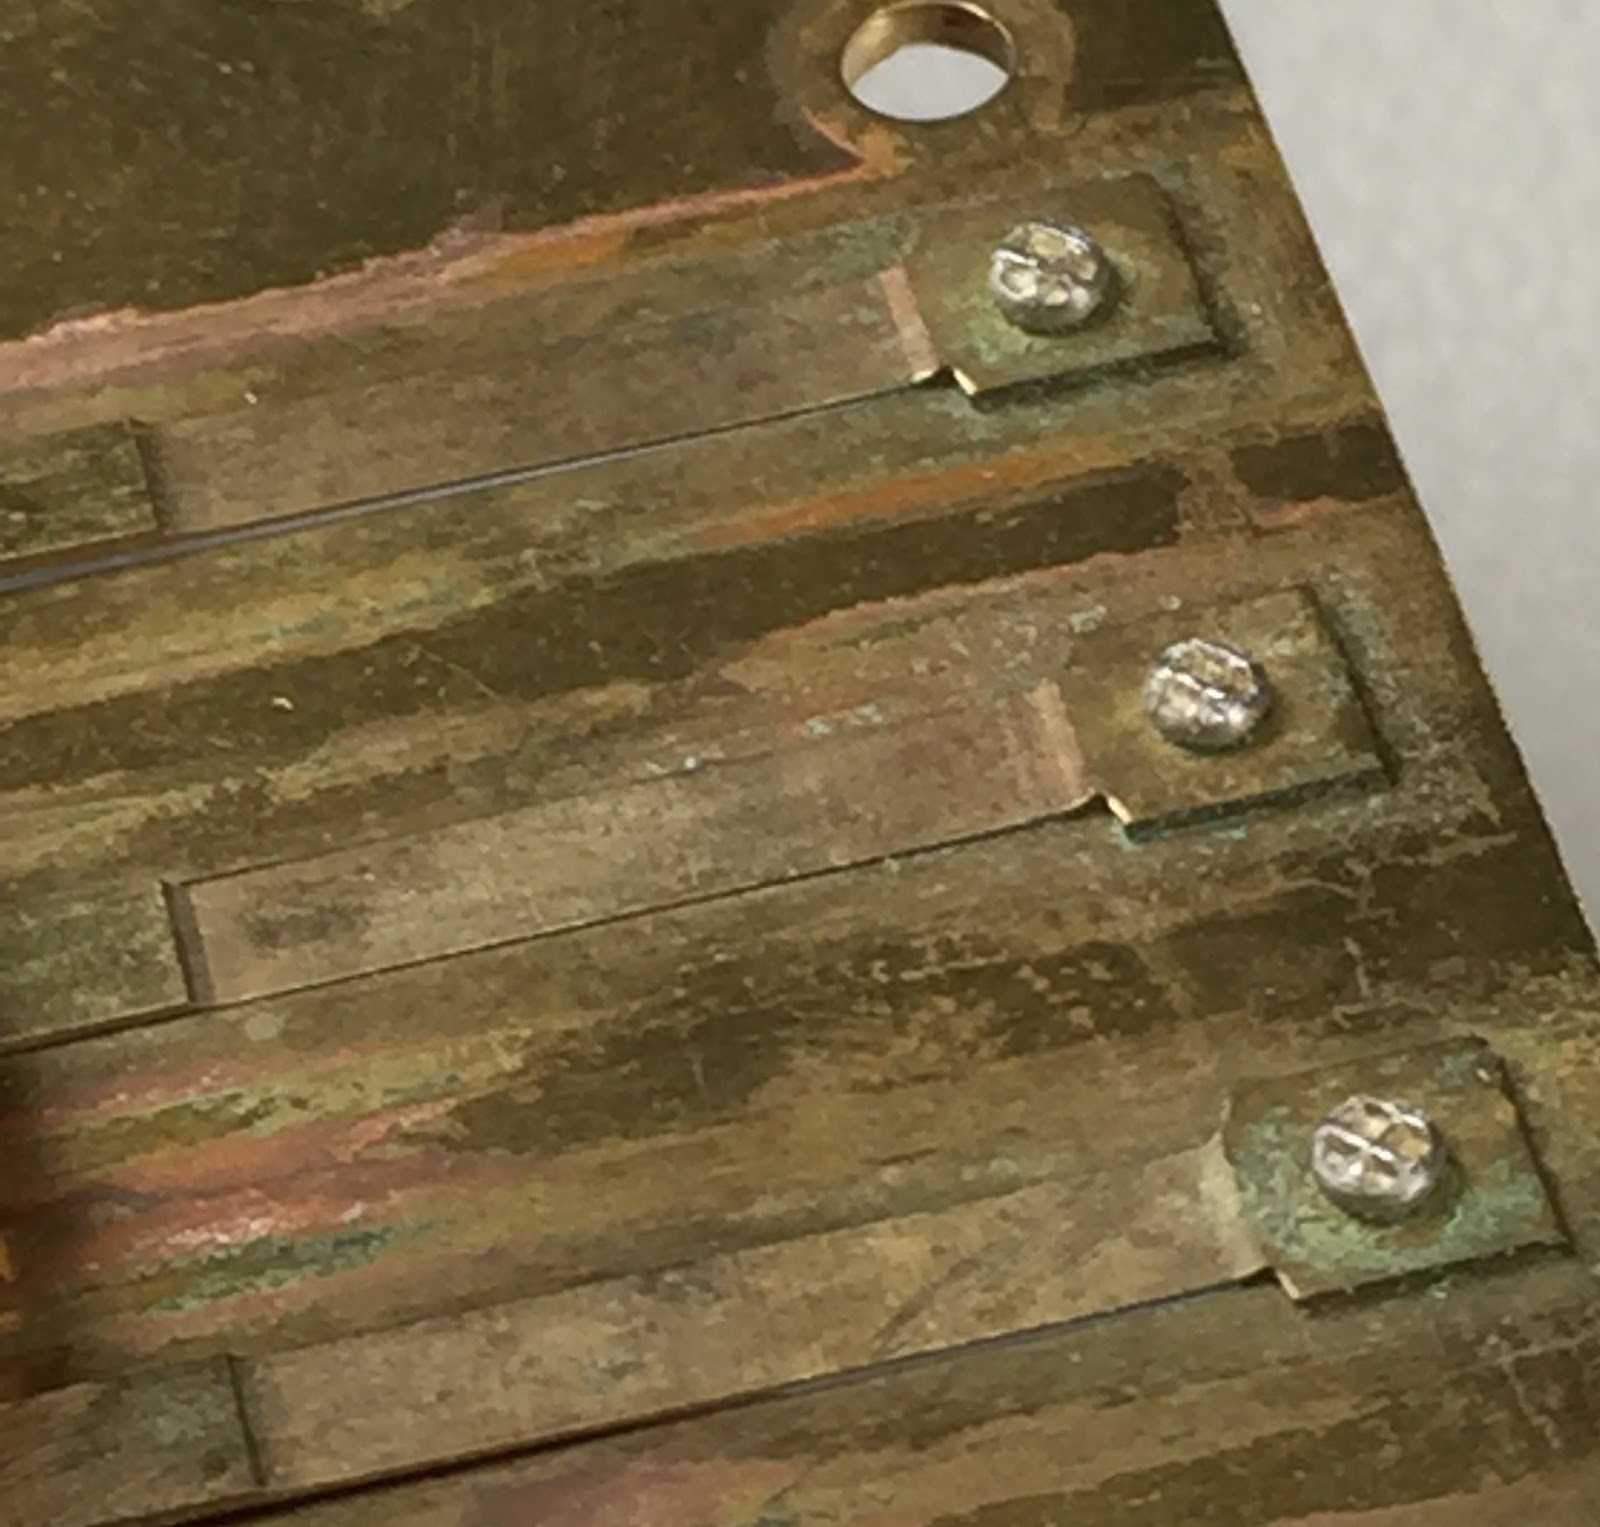
Before I started the procedure, I snapped this pic-shot of the bottom view of the reed plate showing #4 reed (upper) and #3 reed (lower) in the open position
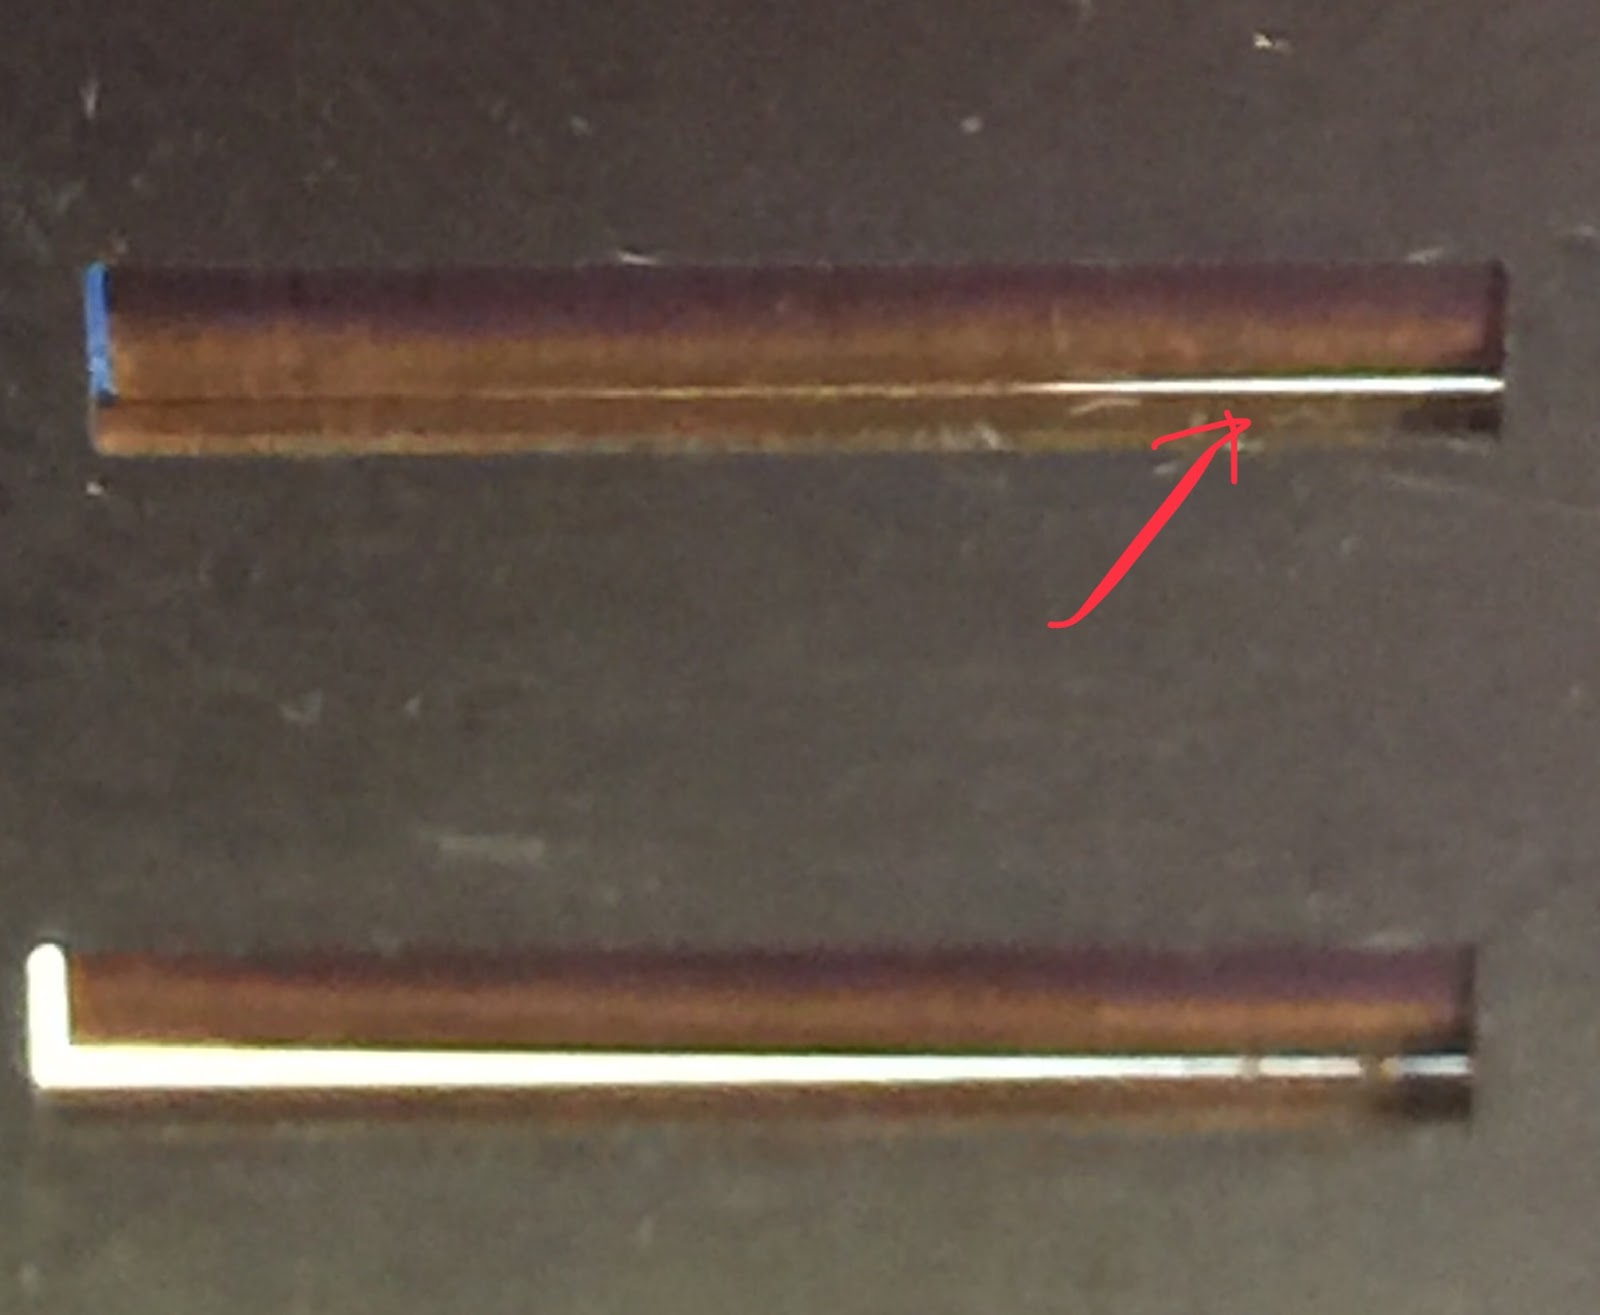
To simulate a closing #4 reed, I taped the tip of the reed in place. The red arrow clearly shows a significant amount of light peering through the Zero Point. If you can see light, so can air leakage. This means we will have to exert more effort to play the harmonica and who wants that?
Our mission is clear, lower the back of the reed into the slot to “mitigate the leak”!
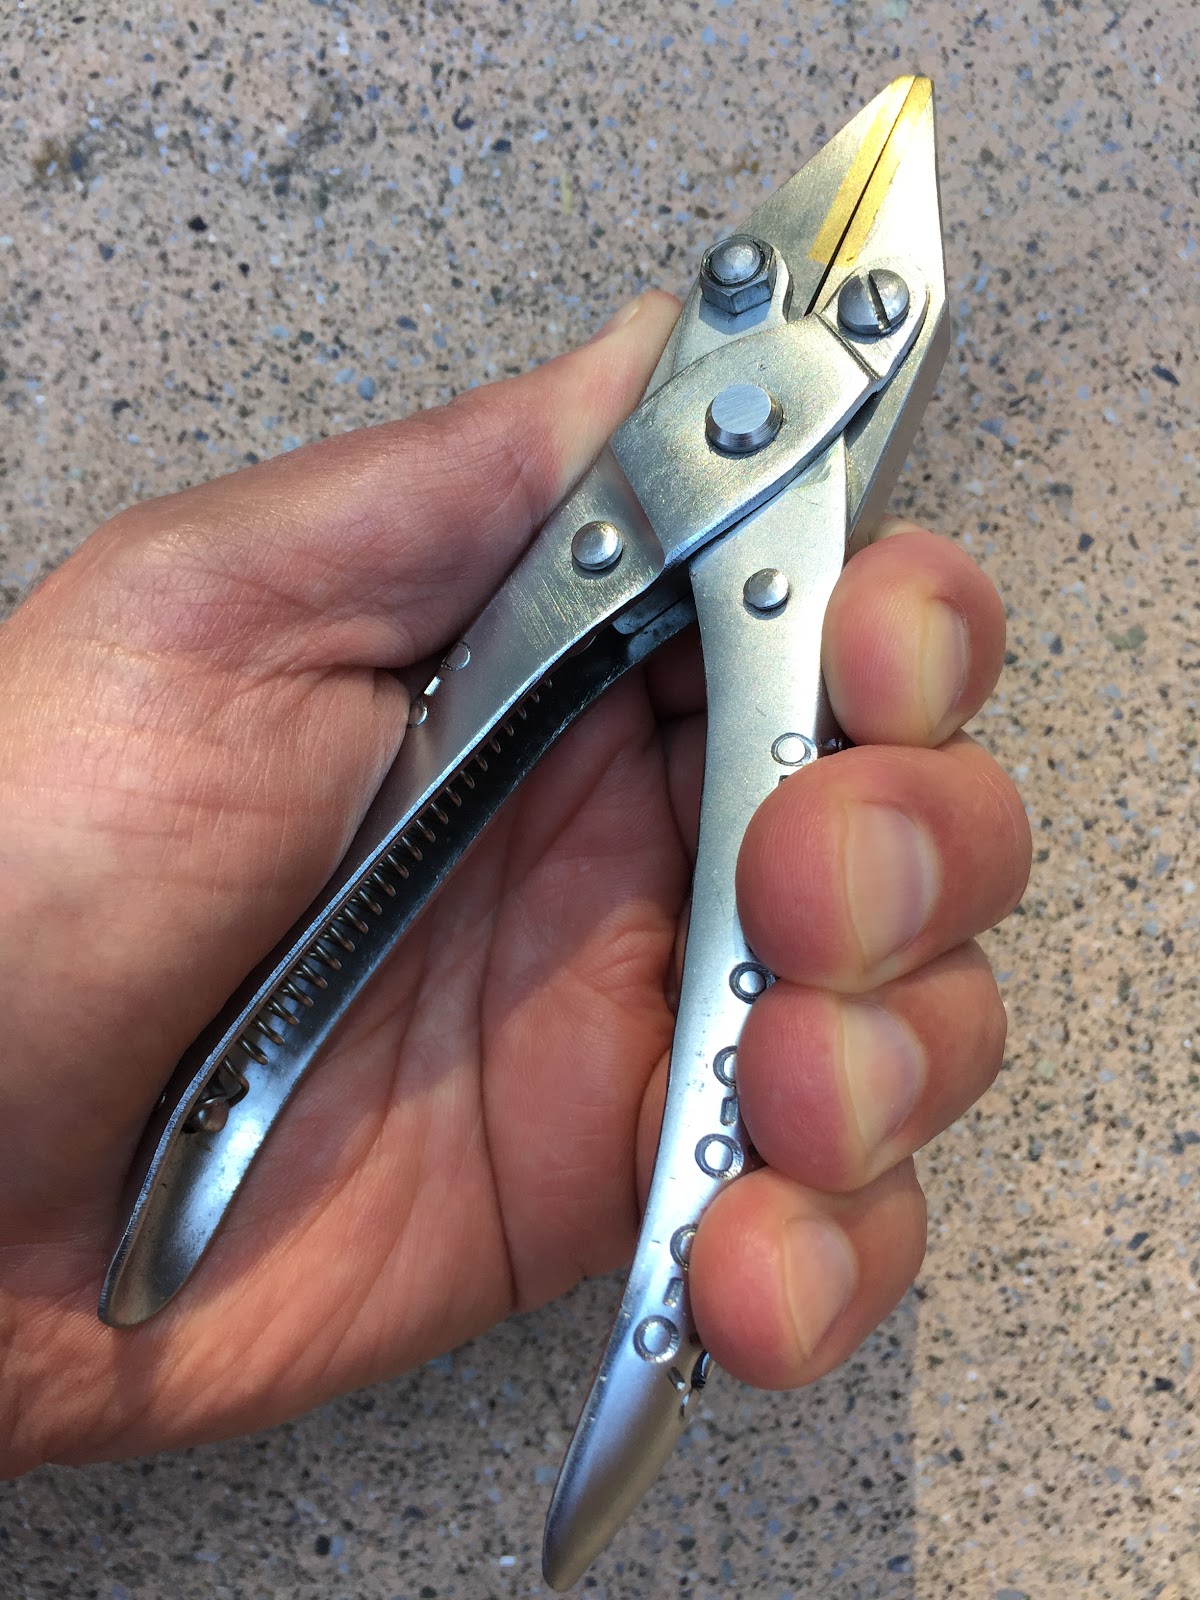
Brass (soft metal) lined jaws measuring ¼” wide x ⅞” long makes for perfect non-marring surfaces that will be gentle on the tender harmonica reeds
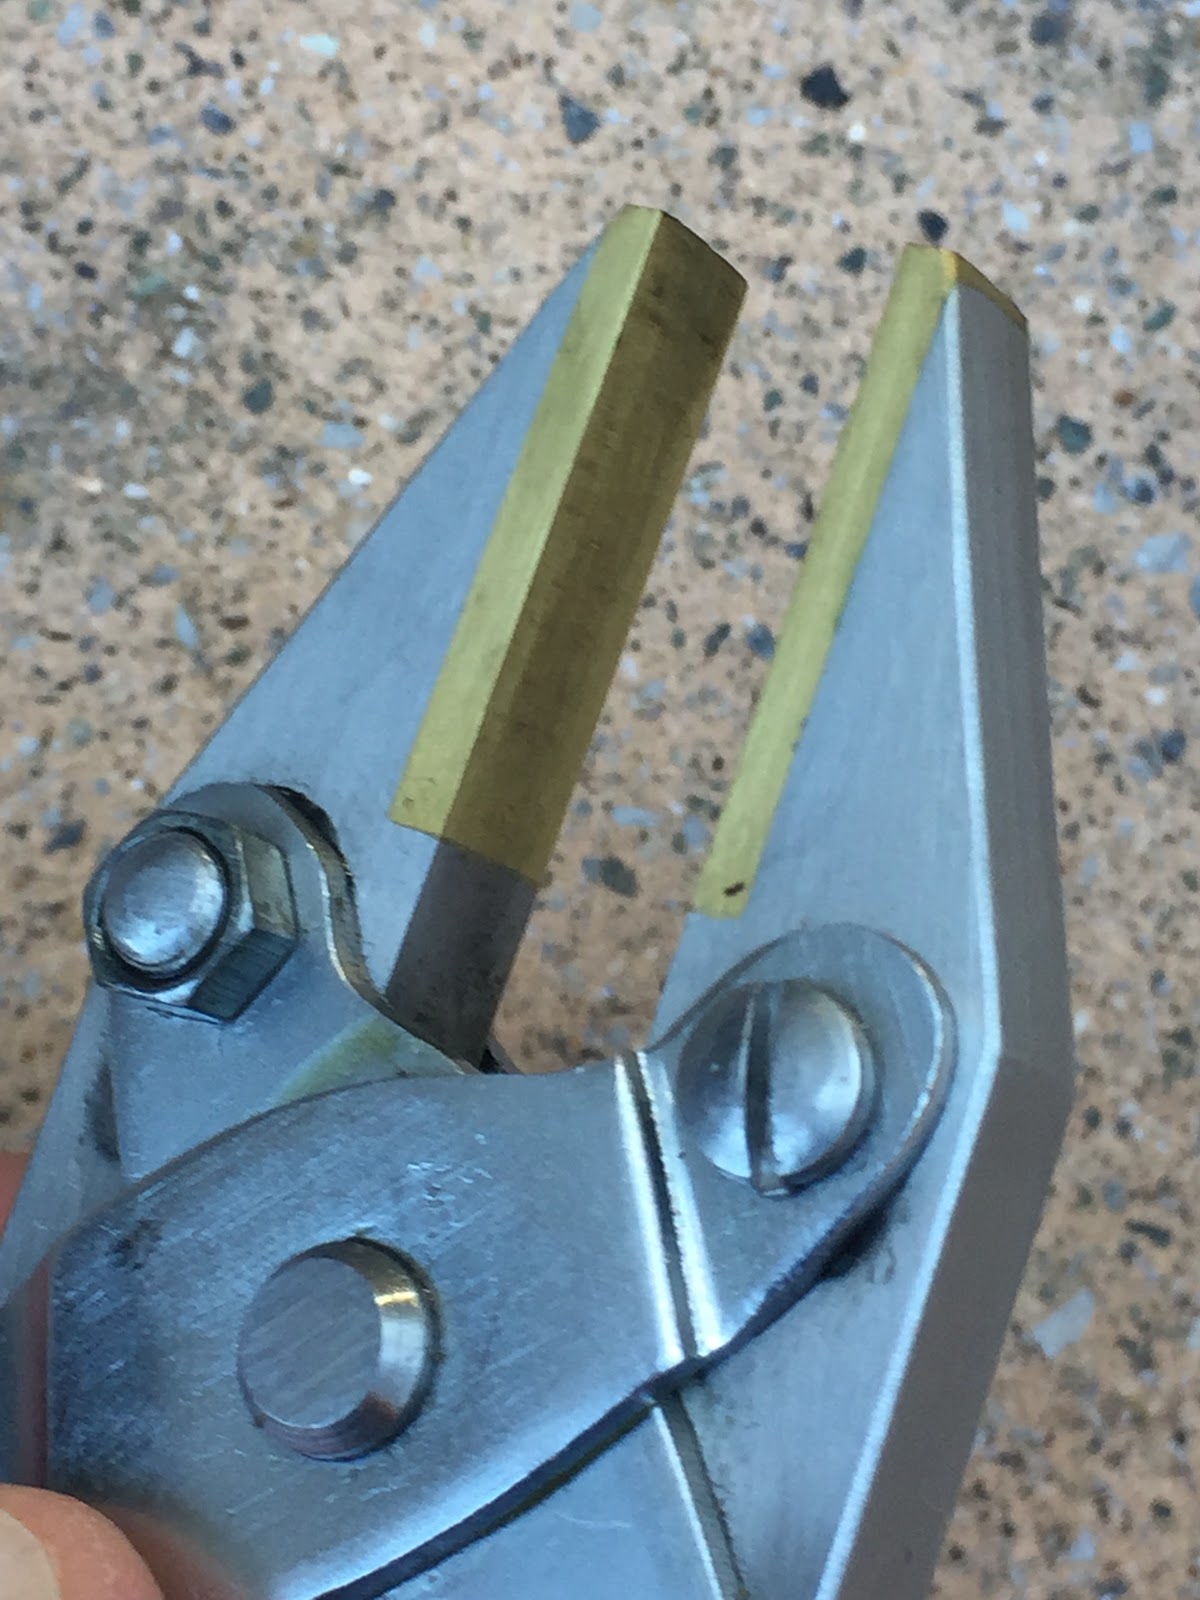
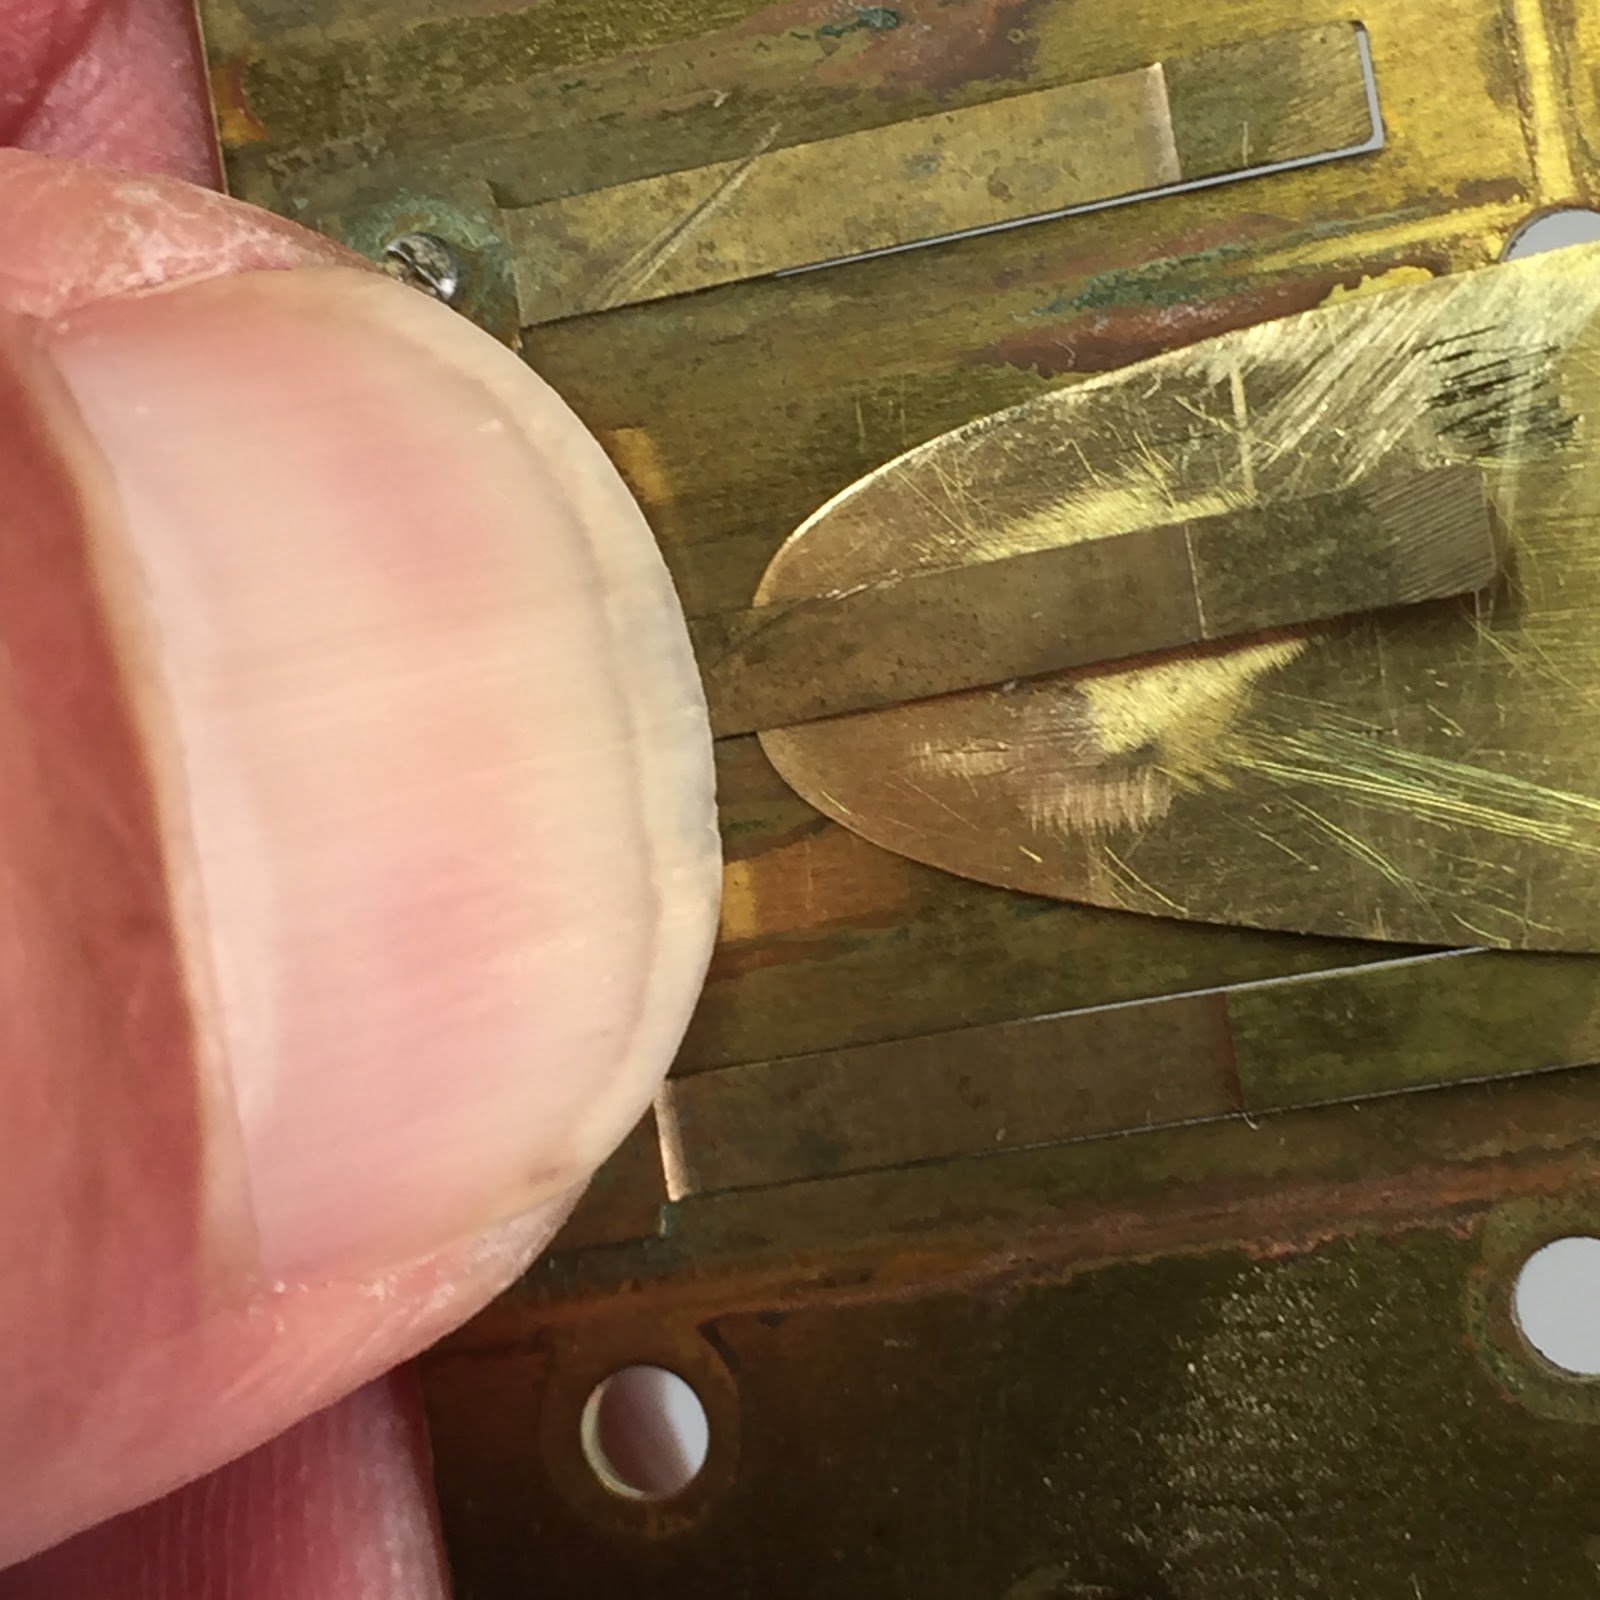
Position front of the jaws to the line where the rivet pad ends and the reed begins, then GENTLY and judiciously squeeze the handle of the pliers
Notice the target zone (contact point) dipping into the slot? Now look at the tip of the reed and how it dropped deeply, and slightly past the reed plate slot. This is an excellent indicator of the amount of pressure you need to apply onto the zero point with the pliers.
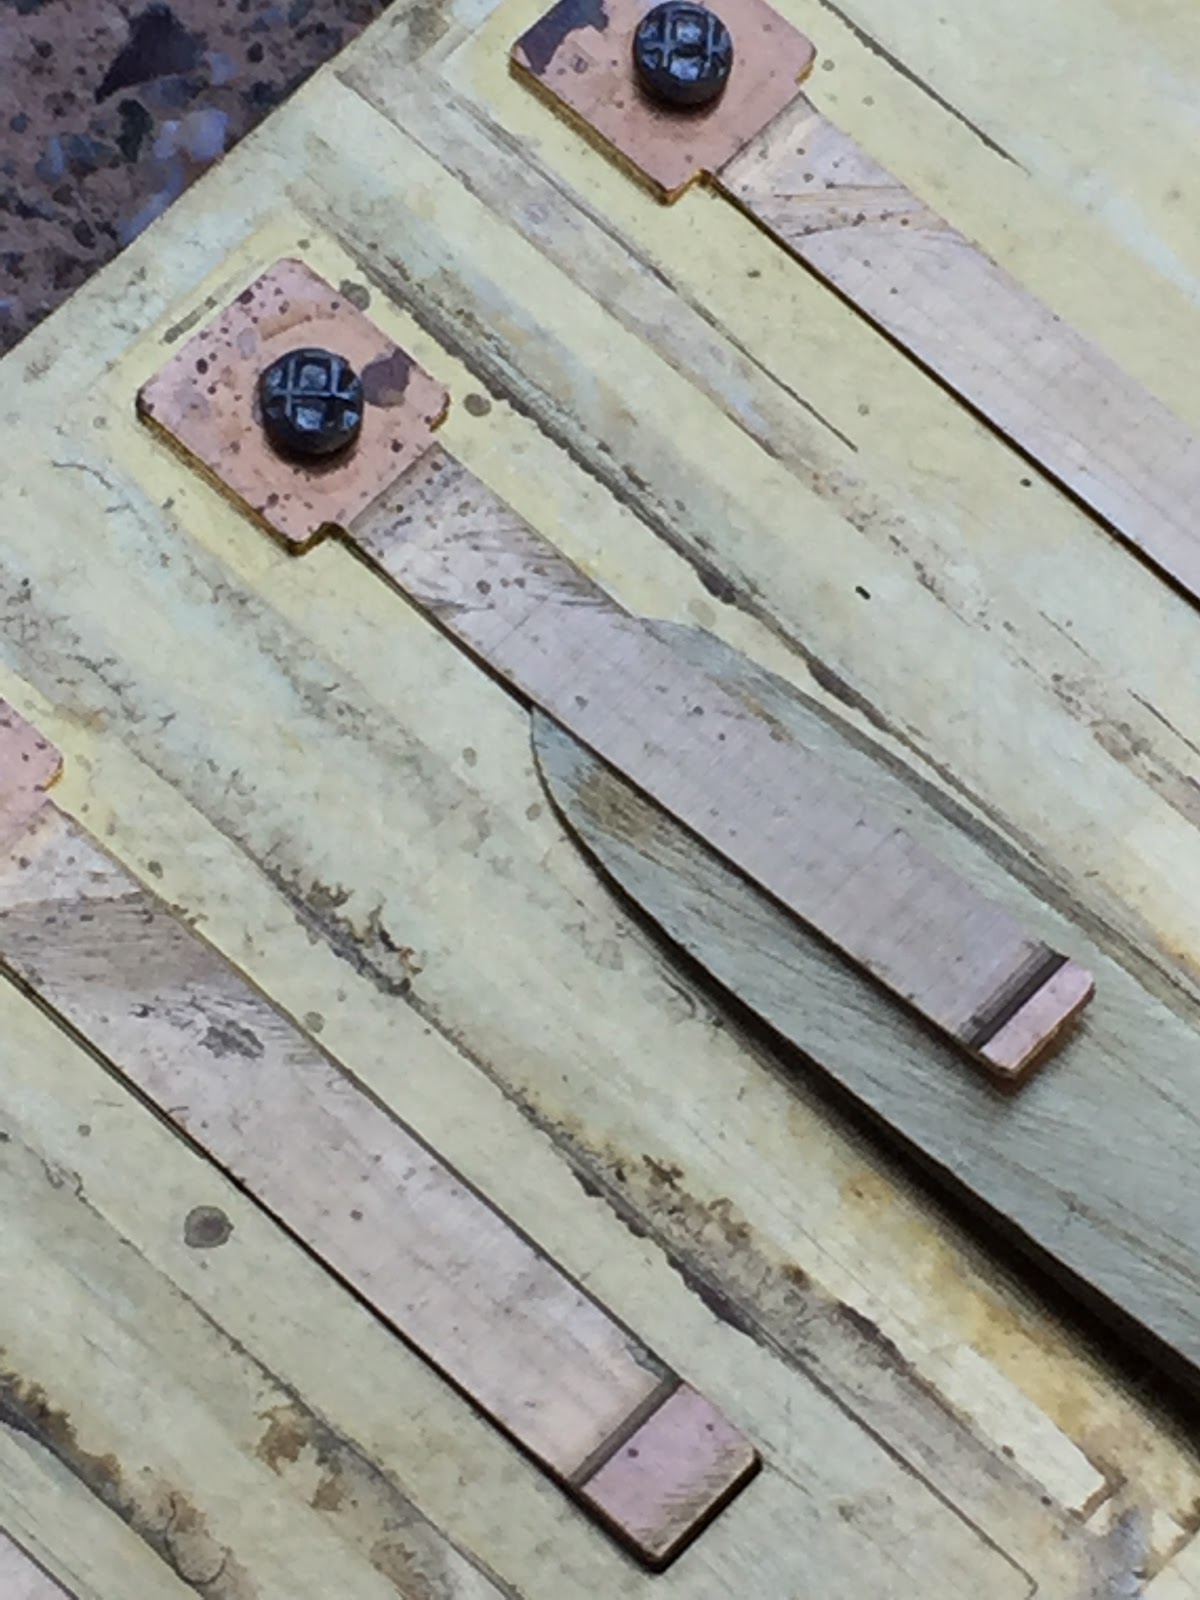
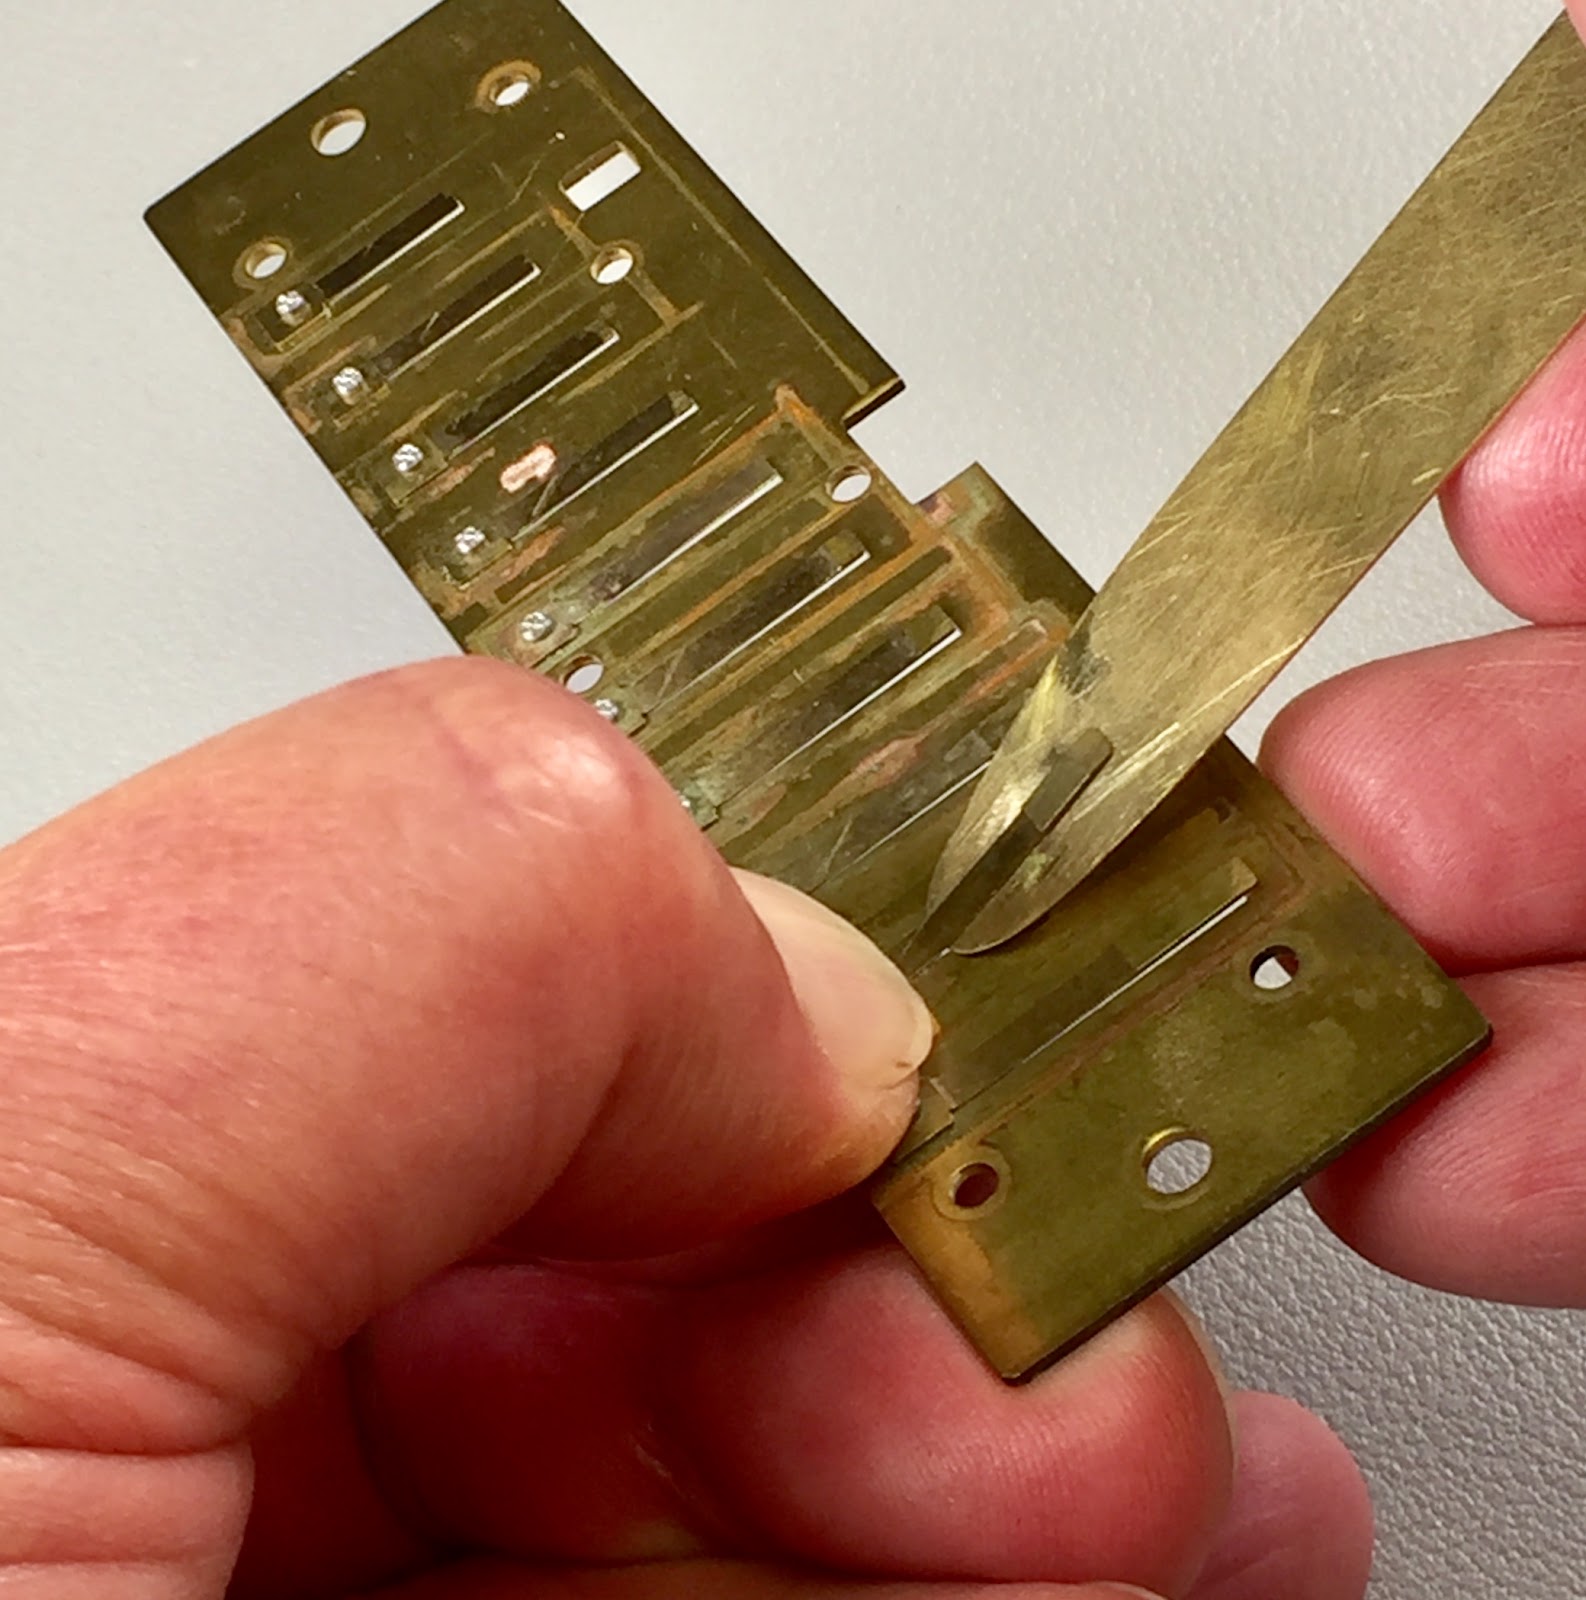
Next, using the knife edge of your reed plinking tool--as flat as possible--carefully pierce it forward towards the zero point. This will raise the zero point to the desired .002” gap. TIP: as a precaution, lightly place your thumb over the free end of the reed, just in case you were too agressive and cause the tip of the reed to launch excessively upward.
The red arrow shows the Zero Point from the rivet head side of the reed plate. When compared to the the upper (#3) and lower (#5) reeds, notice how the top surface of the reed almost levels up with the surface of the reed plate
After the procedure, you can see the dramatic reduction of (light) air leakage to #4 reed. Also notice the tip of the reed being held in place deeper into the slot than necessary, creating the impression that there is a slight upper bow in the middle of the reed.
My closing thoughts; although this method significantly improves the playability (increased volume and bending agility) of the harmonica, this method will also detune (flatten) the reeds approximately <-12 cents>, you will need to allow time to retune (sharpen) the entire harmonica. For me, the extra time required to make a superior playing harmonica is well worth it. I think you too will agree with me ;o)
Your Harpsmith, Kinya
Hey John, I'd be happy to give it go. Please allow one week prep time so that I can bone up on YouTube to see if there had been any new advancements since my last brain surgery ;o)
Your Harpsmith (and Surgeon), Dr.Kinya

Saving this post ;P
Hello Kinya. I guess we are all dealing with this acrid air. Hoping for wind and rain. Should I try to straighten the resulting dip in the tip of the reed by holdiing down the center and massaging the tip from below after "closing " zero point?
Hey James, keep your mask on and keep the faith!
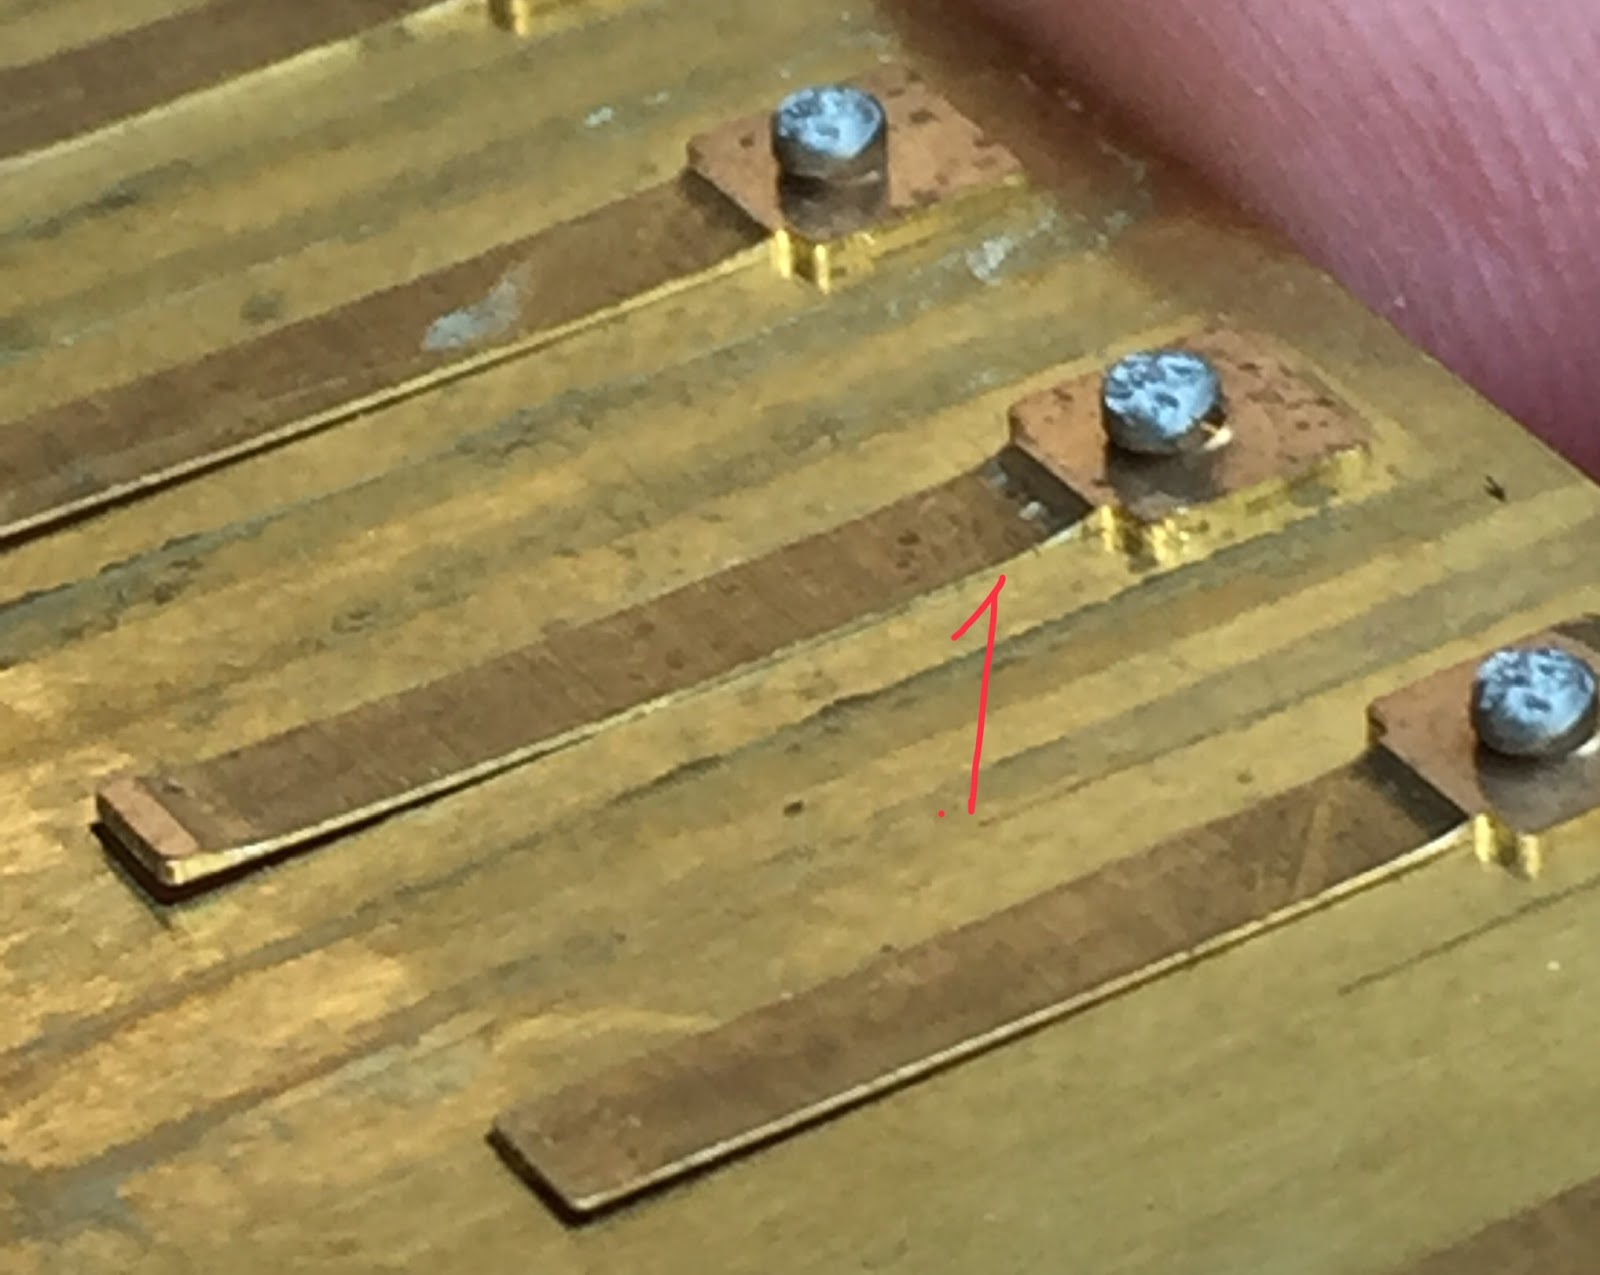
The answer is no. Refer back to the photo with the red arrow. This is where you want to place your left thumb nail (like you are marking a line across the reed). I call this the "brake" point--not brake as in stop the car, but brake as in a tool used to bend sheet metal.
Holding the plinking tool with your right hand, slide the knife edge of the reed (plinking) tool under the reed--to the location just under the edge of your thumbnail--then quickly and carefully lift the plinking tool about 45 deg upwards. This will set your reed to the proper position (gap).
P.s. By next weekend I'm planning on video taping this process and uploading to this site.
Your Harpsmith, Kinya
Look forward to the video.
Hello Kenya. Hope you are doing well during these "weird" times. It's a good time to turn off the news and practice HarpSmith stuff. Are you still planning on producing a video on Zero Point using the pliers technique? It would be helpful to watch the "Master" before the "beginning apprentice" works on his harp. Look forward to any and all info on Harp repair. Thanks. Mic
Hi James, although I did not create the video tutorial I had planned on, I am in the process of editing the photos and discriptions. I will post them as soon as possible...
Your Harpsmith, Kinya
Hello Harp Techs,
Although I was not able to create the video tutorial as planned, I have some terrific photos and descriptions that should be helpful.
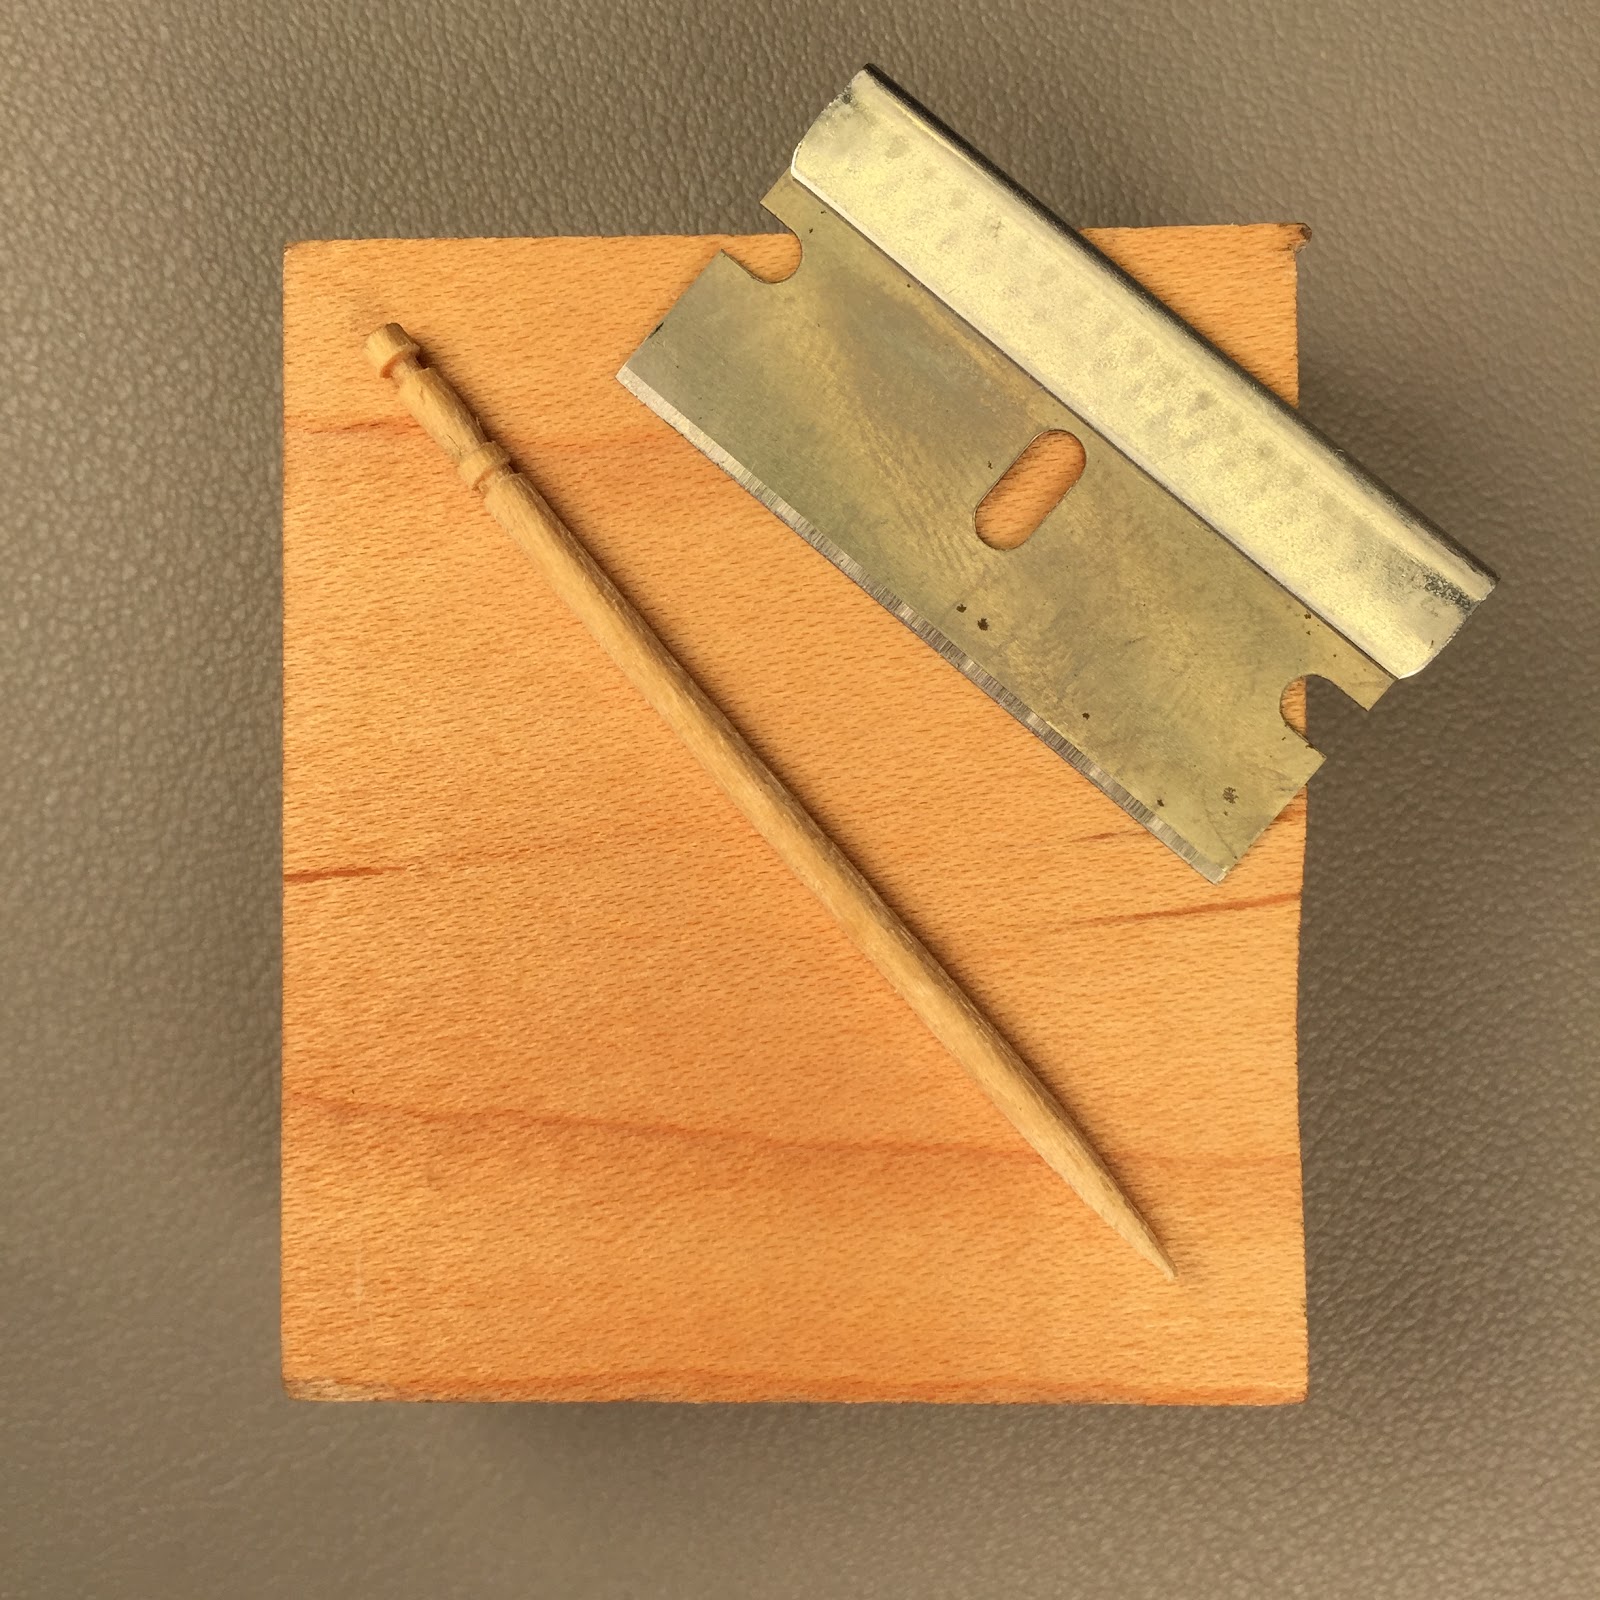
Not shown in my first installment, I found using a small piece of toothpick worked great as a backstop to the pliers, providing a firm, yet malable form for the reed to be safely reshaped.

Remove the point of the toothpick with a straight razor.

To establish the maximum length of the toothpick, use the length of the #5 slot as a guide TIP: for reeds #6 through #10, I have not found the plier technique necessary
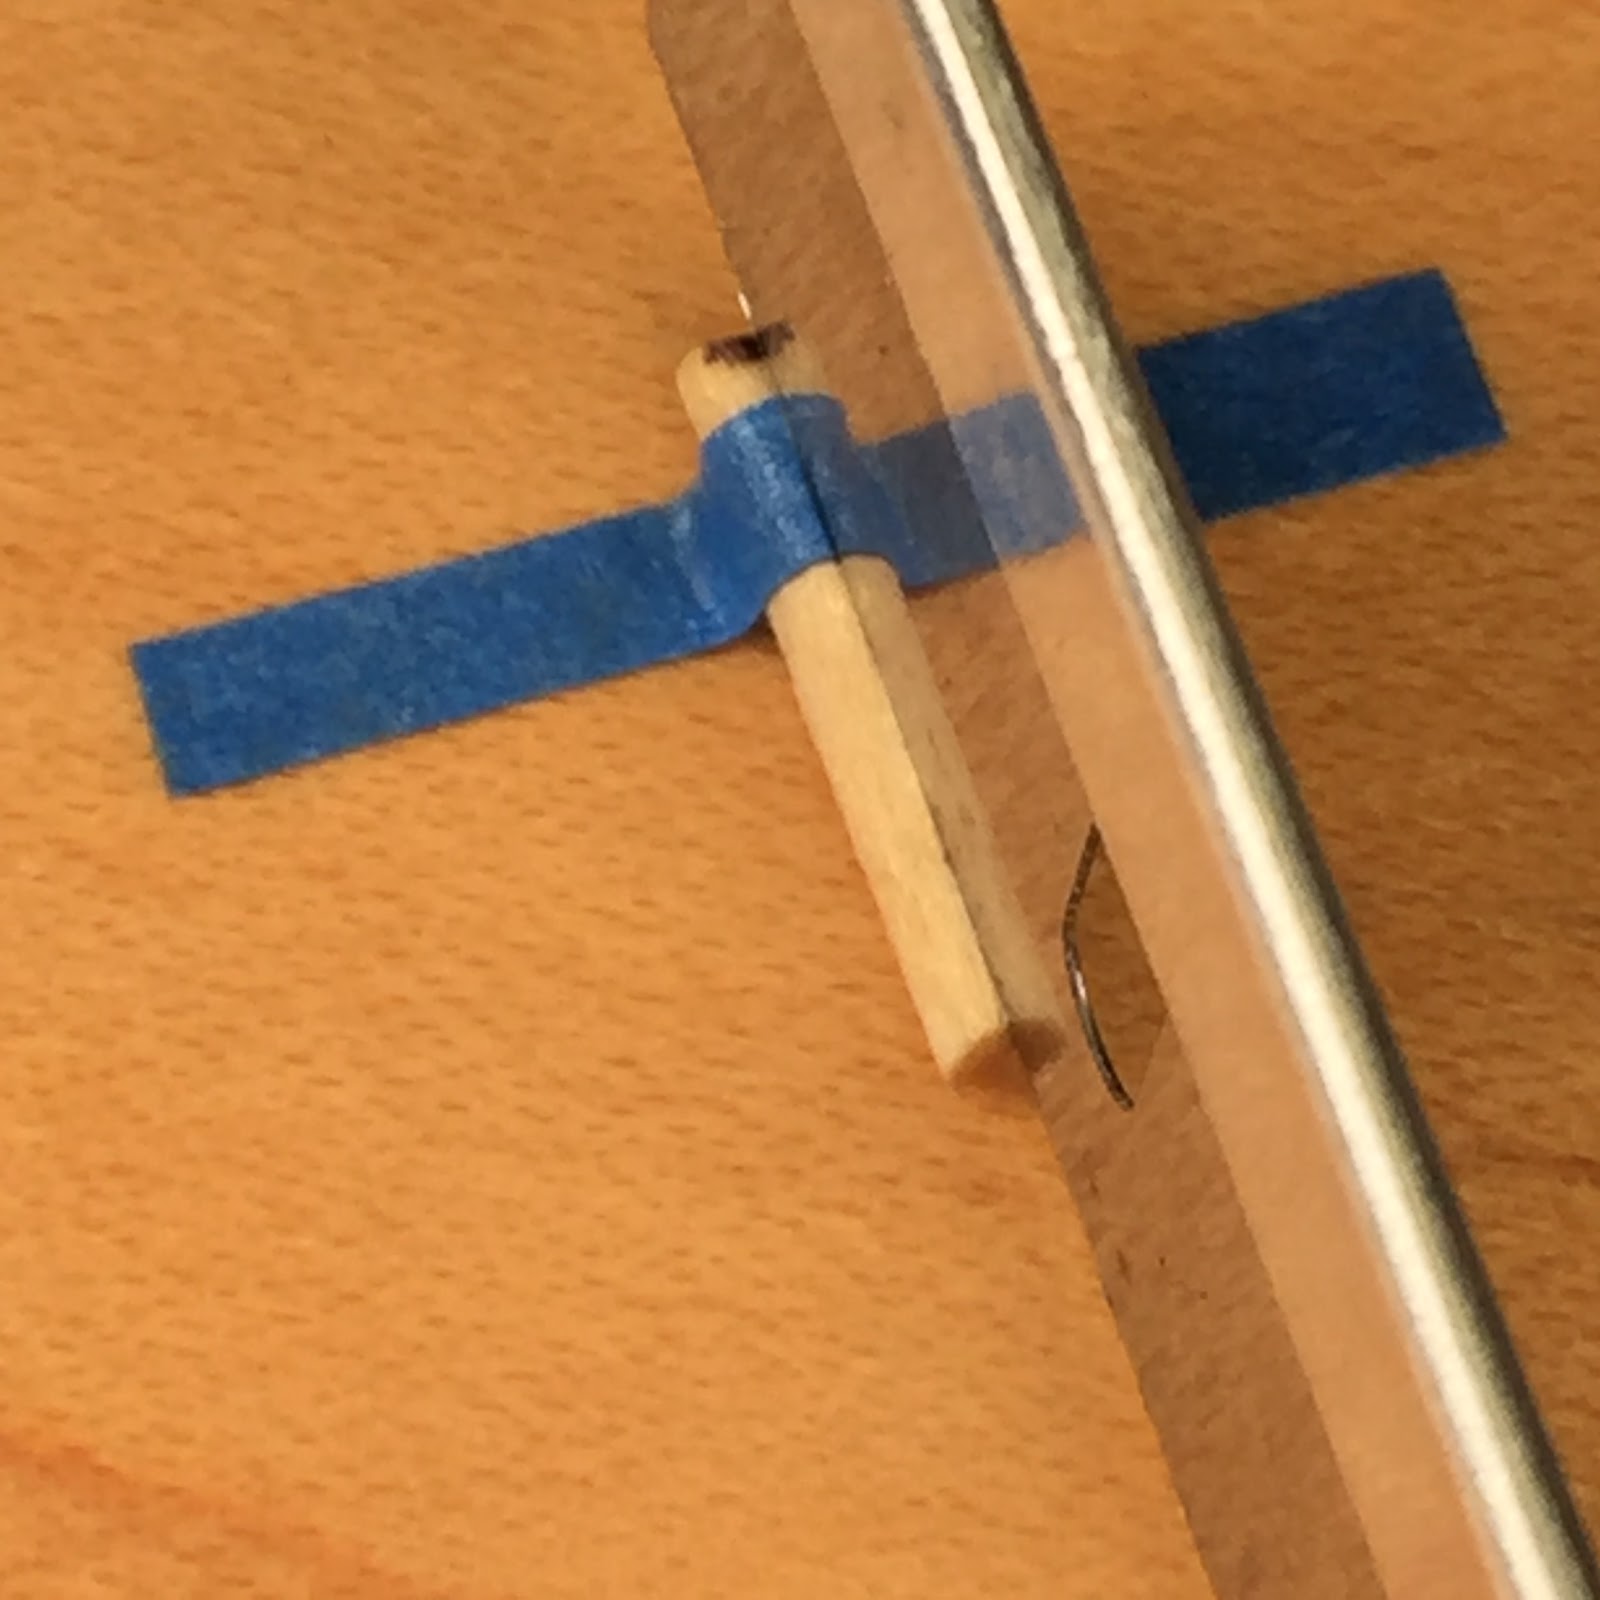
Secure the recently sized piece of toothpick with painters tape
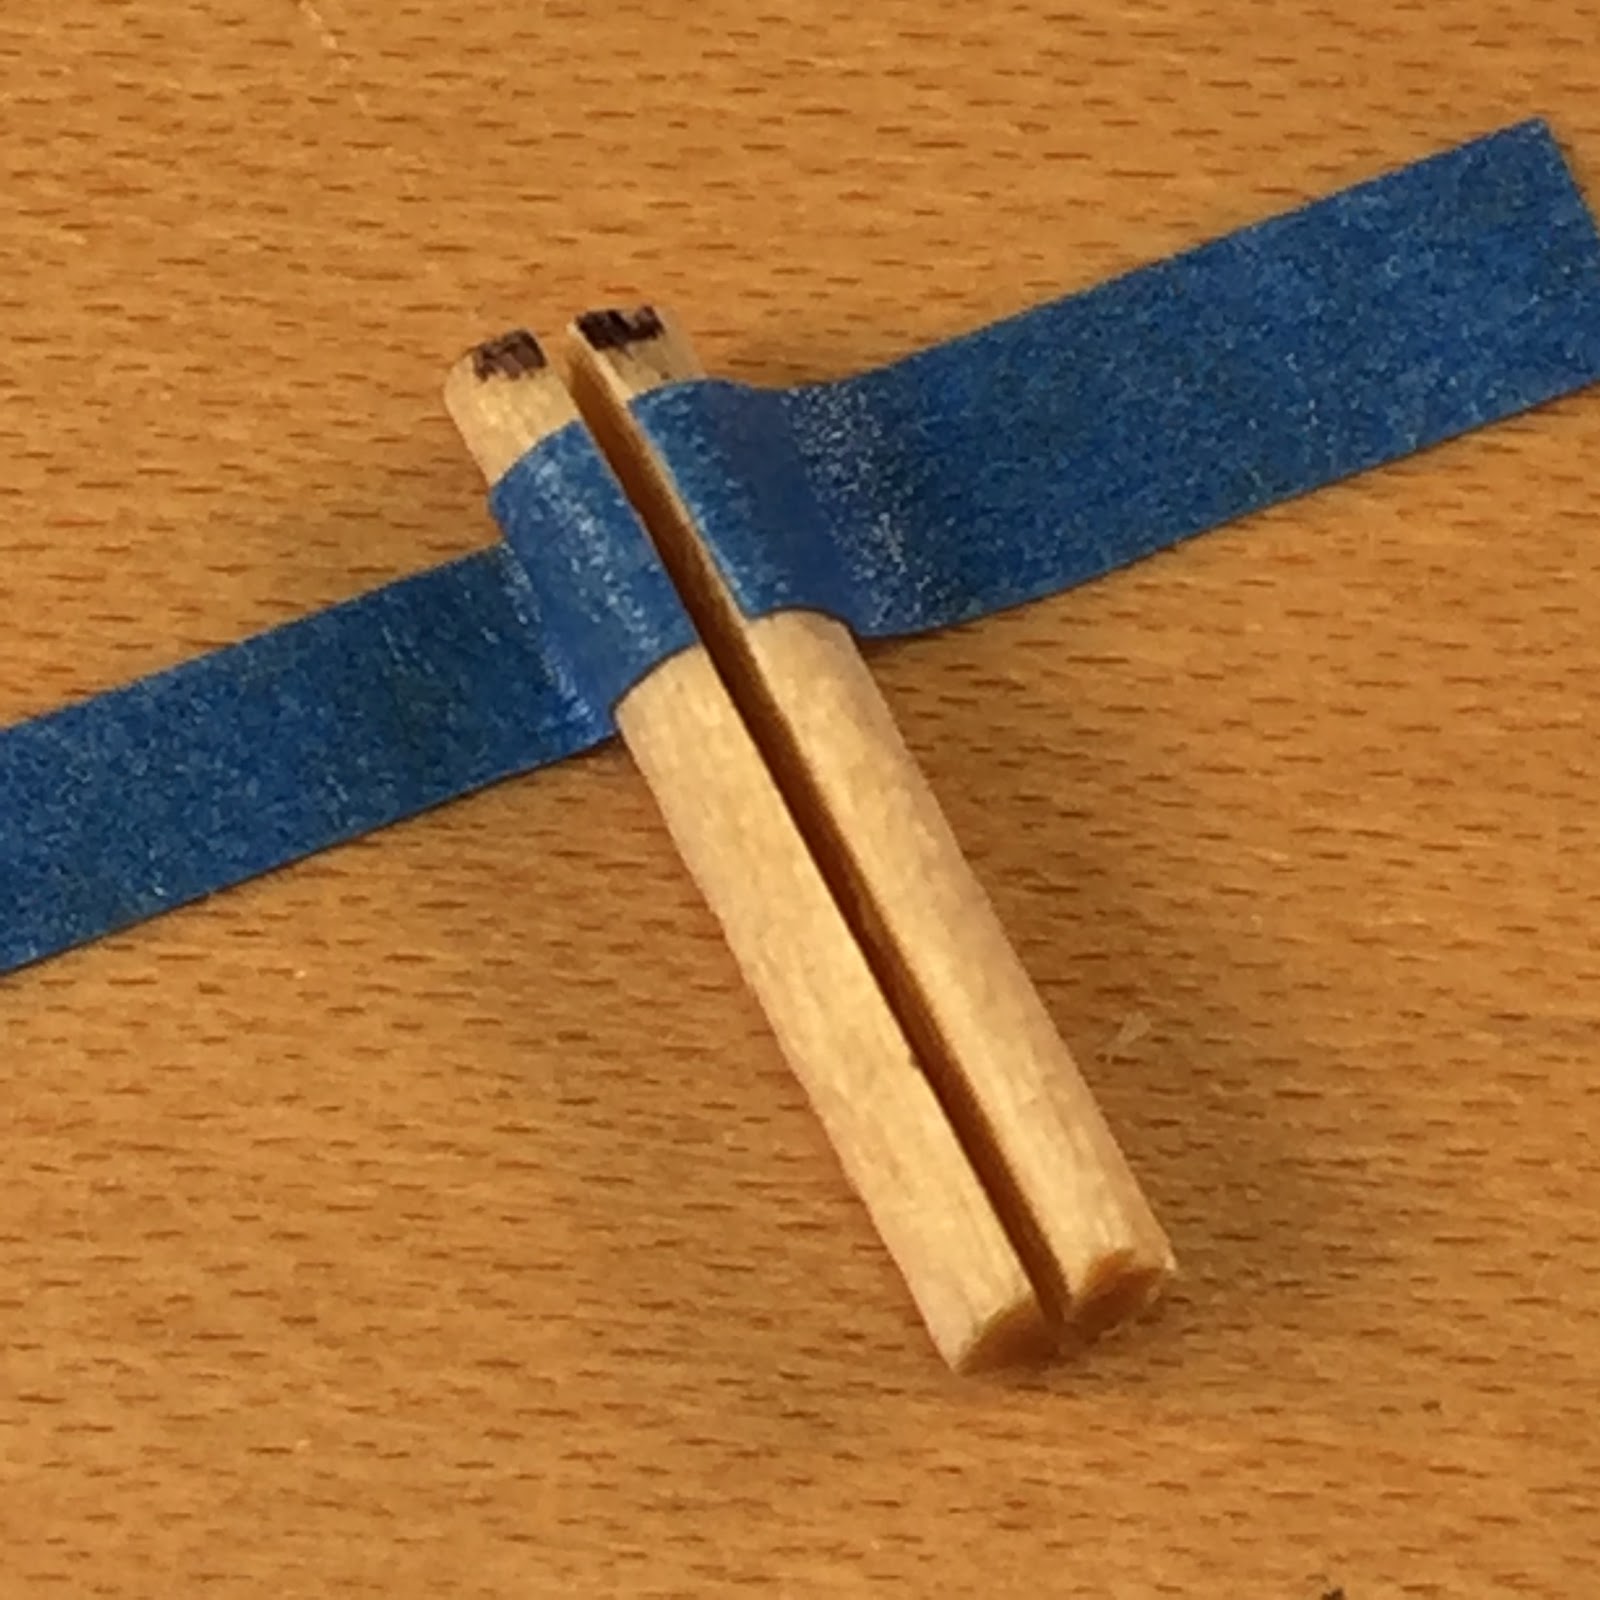
Slice in half so that you have two half-round pieces


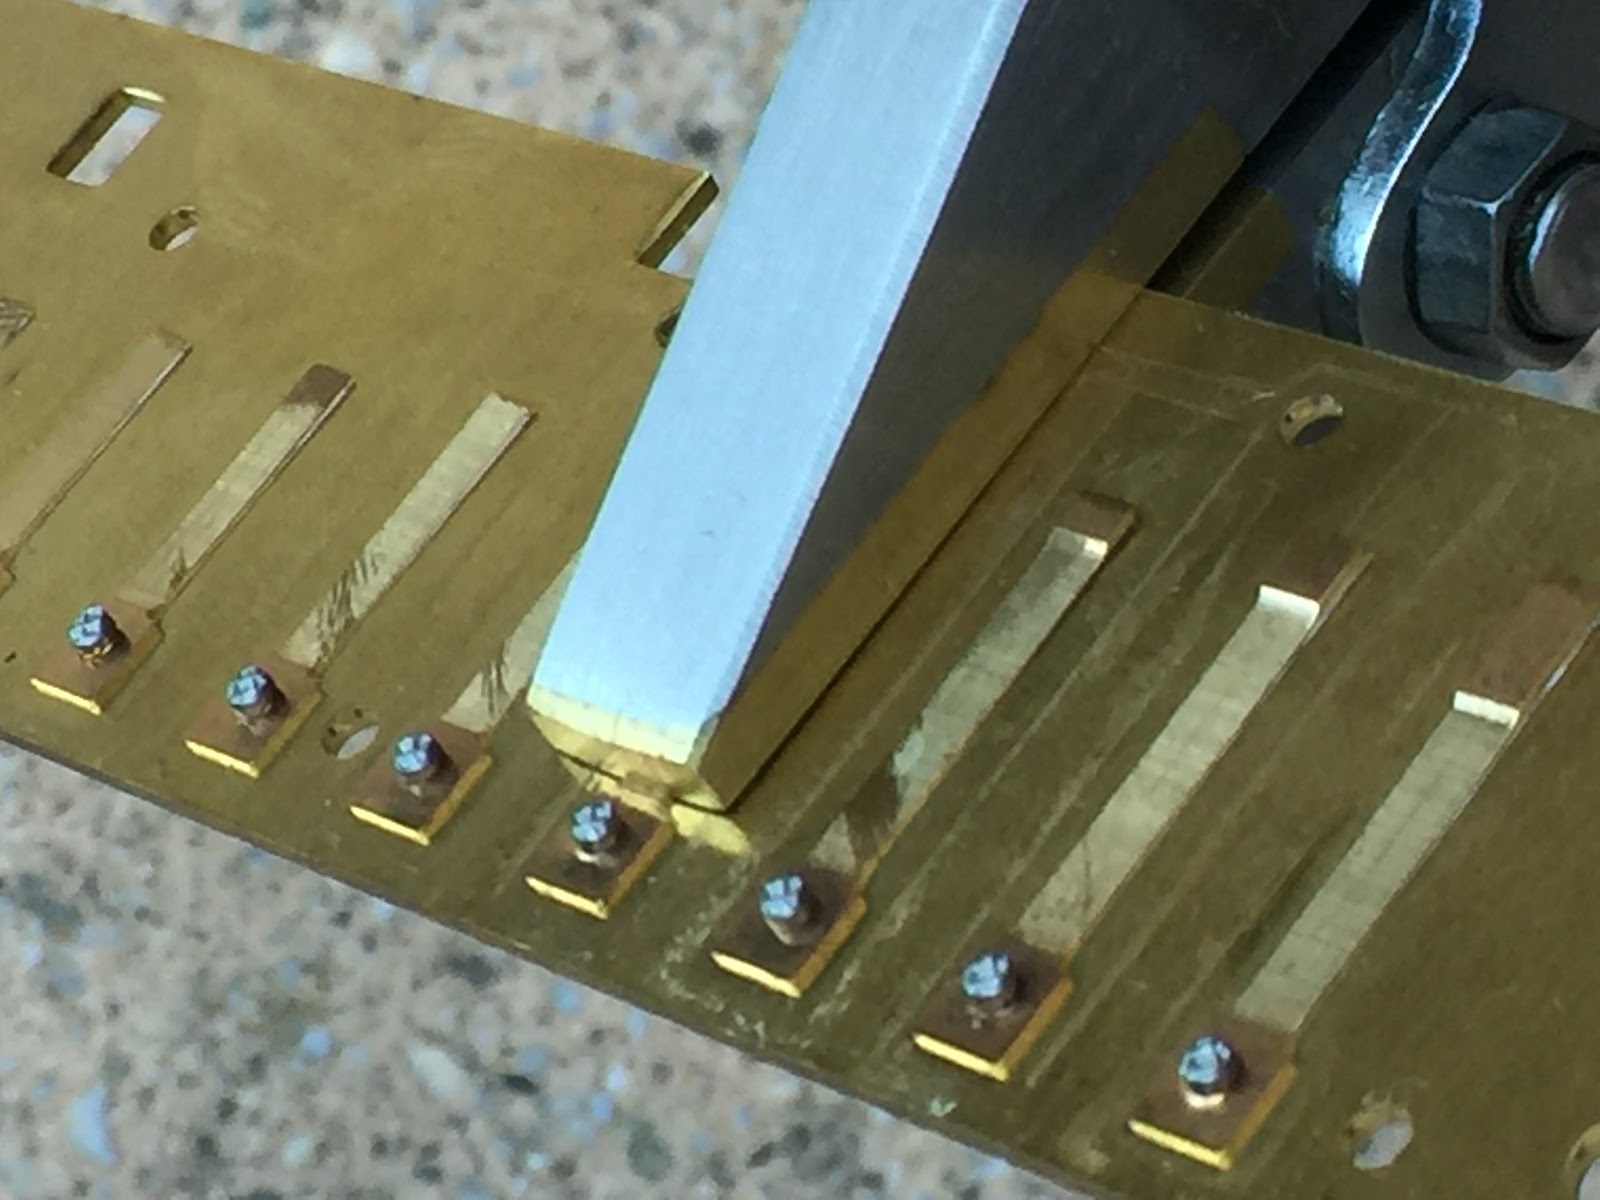
In this image (thanks to Bay Area favorite, Screamin' Iain MacLeod), I’m working on the #2 reed. Nest the round part of the toothpick into the reed slot (flat side facing up)
Flip the reed plate over and carefully clamp the brass lined pliers approximately 1/16” from the edge of the reed rivet pad. Gently press the plier handles together, then flip over the reed plate over and remove the toothpick. TIP: the toothpick will be tight fitting, therefore, press on the top side of the reed to push the toothpick out of the slot. In the below photo, you'll notice the #2 reed flat into the slot. Of course this would be too flat to play

Slide the knife (wedge) edge of your reed plinking tool back towards the rivet end of your reed (it will be a tight fit). This will automatically lift the free end of the reed upward out of the slot. Depending on how much squeeze I had applied to the pliers, the depth of the reed into the slot will be determined. The job of the toothpick was to safely limit the depth of the reed into the reed plate slot. TIP: many times, I have found “stabbing” the reed plinking tool further back towards the rivet end of the reed, the zero point and reed gap finds their proper positions. If the reed is still too deep into the reed plate slot, try this;
Securely position the edge of your thumbnail approximately 3/16” from the edge of the reed rivet pad. This will serve as a “Brake”--not brake as in stop the car, but brake as in sheet metal bending tool. Slide the knife edge of your reed plinking tool back towards the rivet pad end, until you are approximately 3/16' from your thumbnail.
Admittedly this next part is a little tricky, because you need to “abruptly” lift the backside of your plinking tool while maintaining forward pressure at the break line. TIP: (1) abruptly, as if a fly landed on your plinking tool and you jerked the back of the tool upward to scare the fly off (2) practice on a dummy harmonica first.
If you were overzealous and bent the reed into a permanent angle, let me know, and I will show you how to get out of that pickle ;o)
Your Harpsmith, Kinya
Thanks Kenya. Nice pics. I will keep you informed as to my progress.
Great! We will be eager to see your progress.
Your Harpsmith, Kinya
Hi James, I was feeling like I short-changed you for not providing video. To rectify this transgression I searched the Harp Tech Study Series catalog for relevant video content. I believe you will be satisfied with:
https://www.bluesharmonica.com/harp_tech_study_4_reed_gapping.
Specifically, Reed Gapping-Level 1 Method 2 @ 1:53 seconds into the video and Method 3 @ 1:20 seconds
Your Harpsmith, Kinya
You could never short change anyone. In fact I think you go above and beyond which is wonderful for the student. I used the split toothpick tech and pliers to get the zero point. It seemed to work at the rivet pad end but in every case (holes 1-5 only) the tip of the reed did not settle "into" the slot. The last forth of the reed remained slightly above the surface of the reed plate slot. I still had to adjust the reed gap however. My question: Should I have squeezed harder? I was cautious, maybe overly cautious. I do not think that all the reeds had a bow in them to cause this condittion.
Yes. With the toothpick as a backstop, I have found I could safely apply more SQUEEZE.
Did you inspect the zero point over a light source? How did it look? Did it allow the reed to close straight into the reed plate slot-like a door?
Your Harpsmith, Kinya
So James, how did it go with your new found knowledge and techniques? We are all waiting with bated breath...
Your Harpsmith, Kinya
Hello Kenya. Thank you for following up. The harp I was practicing on (crossover Key A) was basically unplayable. I had to replace a 5 draw so I figured if I made mistakes it was no loss. Lo and behold, it is now my favorite harp. What a difference the gapping and tuning made. I think I need more practice on embossing and zero point and to date have not tried placing more pressure with the pliers/toothpick technique. I have another crossover that needs a 5 draw (ruined during my bending practice phase), recently received your recommended pin vise and will perform all the the recommended procedures to bring back this harp. I have been super busy in the blacksmith shop for an Emporium sale and getting the crops, raised beds and field house buttoned up for freezing temps. I recently received my Technician License for Ham radio and I am studying Morse Code (same difficulty as learning how to bend). Like everyone, trying to stuff 30 hours into a 24 hour day. I will let you know how my second harp turns out. So far, very impressed with your techniques. Thanks. Stay safe and sane during these weird times. Mic
Yikes Mic! Thanks for the update. I will post in another forum, another "must have" tool I think you will like.
Your Harpsmith, Kinya
Now that you read Morse code (my second language ;o) --. --- --- -.. / .-.. ..- -.-. -.- -.-.--
--. .... .- -. -.- ... -.- (I can't translate the ending; -.-.--) CM? KW?
OF COURSE WE PROBABLY HAVE INSPIRING HARP techs scratching their heads. I am finding that I have to put as much effort into CW as I had put into bending. Lots of hours every day. I'll enjoy the journey. You are a man of many talents. Look forward to hearing about the new tool. Mic.
For the curious, "Continuous Wave" (CW) transmission, using vacuum tube oscillators that were capable of a very pure note. Sounds like a harmonica player's tube amp!
Your Harpsmith, Kinya
Hi Kenya. I translate "Good Luck" but I still can't translate the ending. I think "k" for Kinya and a "w"?
Next correspndence will focus on zero point until I can pass the 5 words /minute exam. Only half way through the alphabet and numbers.
Ha! I thought I just wrote, "Good luck"
Your Harpsmith, Kinya
Hello All, have any of you tried out this Zero-Point setting technique? Let us know!
Ho Ho Ho and Happy New Years! Your Harpsmith, Kinya
oh there's new stuff in here !
Kinya, I haven't opened a harp all winter. I'm discovering this is something I love doing with the summer breese running through the house hahaha ;P
Also happy new year to you and your XD

Greetings!I'm glad I found this post. I've been using a hybridized method for profiling my reeds based on Richard Sleigh and Andrew Zajac's respective methods. I feel like the "zero point" system has the potential of adding a great deal of clarity to one or two rather unclear aspects of the process, and may help make results more consistent overall.
I'm going to be running a few tests on an A harp I've got on the bench. It's a Seydel 1847. I have a sinking suspicion I'll see some dynamic improvements...
Cheers!
-Rob(VA4ROB)
Yes Rob, we hear you loud and clear.
My memory is telling me the 1847 harmonica has stainless steel reeds. If so, I would go with the steel jaws rather than the brass lined jaws shown above.
https://www.micromark.com/Parallel-Jaw-Plier-Flat-Nose-with-Straight-Jaws
Your Harpsmith, Kinya
Hello Harp Tech, for those who have experimented with the brass lined jaws to lower the Zero Point--even though I warned you that the proceedure will flatten your tuning--you grudingly learned that you had to retune (sharpen) the reeds.
TIP: Next time, try modifying a harmonica that is one half step higher (sharper). For example, if your intended harmonica key is A, then start your Zero Point procedure with a Bb harmonica.
I realize that earlier I wrote the Zero Point proceedure will drop the tuning about -12 cents... but on my last build, I discovered that some of my reeds read closer to -32 cents flat.
Your Harpsmith, Kinya
Hey Woozle Rob, how are things?
I've had some difficulty sourcing a reliable set of reliable pliers with smooth parallel jaws in my small town in Manitoba.
I Will likely order from the US at some point soon.
In the meantime, I attempted to fabricate a tool out of old reedplates that will hopefully allow me to better apply pressure to the base of a reed in a way that ensures the reed dips down very evenly into the slot from left to right. Any tortion in the initial depressing of the reed will increase the risk of that reed might bind in the slot when in motion. It will look centred and even when still but will swing at a slight angle. I've found that this can happen if the plinker has too "soft" an edge, and so when pushing it under the reed, one side may be lifted very slightly more than the other.
Other than that, I've found the method to be producing relatively consistent results. I hope to get a bit more proficient once Inpractoce or a bit more, and perhaps get my hands on some better pliers.
Looking forward to developing my technique a bit more.
Cheers!
Hi Woozle, before switching over to the brass lined pliers, I was experimenting using the 3/8" ram of a small arbor press to push down on the reed.
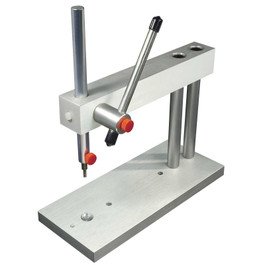
Possibly this tool might be more accessible to you. If so, you might be able to attach your brass reed (plate) "pad" onto the end of the 3/8" ram (of course the punch shown in the photo is easily removed by losening the red knob). Keep in touch
https://www.micromark.com/Press-It-Precision-Arbor-Punch-Press
Your Harpsmith, Kinya
I happen to have a arbor press that my be just the ticket.
I had an idea a while back that I could create a "tray" of sorts that would allow me to slide a reedplate back and forth under an arbor press. The idea would be a tool that could be lowered to provide a minimal amount of precise pressure to the edge of a slot, and then slide the tray up and down once to emboss a slot perfectly and evenly up to the bass of the reed in just a pass or two. The tray would allow the tool to move precisely along the edge of the slot without touching the reed, and providing the same amount of pressure and the same angle from end to end of the slot.
I know that this CAN be done by hand, but I had it in my head that I could take any shake or wiggle of the hands out of the equation.
Anyway, that idea remains theoretical at this point.
One day, maybe.
Would this be OK?
https://www.amazon.com/Mazbot-Smooth-Brass-Parallel-Pliers-125mm/dp/B07W...
Let me make sure I got it...
TUNE HARMONICA TO DISIRED TEMPERAMENT then:
1. Prepare a wooden backstop for the rear of the rivet so not to dip the reed too much while squeezing.
2. Squeeze with Kinya brass viser tool (possibly only holes 2 and 3 for blues players?)
3. Reset to the desired gap
4. Let sit for a few days
5. Only then retune harmonica
Is that correct? I could also do the squeezing first, and only after a week or two start the tuning process. What do you recommend?
Hey Millman, terrific call on locating an alternate source for the brass lined pliers!
1. Prepare a wooden backstop for the rear of the rivet so not to dip the reed too much while squeezing. PERFECT
2. Squeeze with Kinya brass viser tool (possibly only holes 2 and 3 for blues players?) Reeds 2 and 3 to be certain, however, for players who use the "overblow" technique, setting the Zero Point for reeds on a C harmonica: 1 (Eb), 3 (Eb), 5 (Gb), 6 (Bb) will make a big difference
3. Reset to the desired gap. PERFECT
4. Let sit for a few days. PERFECT
5. Only then retune harmonica. Yes, final tuning is always recommended and using the iStroboSoft software by Peterson will take the frustration out of the tuning process ;o)
Your Harpsmith, Kinya
Hey Woozle, it has been my experience (working on ALL makes and models of harmonicas), there will always be variances in tolerances-making tools and dies extremely difficult. This is why I rarely use the original "heel of the tweezer" or "small steel ball" to set my sizing (embossing). Invariably, the reed would click on an edge that I thought would have been perfect--even after I had corrected the reed axis at the reed rivet (impossible on spot welded reeds). Most of my work is sizing one reed slot side at a time.
I luv how your mind works though...
Your Harpsmith, Kinya
Kinya, you're a bloody genius!
This is defiinitely the post of the year.
I just finished one harp (focusing on the holes I need tight) and WOW, I am reborn! The response!!!!
It went 10 cents flat, not sure if I should tune it now and let sit, or first let sit and then tune it..... My urge wants to tune it now and just play it and check tuning again in a few days... Is that OK boss?
Again, post of the year, no doubt.
Millman, for sure--go for it!
BTW, have you tried the Peterson iStrobosoft yet? It has saved me a ton of time...
Your Harpsmith, Kinya
Is it working well on Android? If you think I should get it even though I have Android, I will! It's not expensive for what it claims it does.
Currently I use PanoTuner at 443Hz ET and just do the sweetening manually, which indeed is annoying and time consuming.
I just read somewhere that Istrobo isn't so hot with android.
Hey Millman, I just learned that many cool in-app features-like Harmonica Sweetners-are not available for the Android platform. Bummer;o(
If you tune as much as I do, you may want to consider purchasing a used iPhone, or iPad so that you can install the iStroboSoft without any compromises
Your Harpsmith, Kinya

Kinya if I ever need brain surgery done you are my man.