Installing New Windsavers on the Hohner CX12 Chromatic Harmonica

Hello Harp Techs,
All Chromatic harmonicas have two reeds in every chamber--one blow and one draw. On the opposite side of each reed, a “windsaver” (also known as check valves) are installed. Windsavers act as check valves to prevent the draw reed from vibrating when the player blows a note, and conversely, prevent the blow reed from vibrating when the player draws a note. Overtime, windsavers lose their ability to slap back into place; and therefore, allow precious air pressure to escape. This reduces playability, tone and volume of the chromatic harmonica.
Originally made of leather, now harmonica manufacturers have taken full advantage of the high tech plastic technologies available, to produce harmonica windsavers that will perform better (airtight with minimal sticking and buzzing) with increase longevity.
Recently, a member queried the forum regarding the Hohner CX12 windsavers, and the issues he was experiencing. This was my que to install all new windsavers on my CX12!

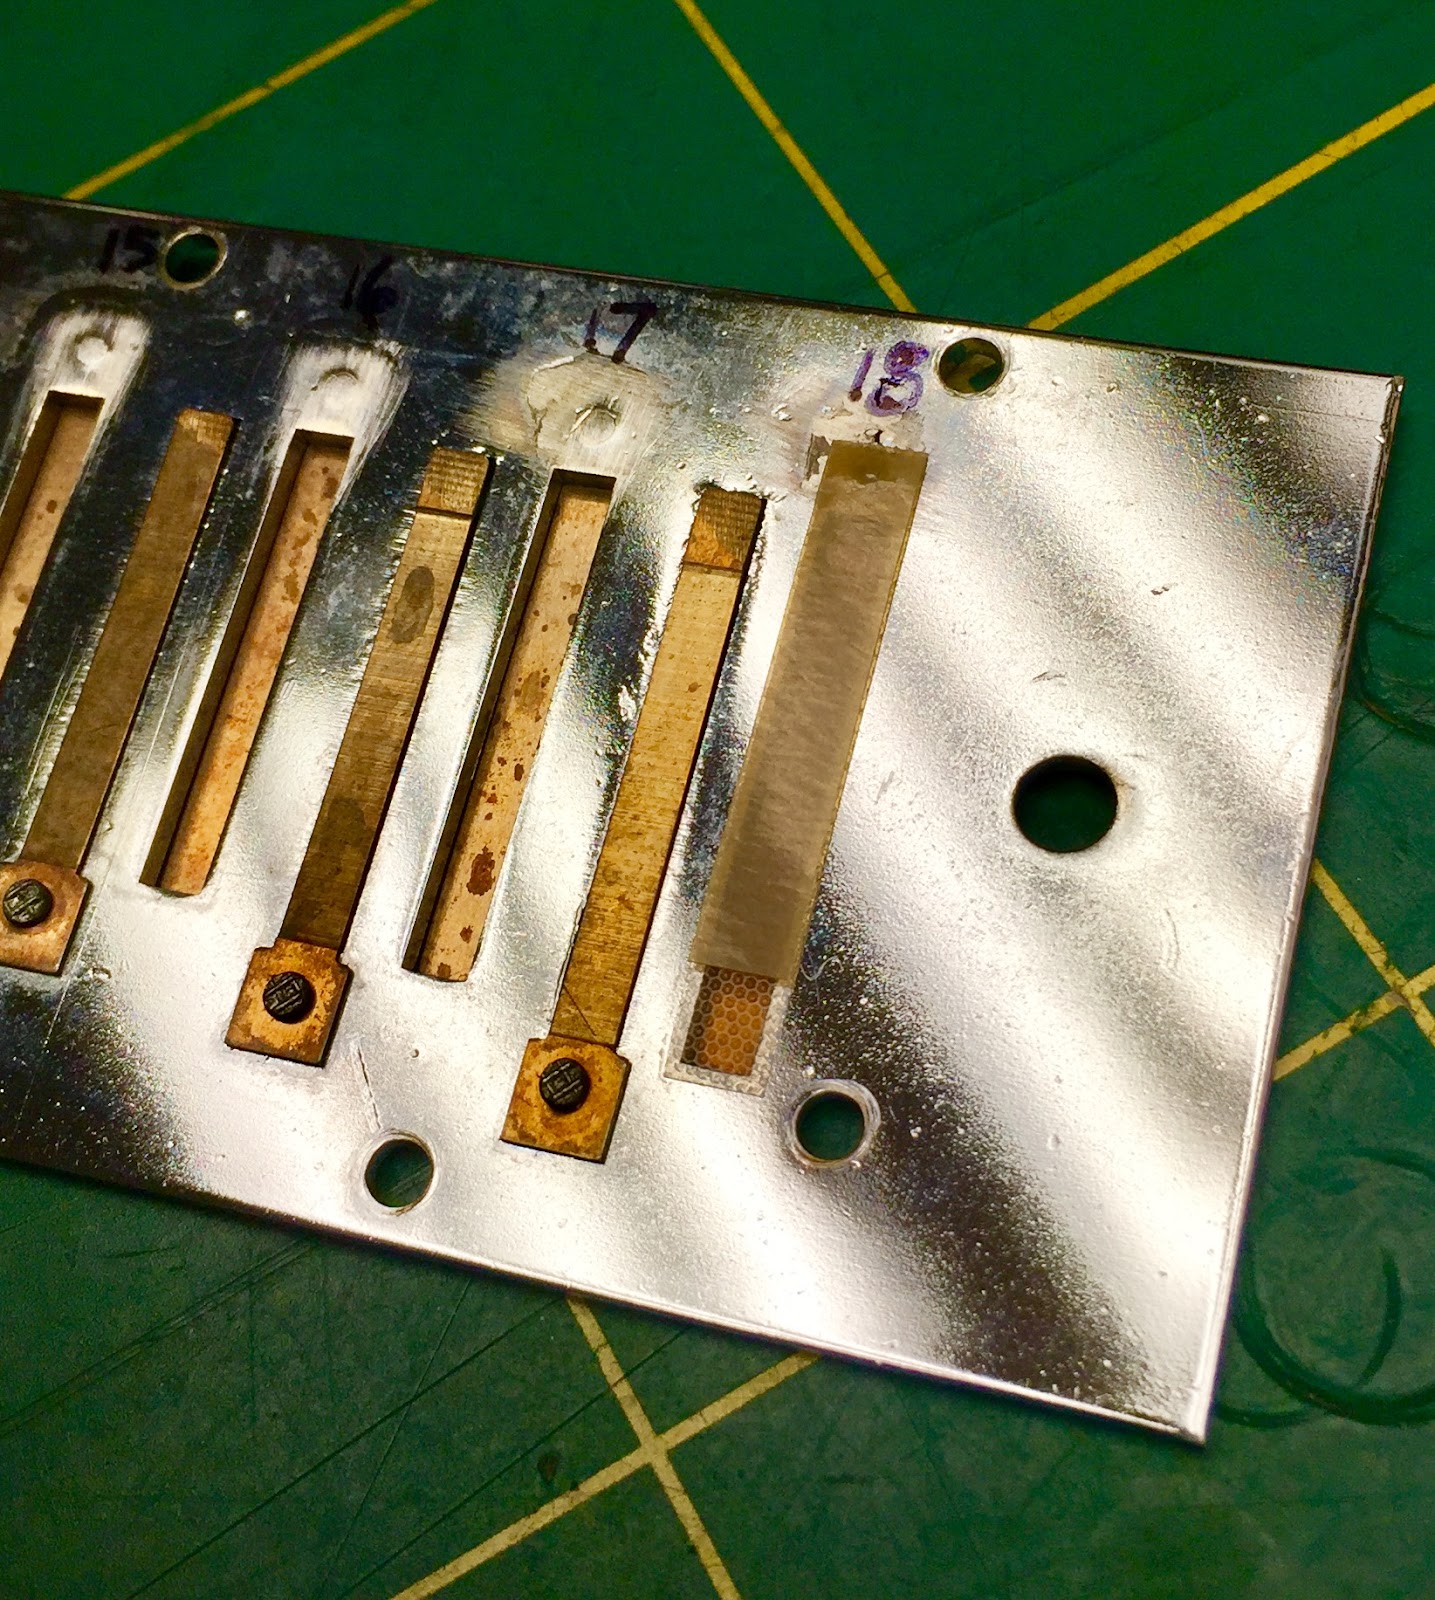
Over time, the windsavers suffer from angulation (bending upward), which is obvious on windsaver #3. Note: #1 windsaver is flat, because I replaced it last year.

Harp Techs and players alike endeavor to have all chromatic harmonica windsavers behave as well (lay flat) as the windsavers on on my new CX12 (shown above)
Take’n it to the Bench


Depress the button located on backside of the slider button and slide the slider out.

Next, position your thumb over the hole and slide the retention spring bar forward

This will allow the retention spring bar to snap out of it’s nesting slot on the opposite end of the body.
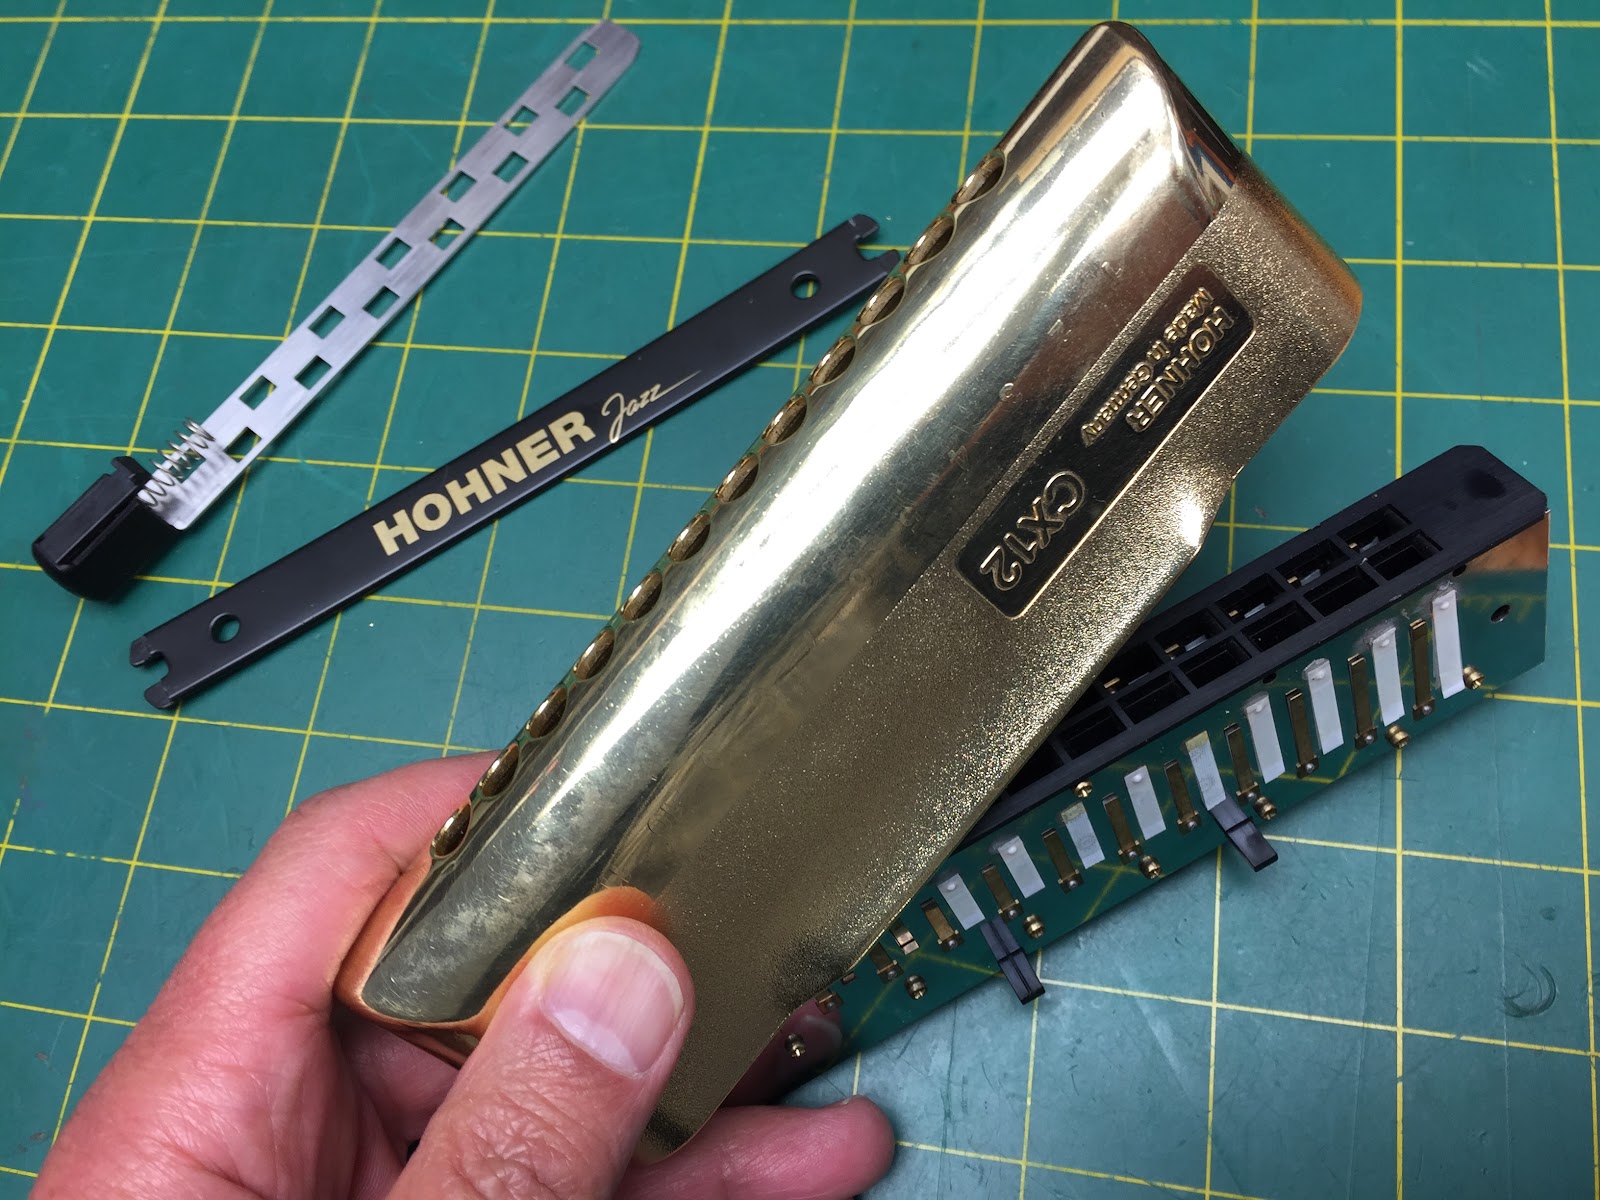
Remove the reedplate/comb module from the housing

Remove the machine screws to separate the top/bottom reed plates

Removing windsavers is waaay easier than installing them ;o) Simply peel them off.

All windsavers were removed from this side of the bottom reed plate

Here I am pointing to a blob of adhesive that oozed under my last windsaver project, and settled into the back corner of the reed/reed plate slot. This compromised the performance of the reed. That was bad form and I’m not proud of it ;o(

Apply a strip of Blue Painter Masking Tape about ⅜” inch from the reed rivet heads to protect the reed plate surfaces before the next sanding step

Particularly with chrome over brass reed plates, you can significantly improve the adhesion of the adhesive by roughing up the surface with a sanding stick

Blow off the residue left behind by the sanding process

Cleared of the windsavers, this is a good opportunity to calibrate the reed profiles (gapping)

Hohner windsavers are package in envelopes numbered from #8 through #22. The 48 reed CX12 chromatic harmonica is lacking of the lower octave found on 64 reed harmonicas. For this reason, we will not use the windsavers found in envelopes #19 through #22

Each envelope will provide the Harp Tech with the precise windsaver (length and width) for a particular reed slot size. Note: the divot located on the bonded side of the windsaver--this will provide a good fit over the reed rivet. The stiff tan colored strip acts as a spring to snap the clear dimpled strip of plastic lay flat over the opening of the reed plate slot.

It is useful to number the reed plates with the windsaver envelope number. This will mitigate the possibility of accidentally installing the incorrect windsaver.

Pattex Repair Gel is the new adhesive that Hohner provides for windsaver replacement


Here, I’m applying a small droplet of the adhesive onto a repurposed yogurt lid

Using a toothpick, I apply a droplet of the adhesive on top of the rivet

Holding the new windsaver with tweezers, line up the divot end of the windsaver over the reed rivet and gently lay over the droplet of adhesive
It is critical to position the windsaver evenly over the sides of the reed plate slot

Before 30 minutes tick off the timer, carefully dampen down--with a flat wooden dowel--on top of the base of the windsaver to ensure even distribution of the adhesive

Flip the reed plate over and plink each reed to make certain not adhesive seeped on to the base of the reed (NO BUENO!)

These windsavers are safe and secure, and ready to be …

Check the alignment and adhesion of each windsaver by lifting and releasing.
Everything checks out perfectly. Reattach the reed plates on the comb (threaded reed plate holes on the bottom reed plate). Congratulations--now get back on the bandstand and WOW us!
Factory Hohner Windsavers and adhesive are available from https://rockinronsmusicsd.com/valves.html
Your Harpsmith, Kinya
Yeah Mike ... I just completed another harmonica--works like a charm!
This task definetly requires the patience of a Zen Master, but after all--with the commitment to play the chromatic harmonica comes greater responsibility, requiring more attention than our short harp (diatonic). I suppose it's not that different than someone who chose to play the guitar ... learning to change their own strings was mandatory (unless you have Roadies or Groupies who do that for you ;o)
Your Harpsmith, Kinya

I like this
......Mike