How to Replace Manji Welded Reeds

Hello Harp Techs, Suzuki Musical Instruments pioneered the rivet-less process for installing reeds on reed plates, by using a sophisticated spot welding method. When I toured the Sukuki harmonica factory in Hamamatsu, Japan, I was able to witness first hand how ten phosphor bronze reeds were attached simultaneously to their matching Manji reed plate. It was an engineering marvel. In contrast, the Hohner Marine Band harmonica reeds are positioned in place by hand, one-at-a-time over the slot of the reed plate, then riveted into place by an operator’s foot pedal.
Originally replacing faulty spot-welded reeds required expensive Suzuki tools.
For this article I will demonstrate how to replace a Suzuki Manji reed with the “normal” tools found on many work benches.
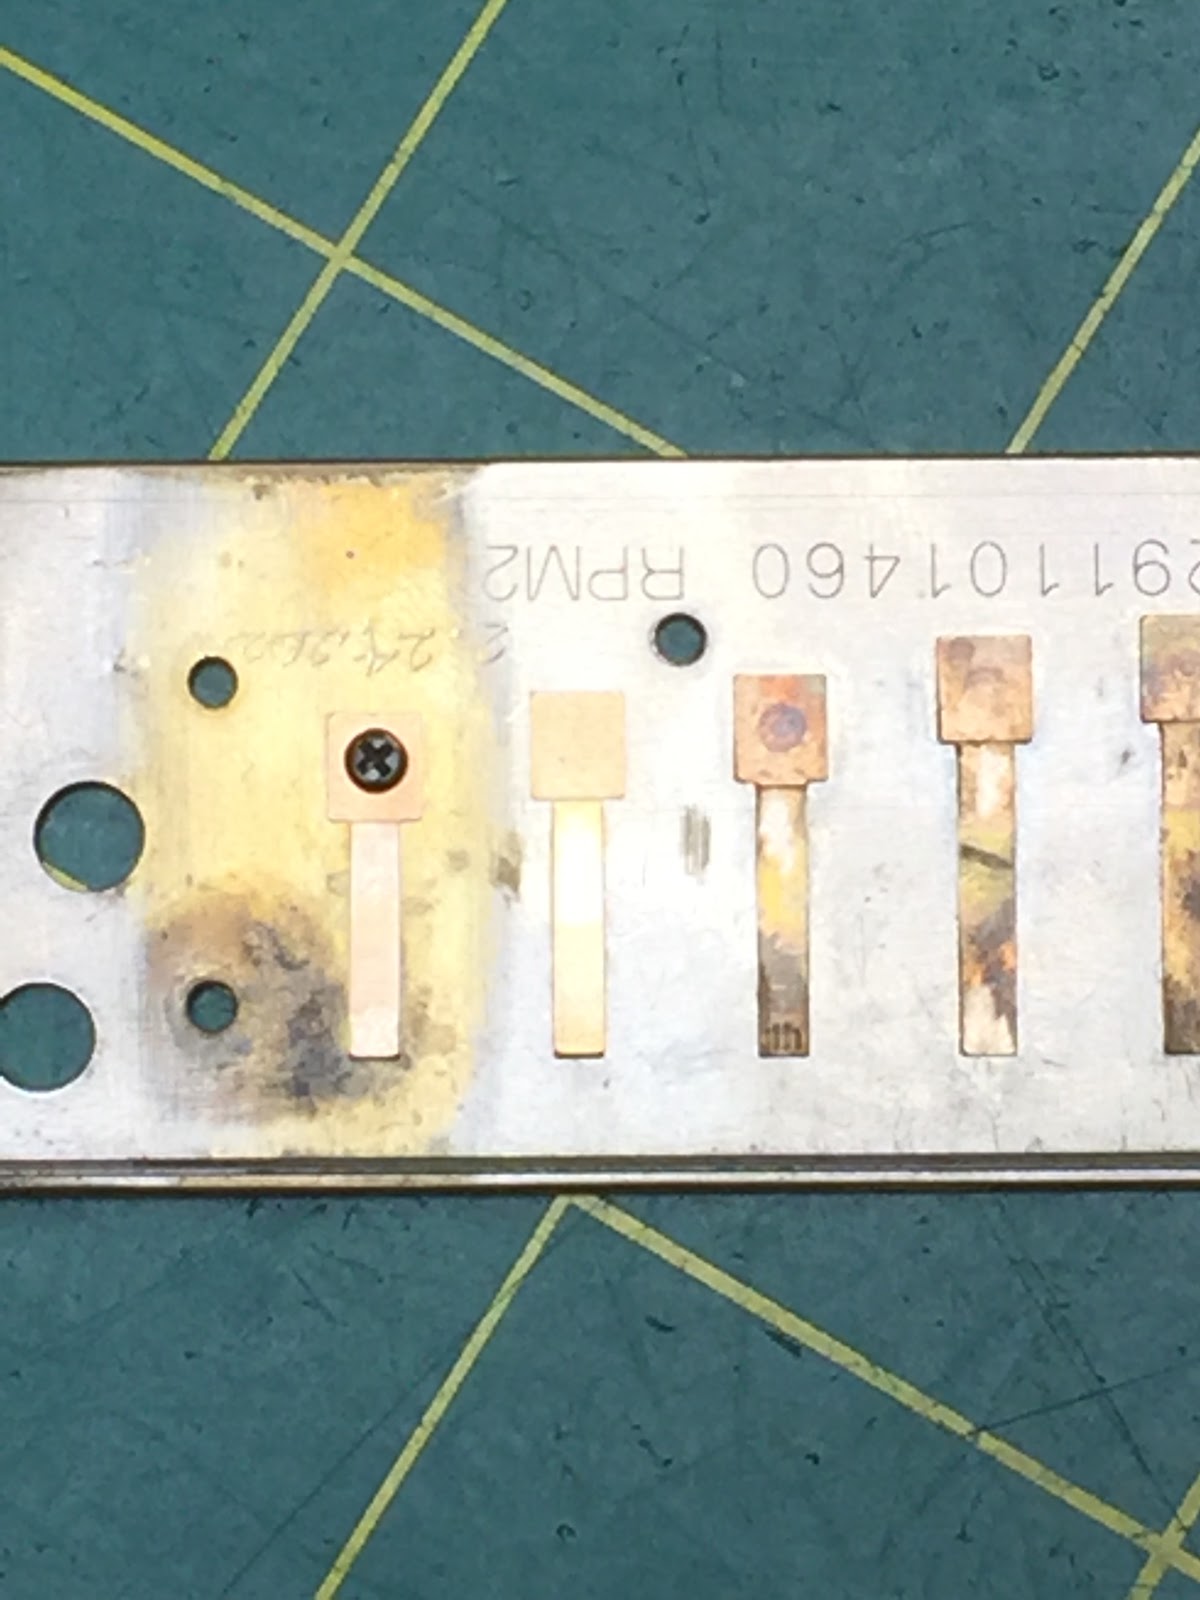
First, verify the faulty reed. Your ears will give you your first hint (out of tune) and secondly, the readings on the chromatic tuner will indicate the reed will be significantly flat (probably by more than a ½ step/semitone) and third, your efforts to hold the correct tuning will fail. You can accelerate this process by “plinking” the reed as convincingly as possible. For this harmonica, blow reed #9 was fractured. (note: Andy Just really works the top end of his harmonicas)
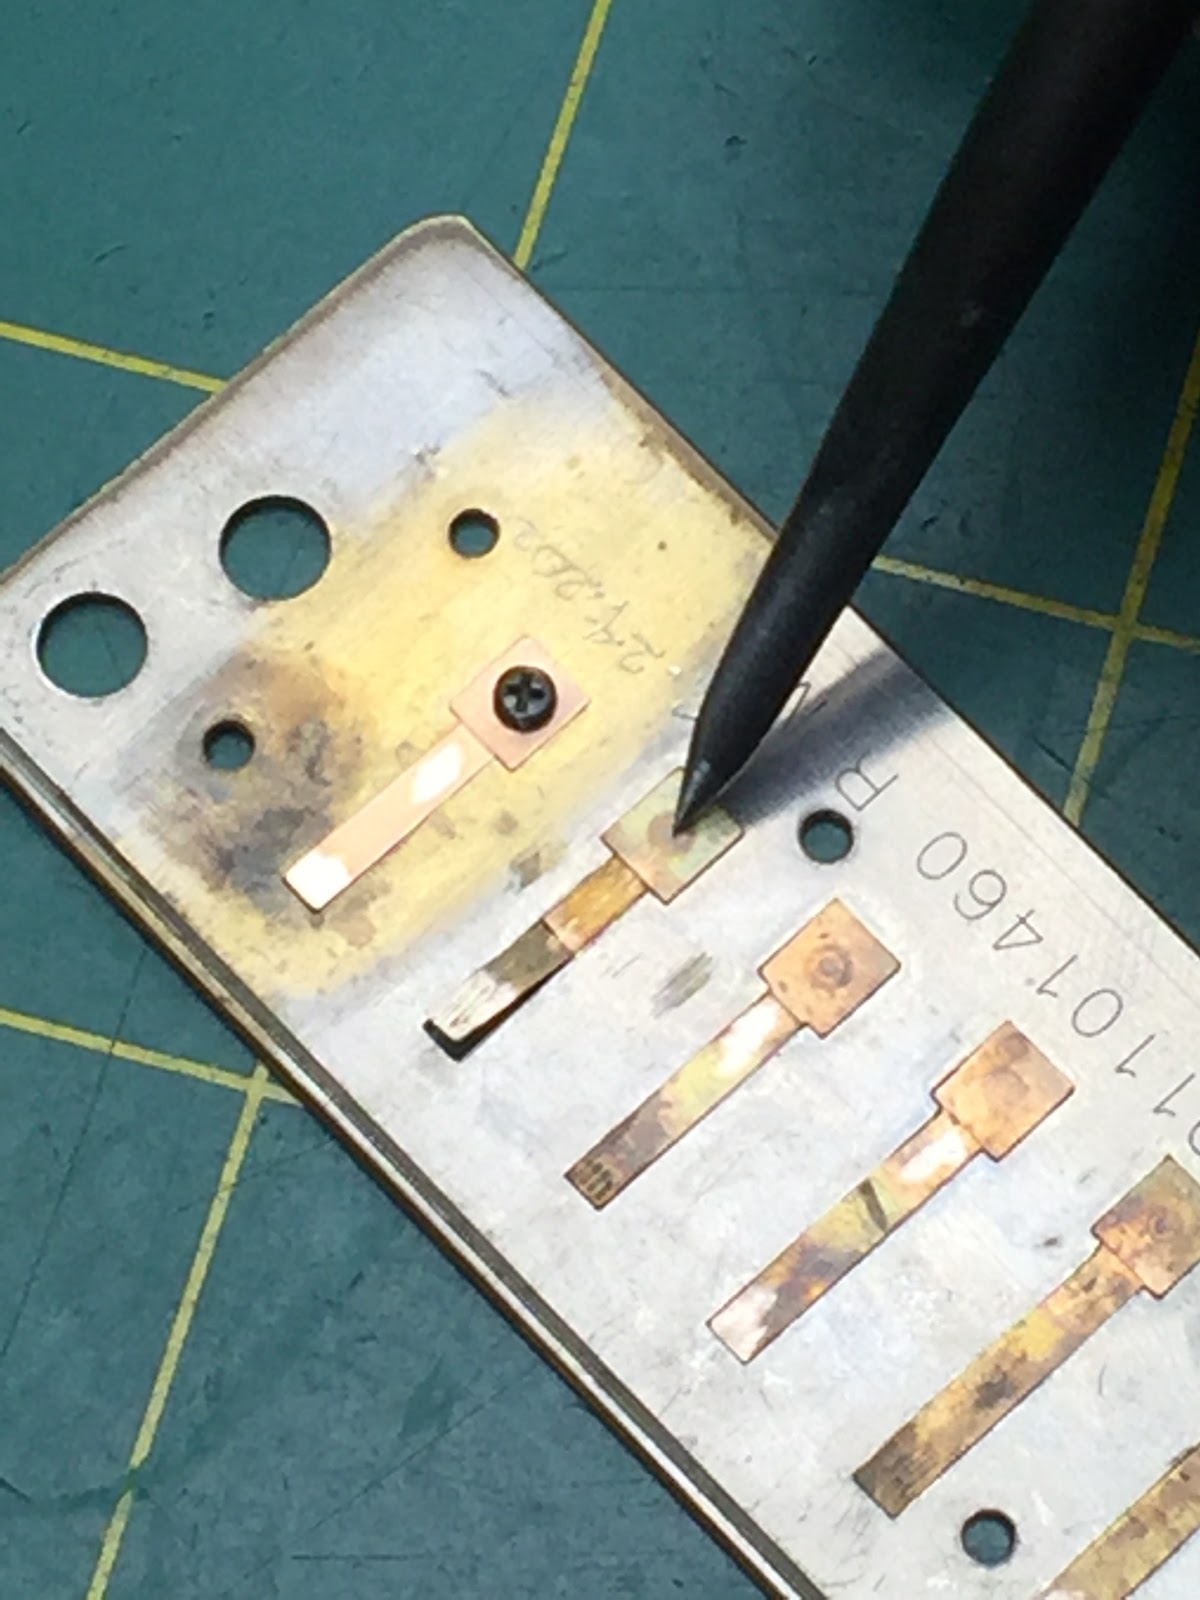
With a center punch (scratch awl), imprint a divot dead center over the spot weld. Look: do you see where the reed fractured after I had plinked it a few times

A light tap of the hammer is all you need to create a small countersunk hole
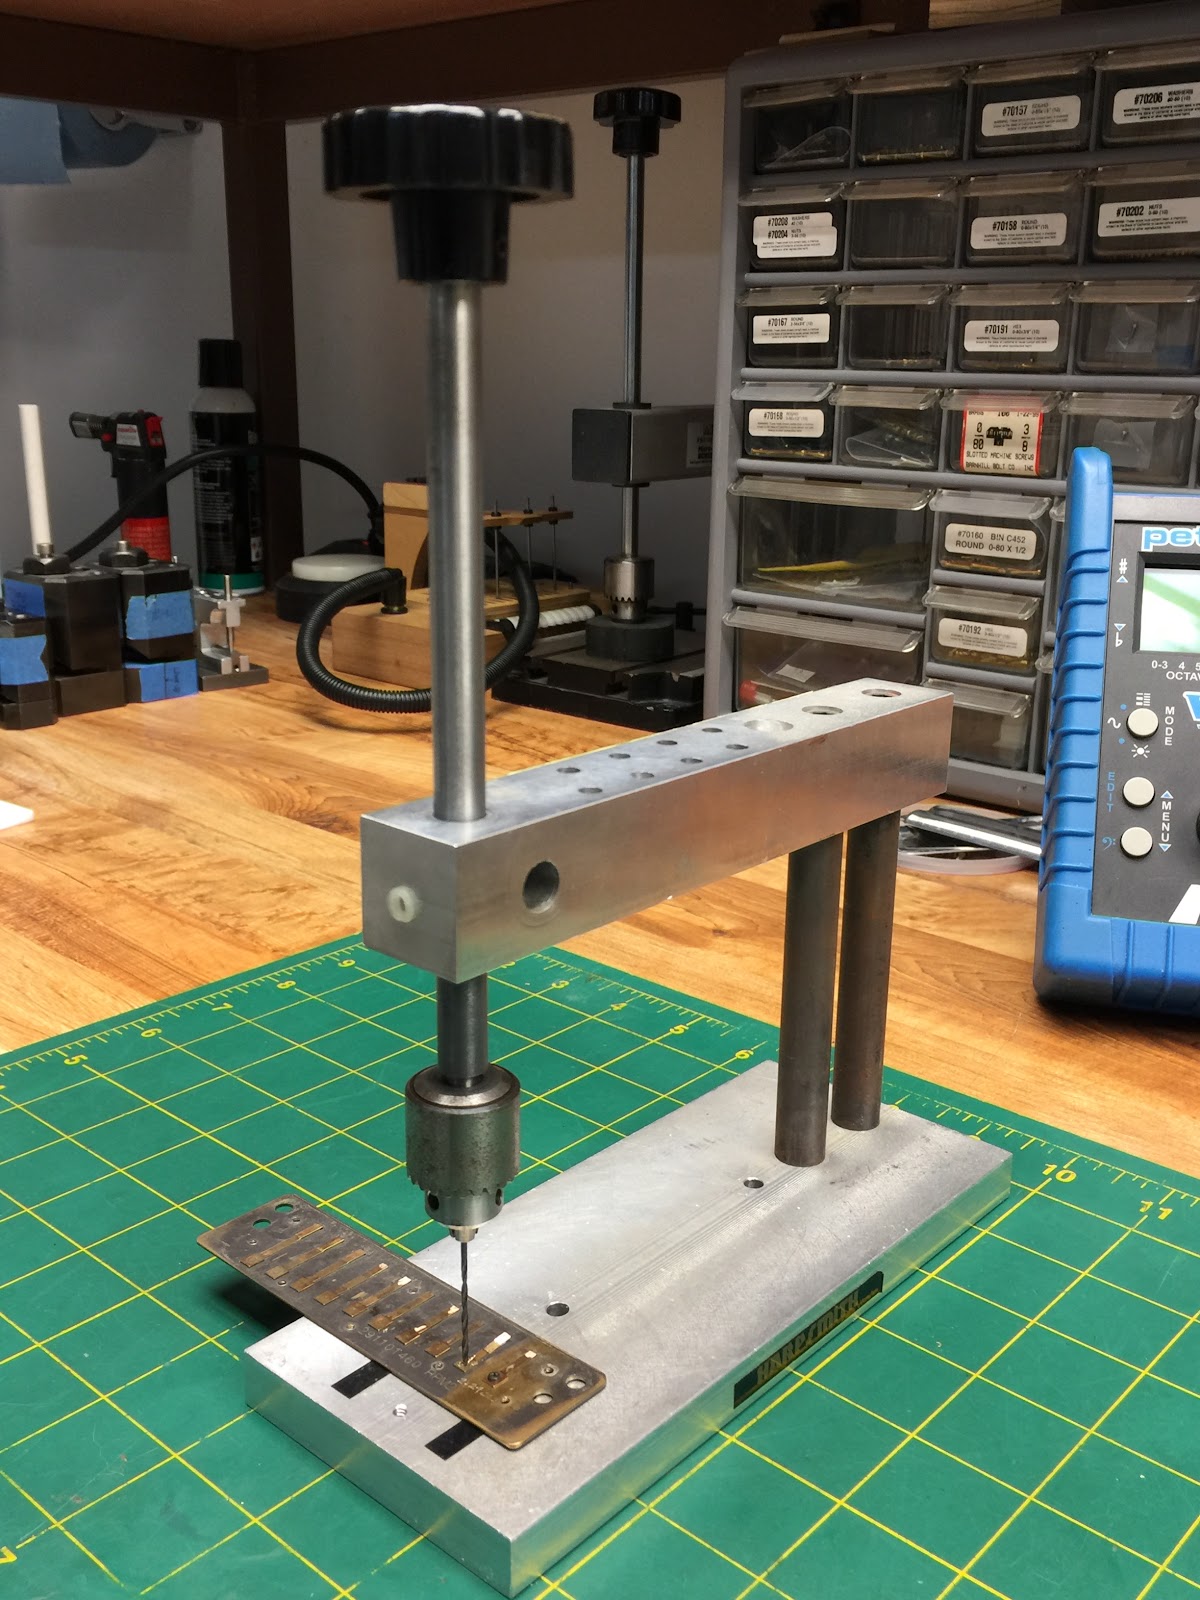
Position the tip of the #55 drill bit into the countersunk hole
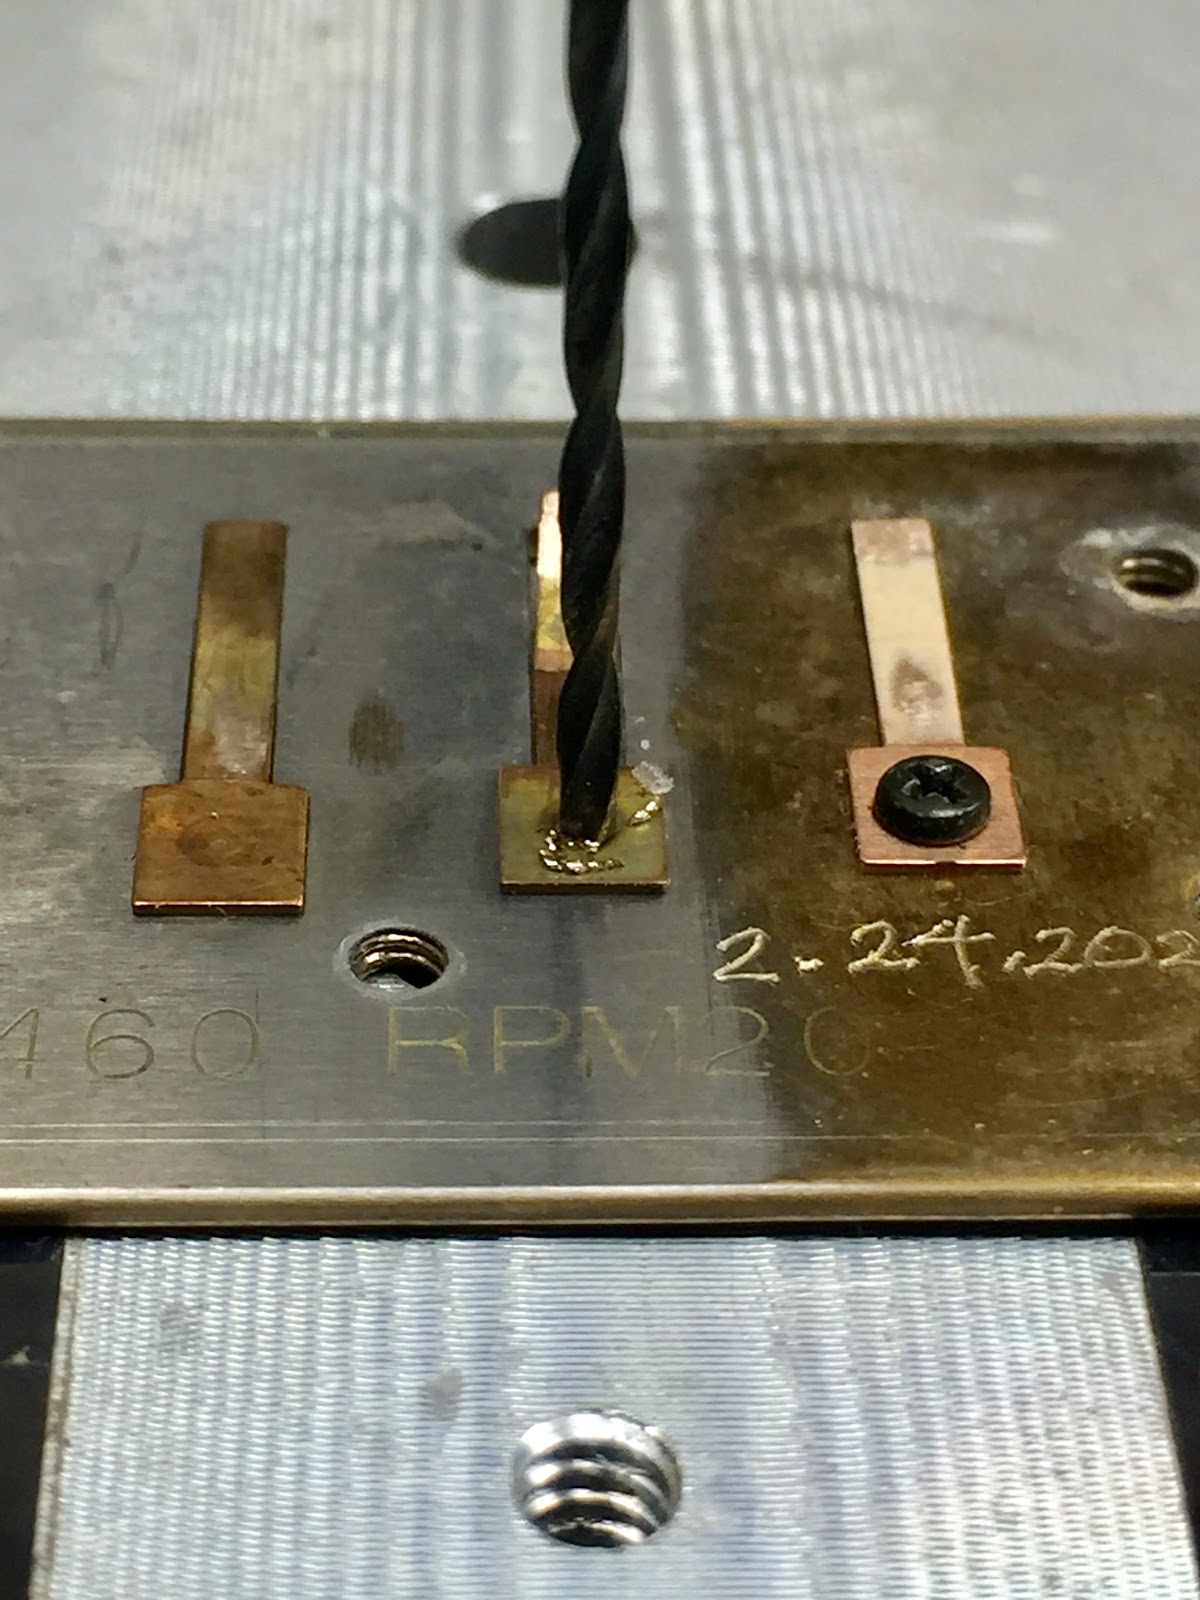
Carefully drill a “pilot” hole all the way through the other side of the reed plate (be cautious not to drill through the surface of your base (My aluminum base had a clearance hole for the bit to pass. A scrap piece of wood works great as well)

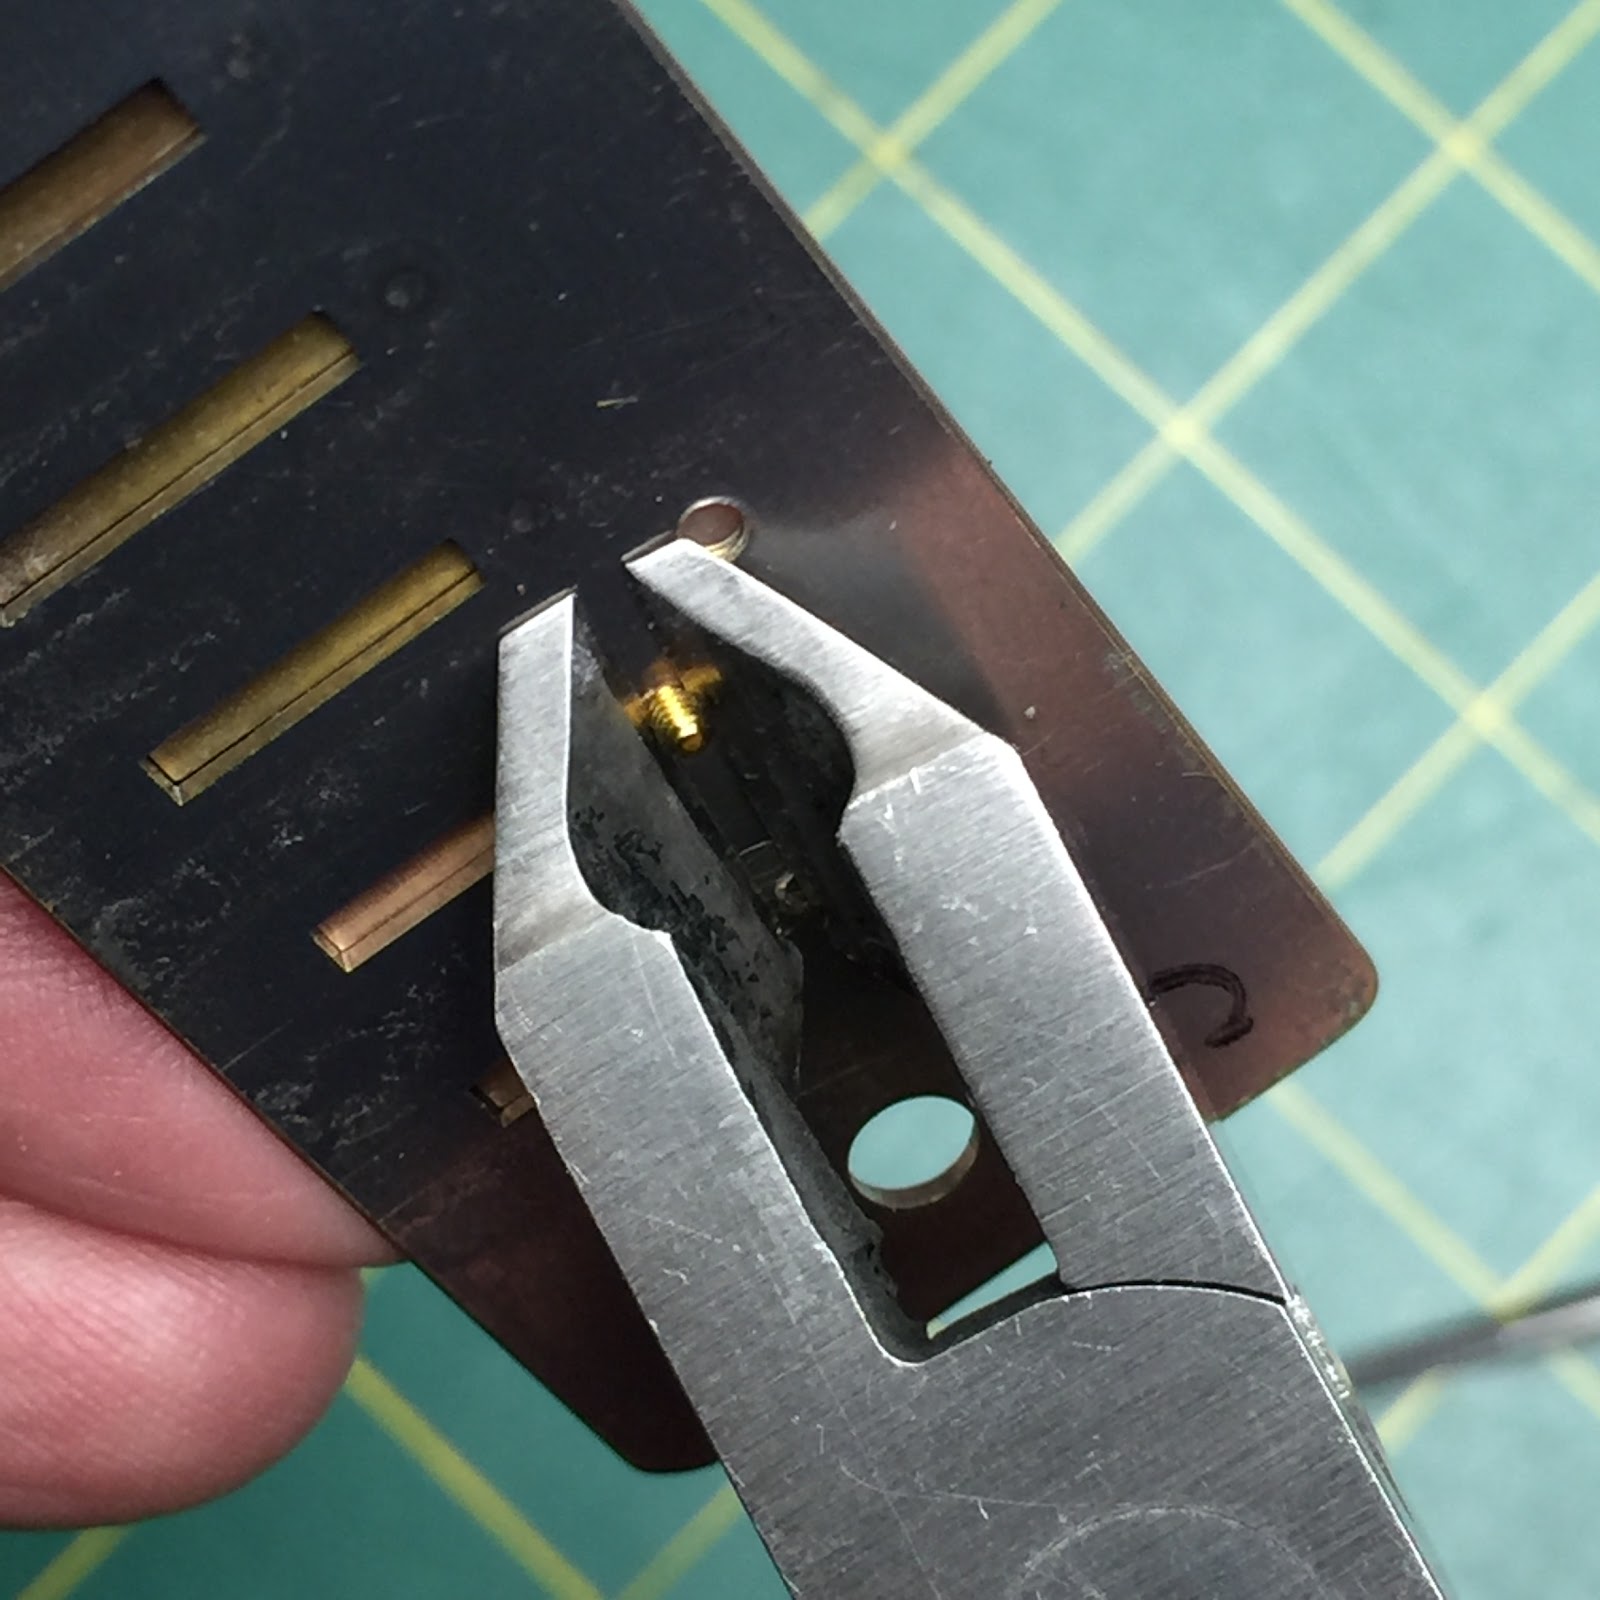
Line up the (Suzuki) open end reed wrench to the base of the reed (keep the wrench flat to the plate)
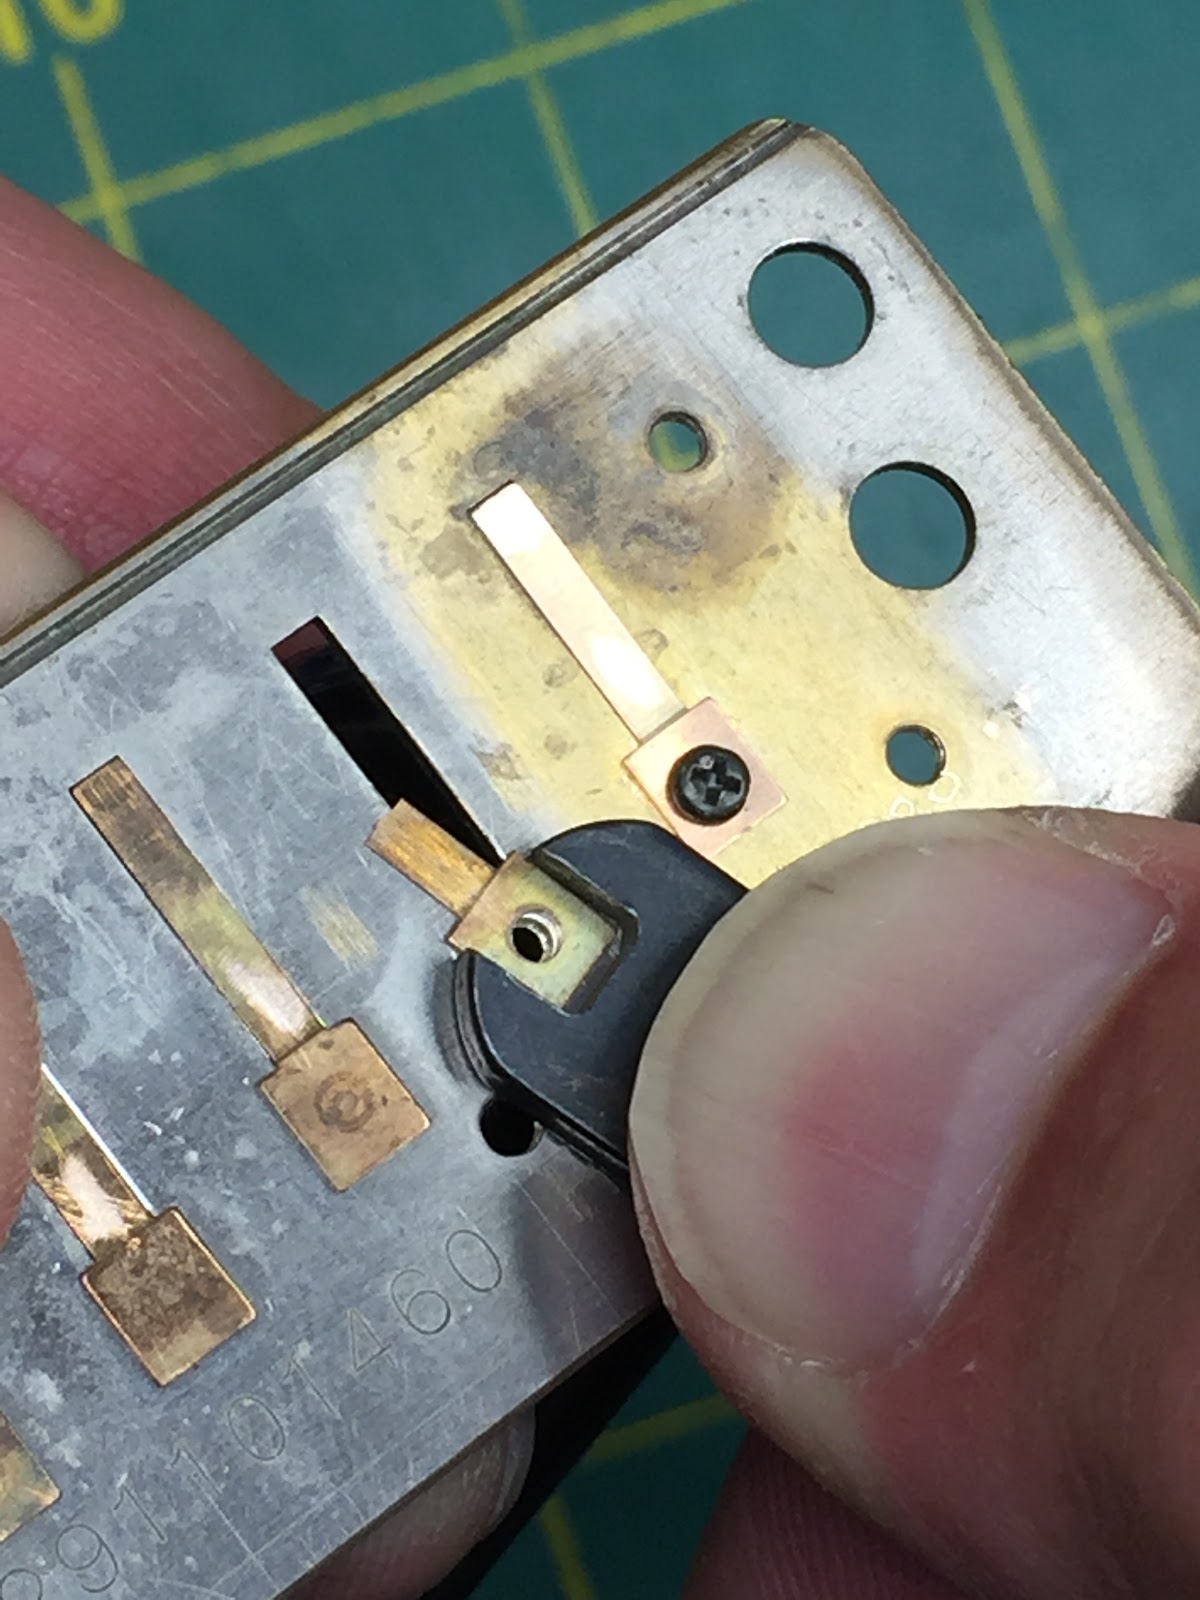
Pivot the wrench and without much effort, you will break the weld and release the reed

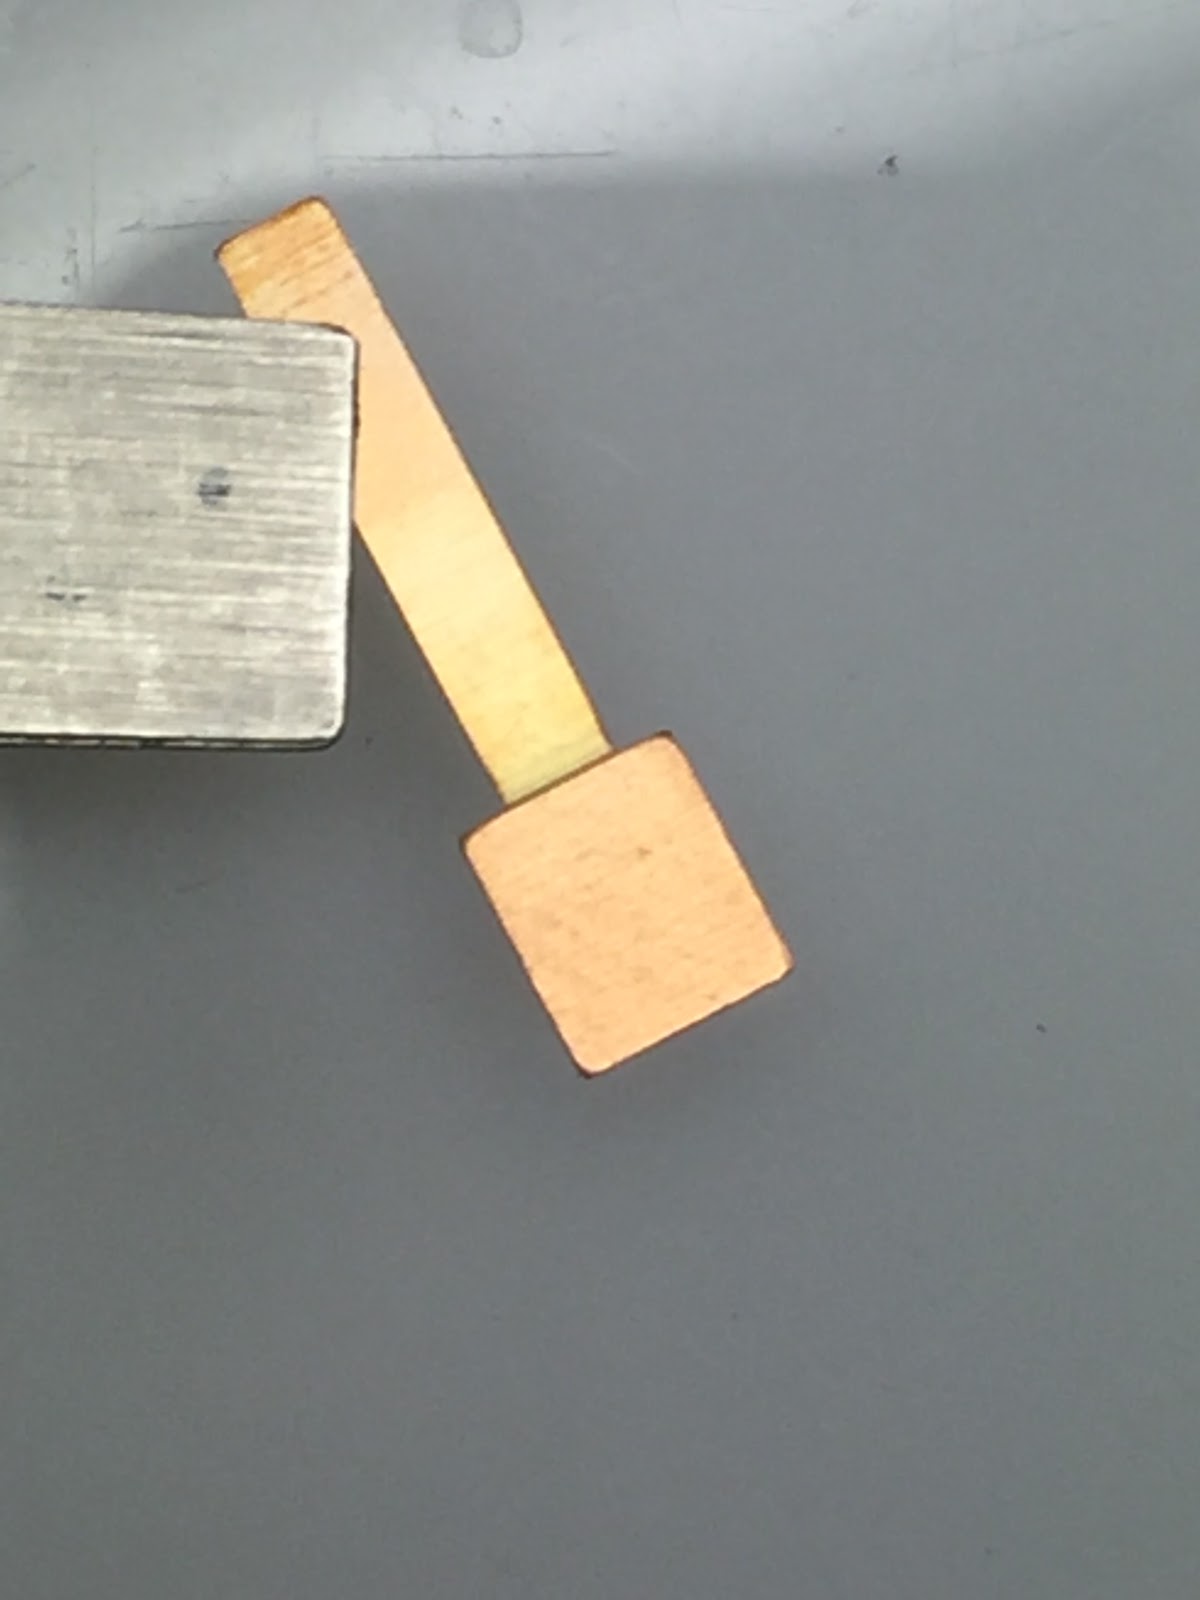
Easy to see where the hairline fracture was
Remember, Suzuki reeds are spot welded in place at the factory, and therefore, are not made with the pre-drilled #52 clearance holes found with the Hohner reeds (rivets). This means we will have to drill a perfectly centered #52 clearance hole for our #0-80 brass machine screw
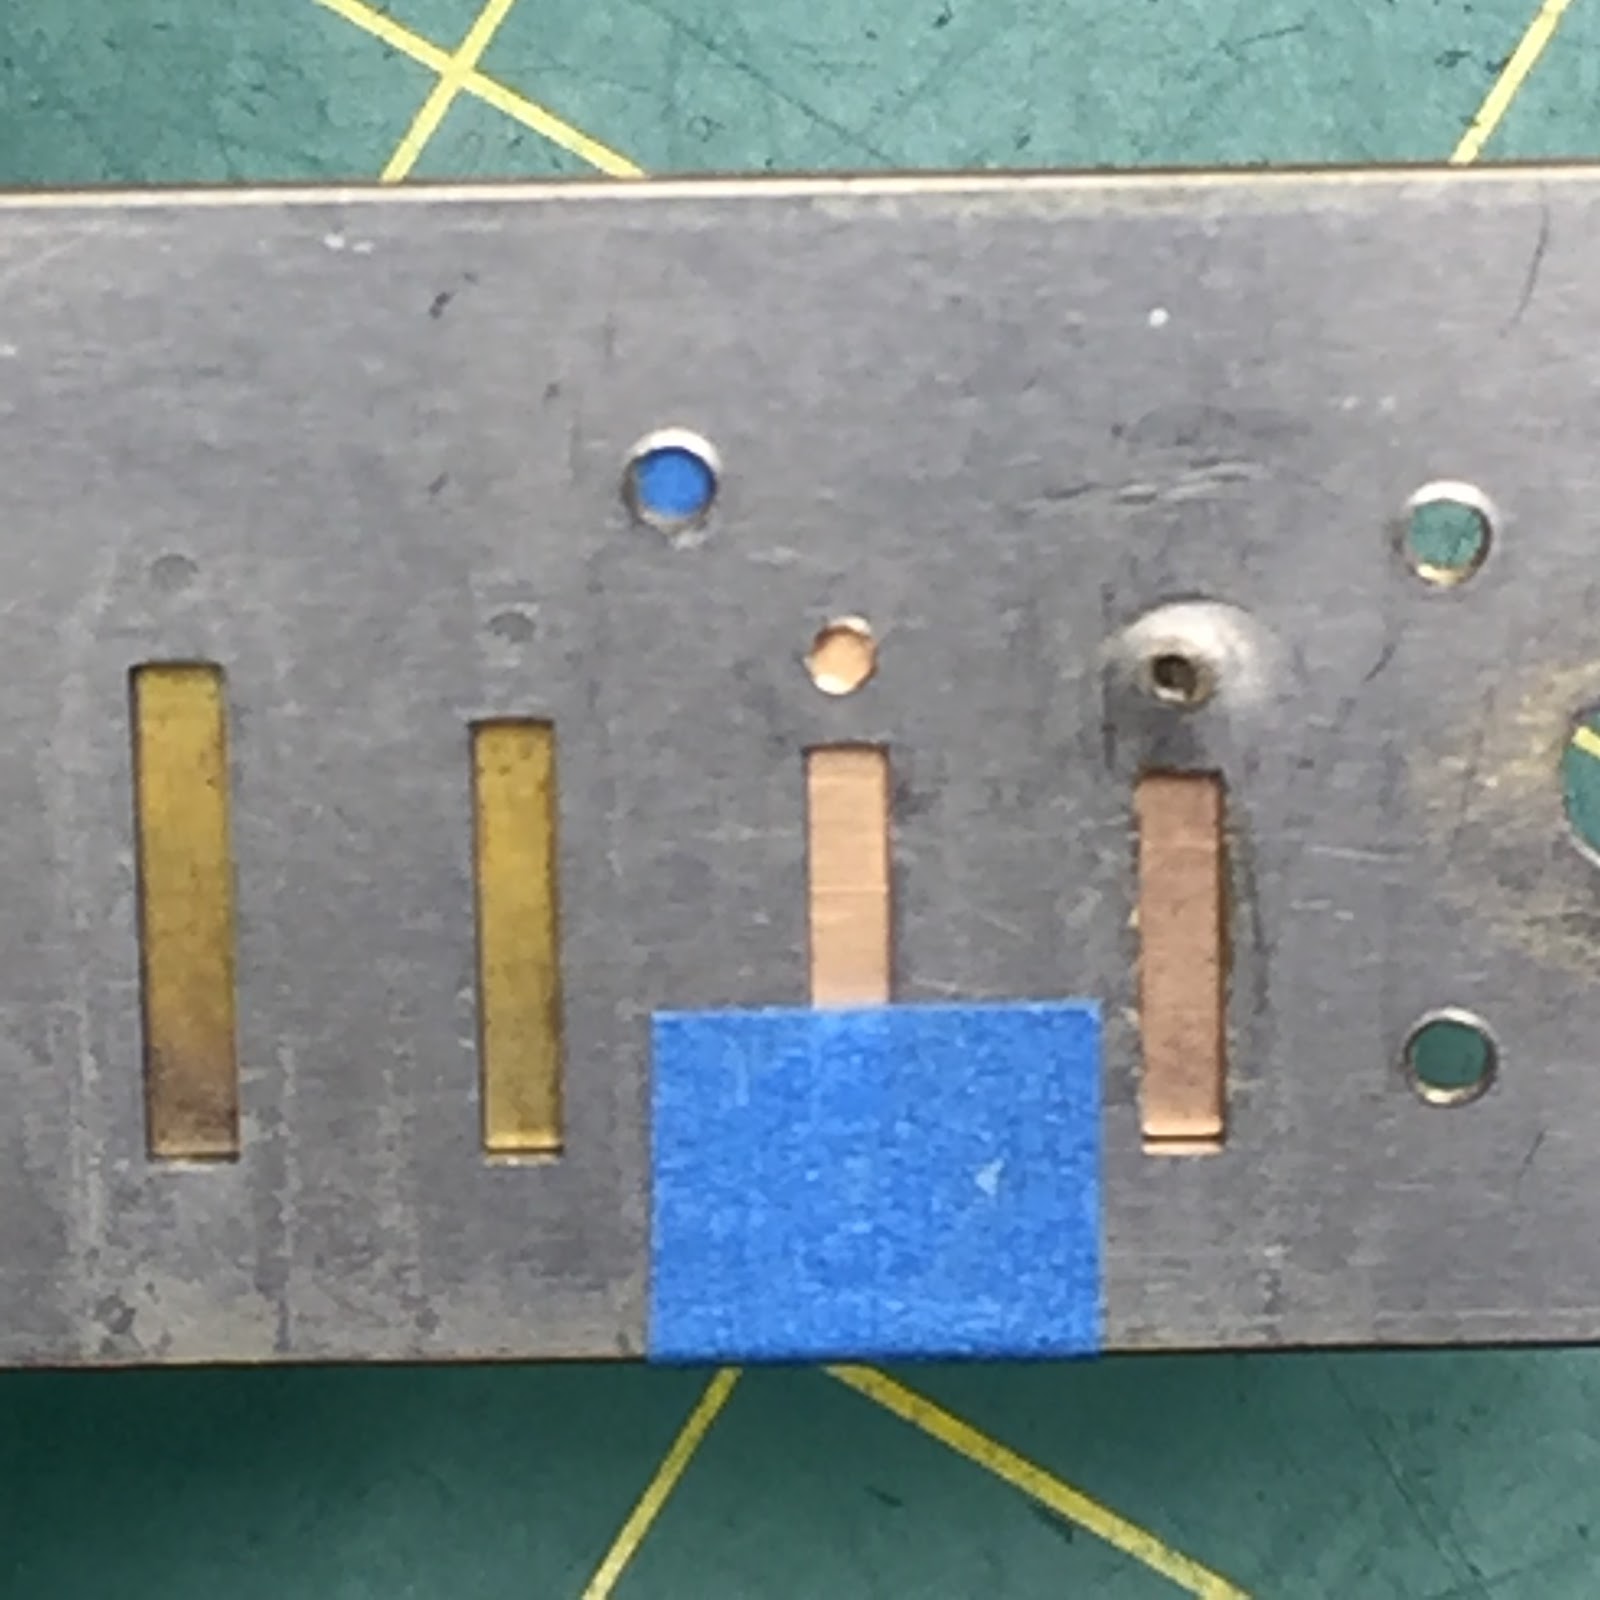
Lay the new reed (or donor reed from another Suzuki harmonica) into place
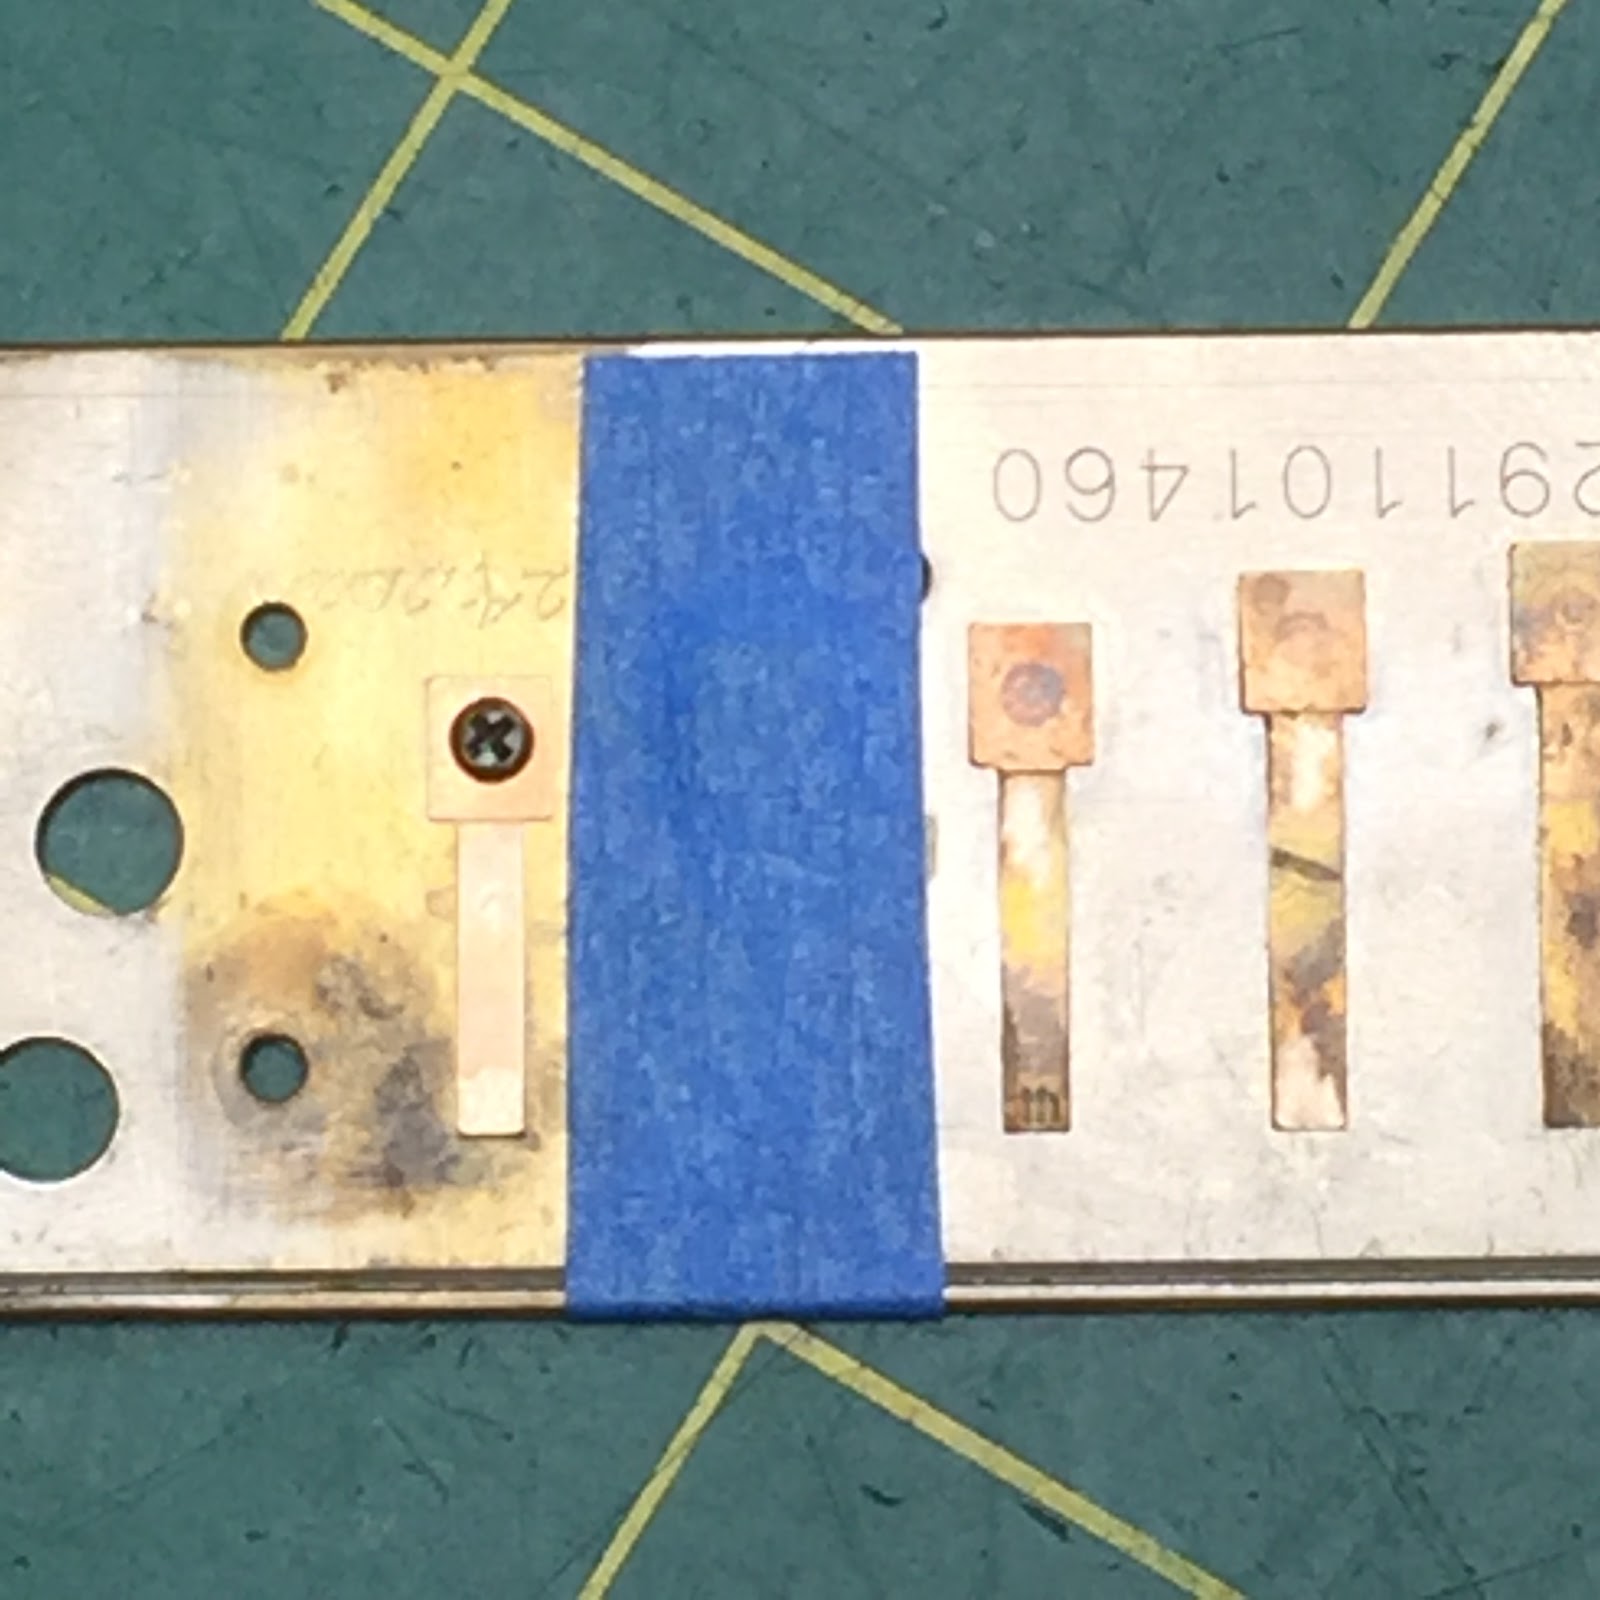
Perfectly secure the reed in place with Blue Painter’s Tape then flip the reed plate over
Look for the #55 pilot hole

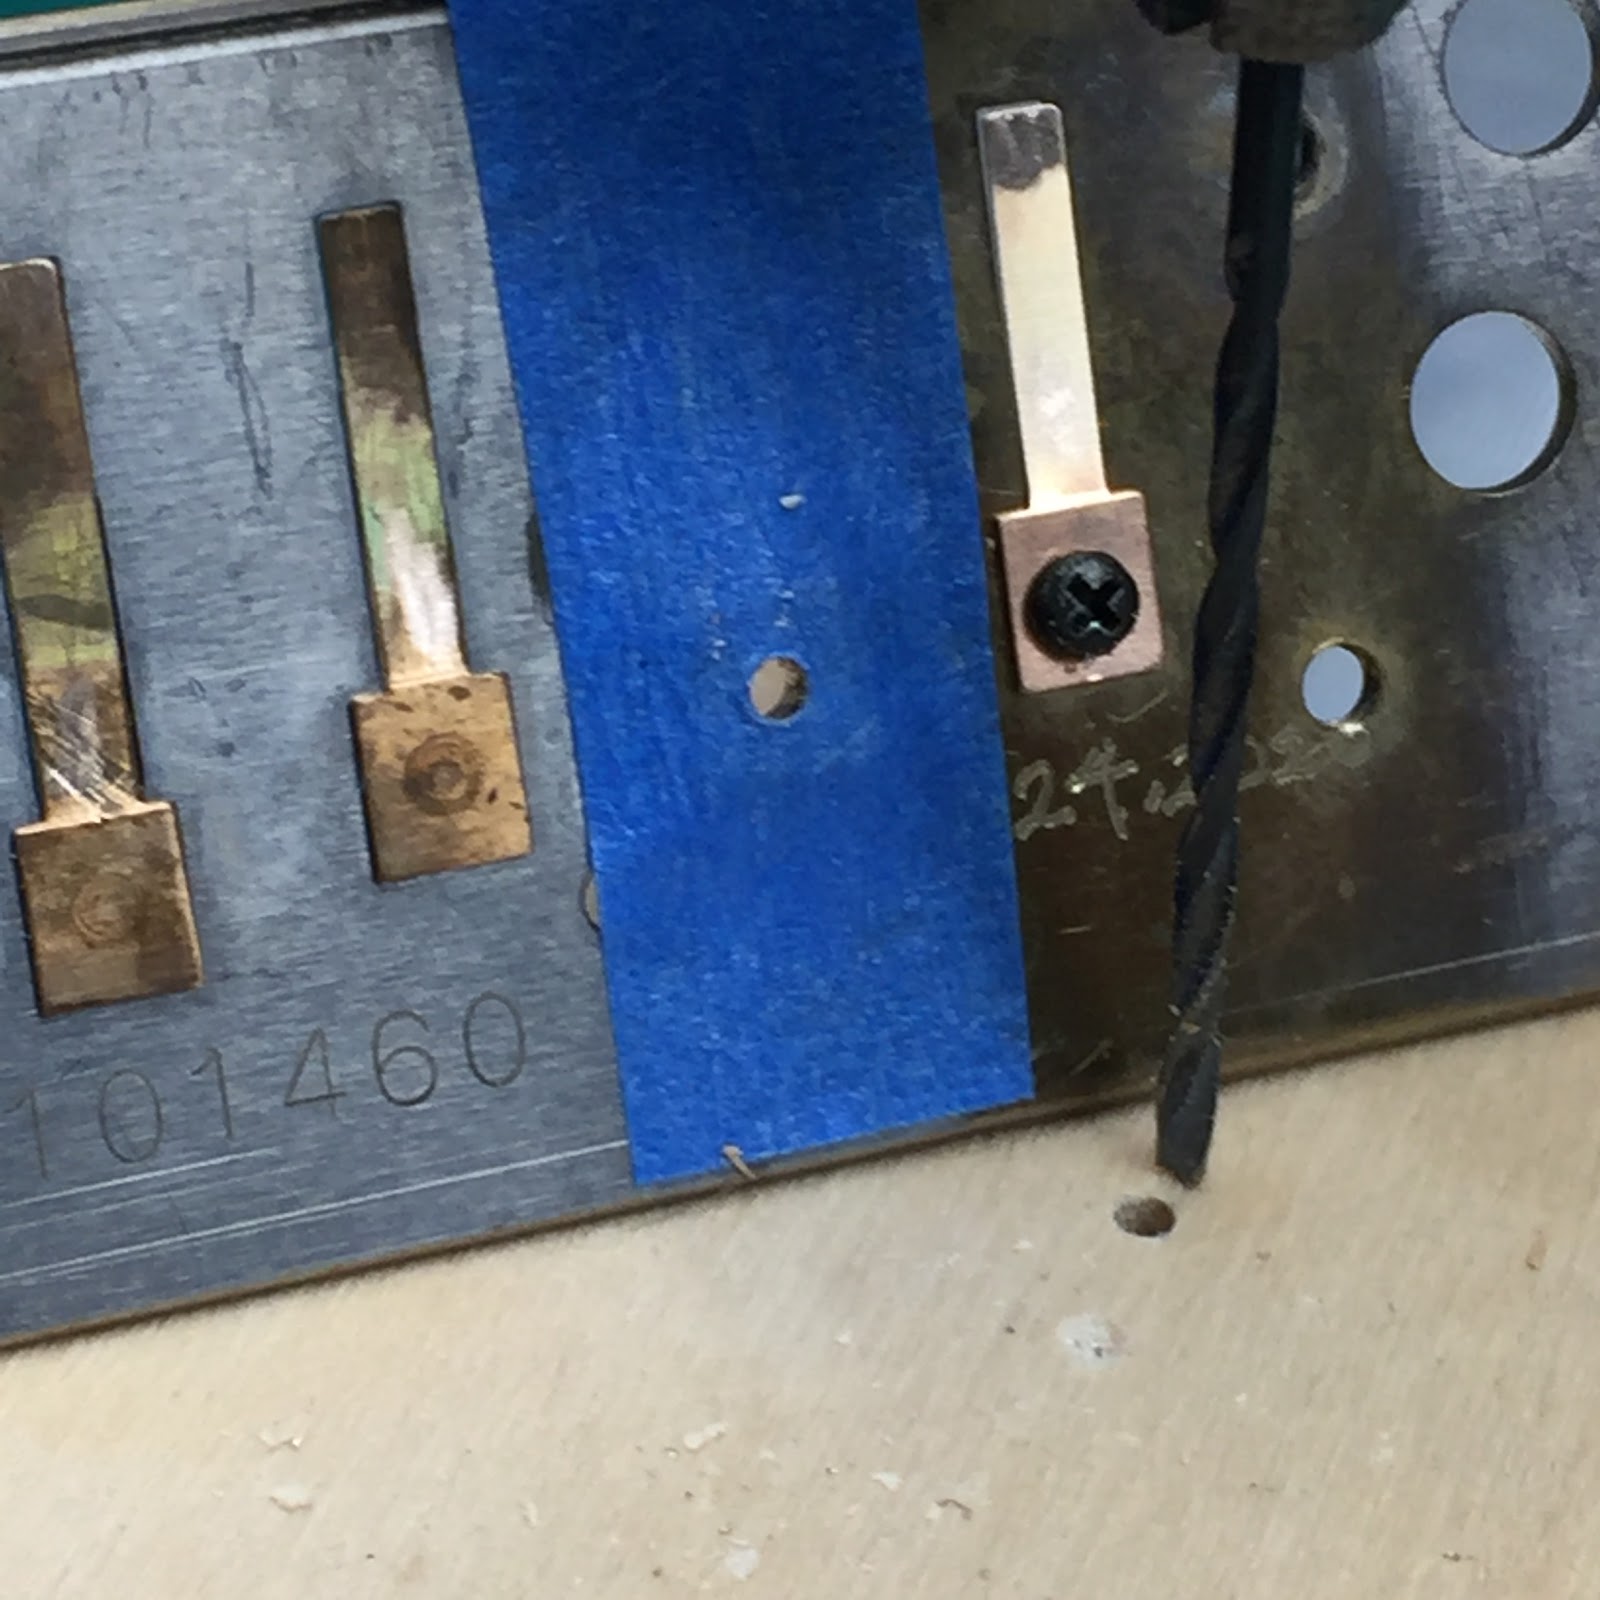
With the #55 pilot hole drill (any larger than that, the tap will not enough purchase), insert into the reed plate hole and drill through the reed plate pad Tip: place a wood block underneath the reed and when you pull up wood shavings through the flutes of the drill bit, you had successfully drilled through the reed pad.
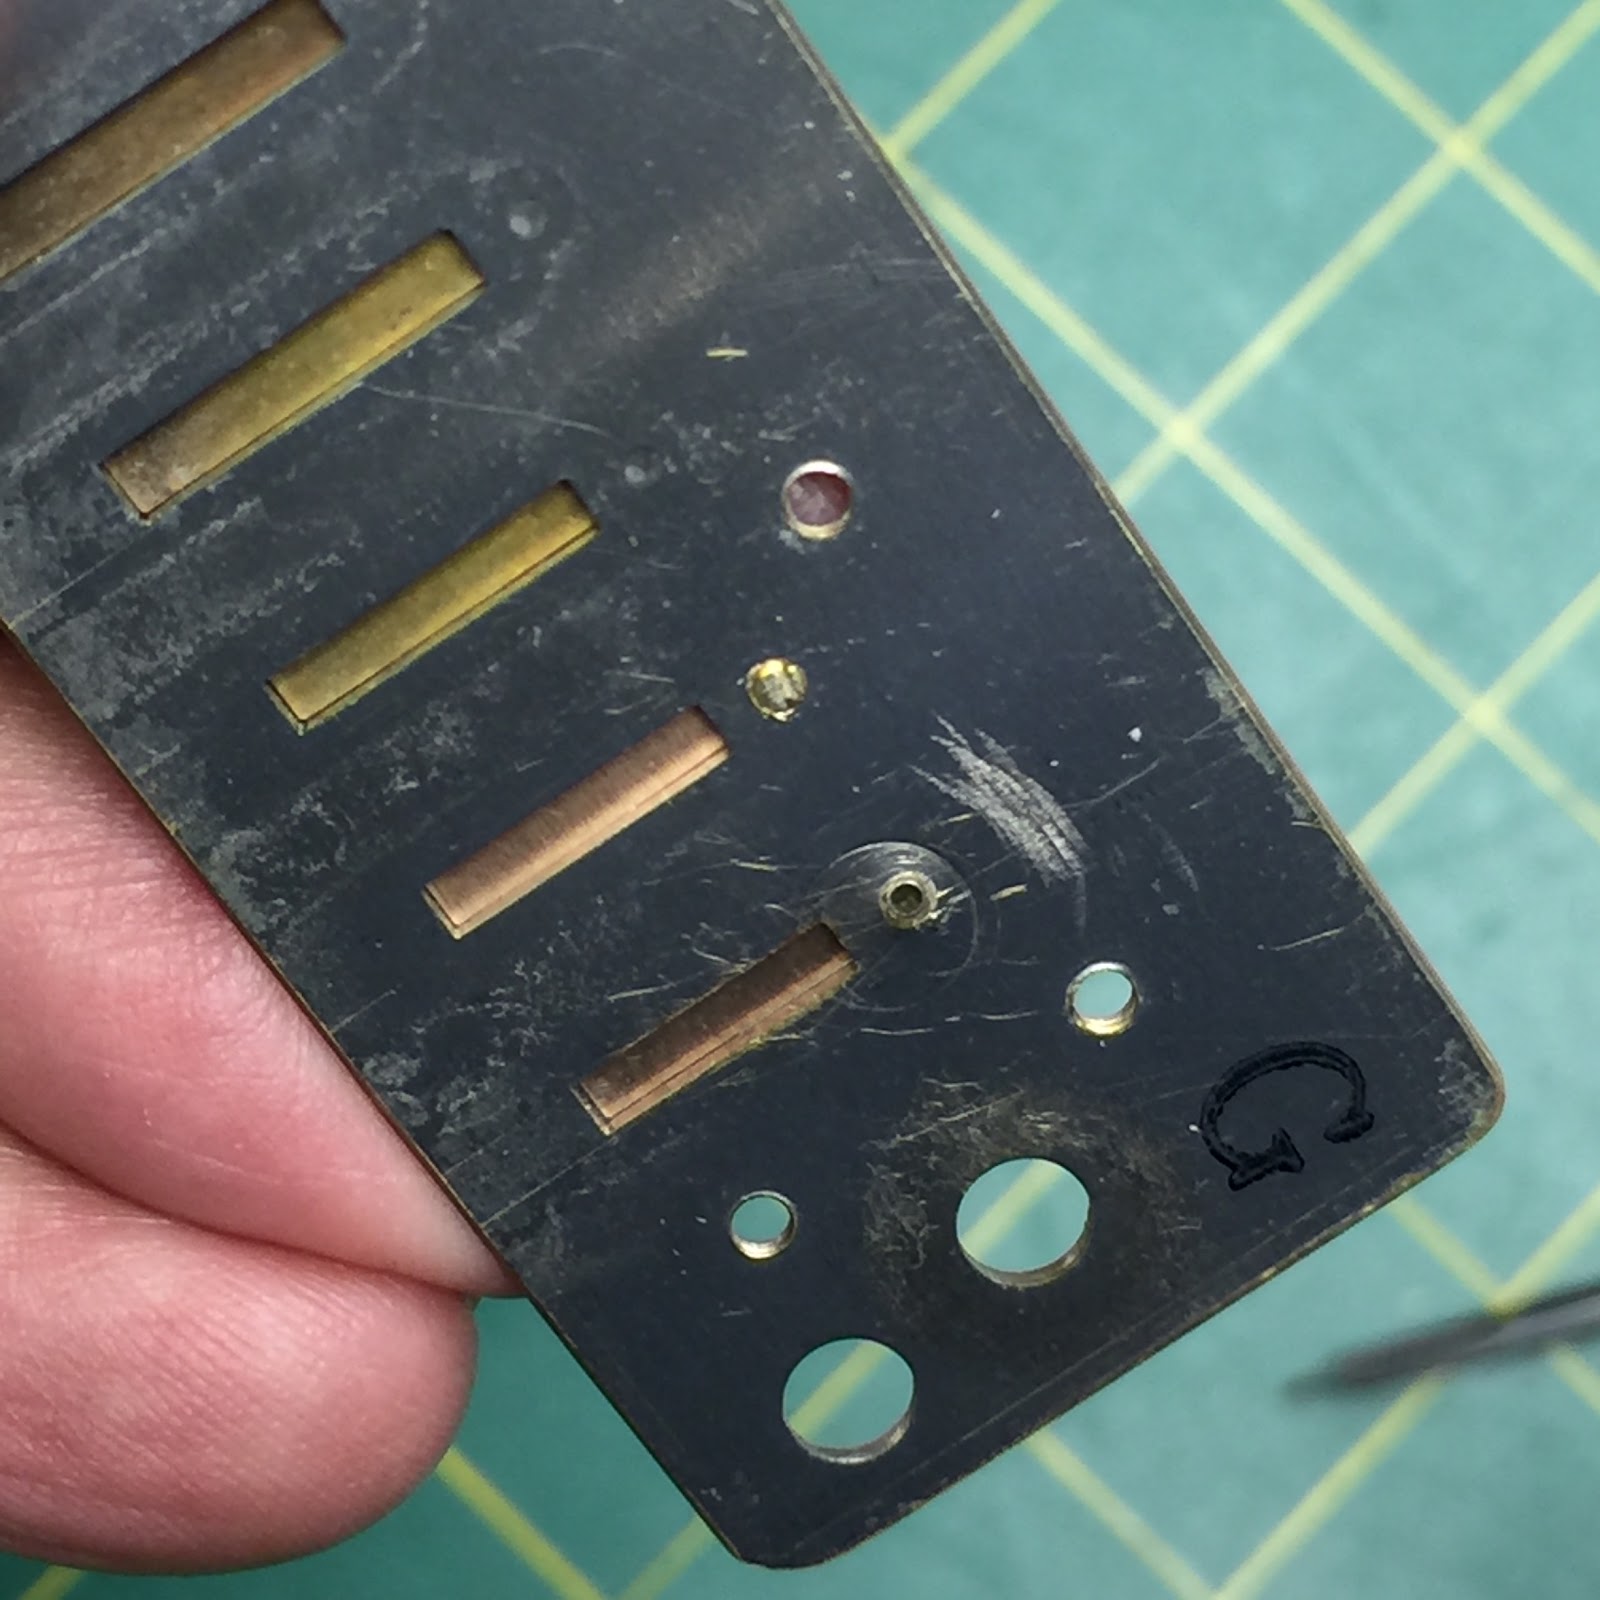
Flip the reed plate back over and you will see the #55 hole through the Blue Tape

Remove all the Blue Tape and you are left with perfectly centered #55 hole on the reed pad

Brass reed material is soft (except Stainless Steel Seydel), it is easy to enlarge the pilot hole with a finger drill bit into the required #52 “clearance” hole for the 0-80 brass machine screw. For the moment, I will put this reed off to the side (in a safe place) and finish the reed plate

Next, it’s time to cut-in the threads into the #55 pilot hole by running a 0-80 tap all the way through the plate. The reed plate material is relatively soft, so the tapping process will be quick and easy. Although, I use a hand turn type drill press tool (for super straight tapping), a hand held Pin Vise or T-Ratchet wrench will work just fine.
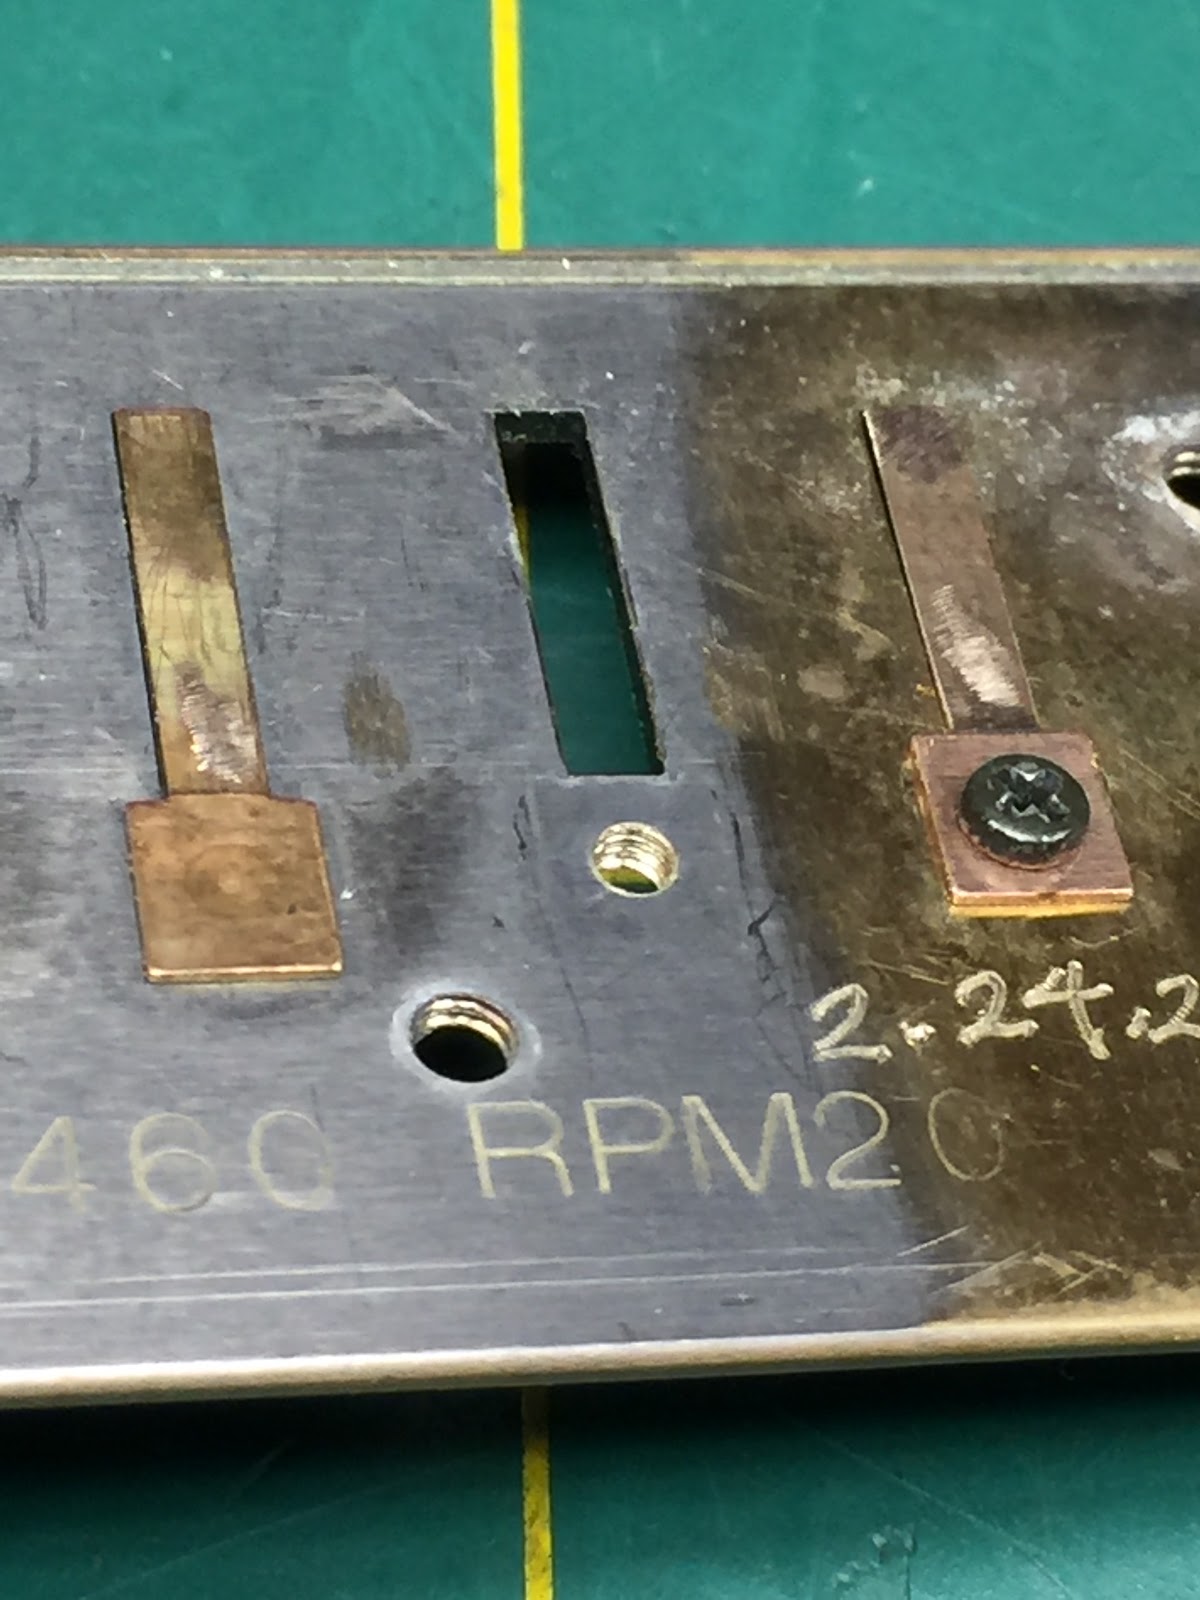
This close-up shot shows you the #0-80 threads that I had cut into the reed plate. Also notice I cleaned up the burr/debris to insure the new reed will be set perfectly flat.
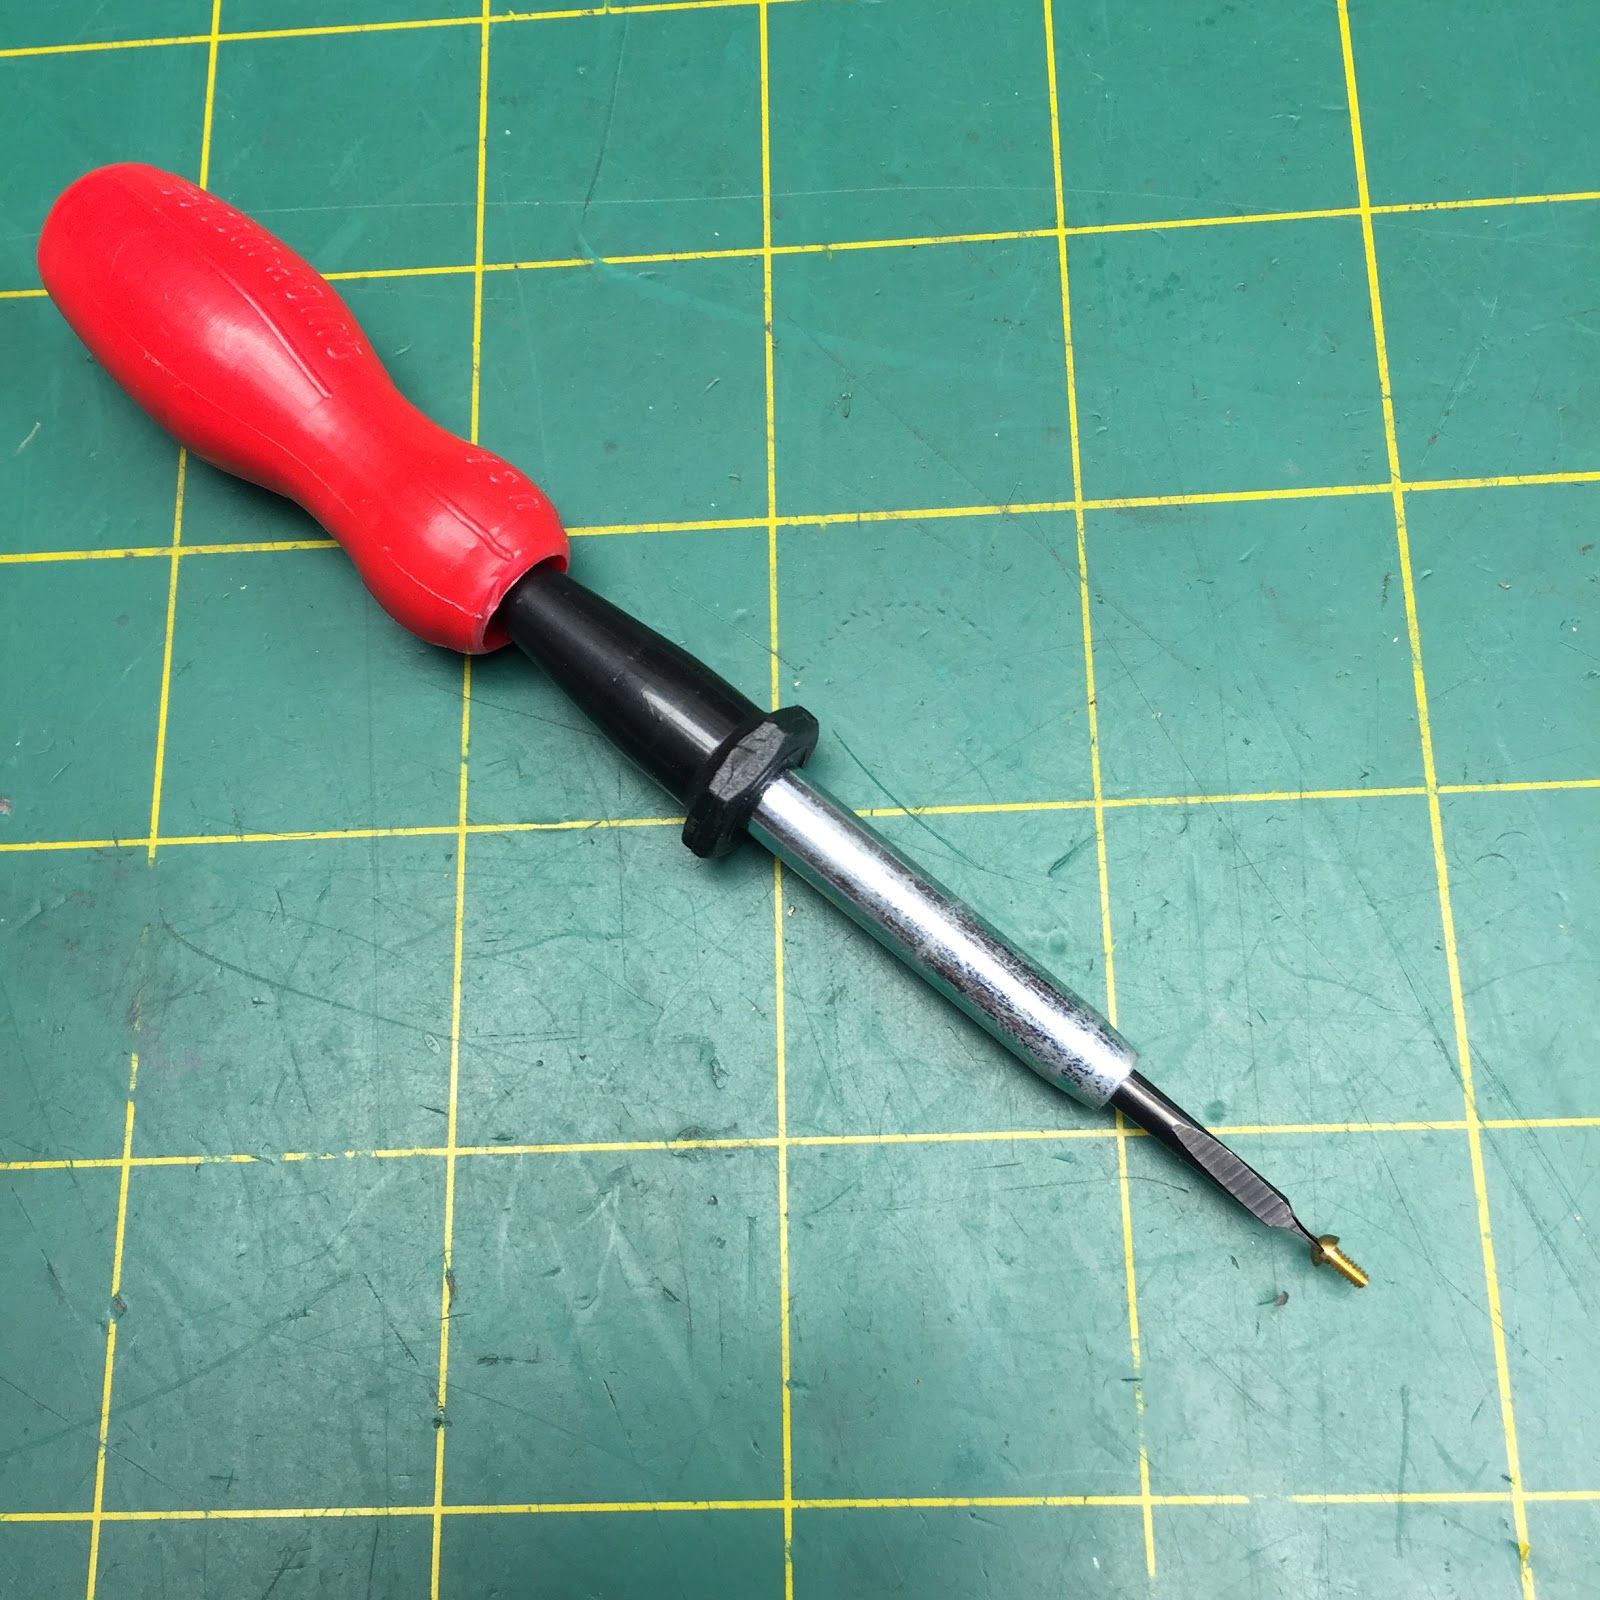
One of the reasons I chose to use 0-80 x ⅛” brass slotted head machine screws was that small screw launchers can easily and securely hold these extremely small screws

Tip: Always a good idea to slip a 0-80 brass washer on the machine screw shaft as well. You’ll thank me when you install the reed--the washer will apply downward pressure as you tighten the screw and minimize the reed from pivoting clockwise

Screw down the new replacement reed and plink for alignment and clarity. Tip: use a light box to ensure you are centered inside the reed plate slot to avoid clicking and clacking (or worst yet--not play at all!)
The last step before tuning the reed, is to nip off the extra shaft, so that it doesn't interfere with the comb mounting. I use a modeler’s railroad rail side cutter.
Here is the backside of the reed plate with nothing to block our re-assembly onto the comb.
In my next installment, I will show you how use #0-90 flat head machine screws/nuts. OH BOY!
Your Harpsmith, Kinya
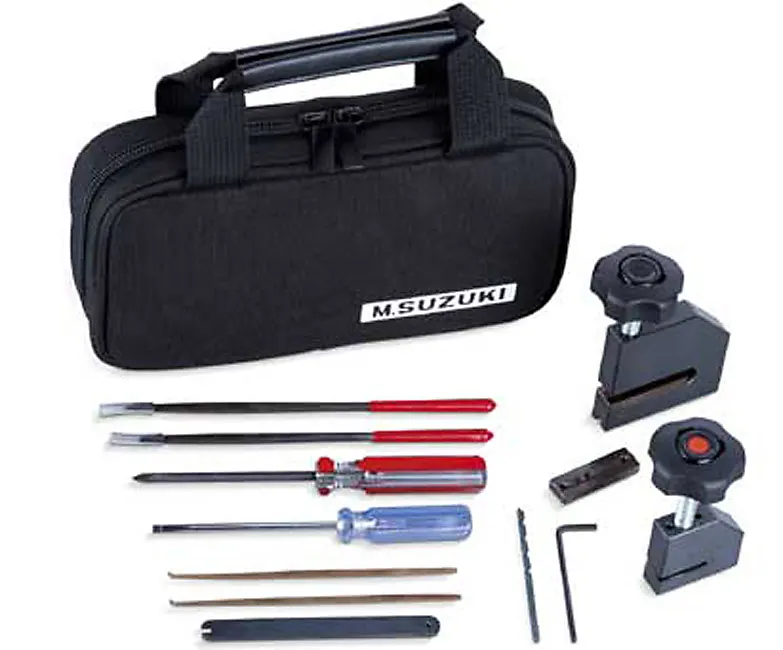
All Fasteners (machine screws) Tools (with exception of the Suzuki reed wrench) are available from https://www.micromark.com/
Hi MX, good to hear from you.
Well--let me count the reasons why I do not spot weld harmonica reeds:
- I don't have access to spot welders
- If I did, I could not hold the reed in place with my beloved 3M Blues Painter's Tape. It would probably burst into flames
- This means I would have to fabricate a special jig and clamp
- If, and I mean IF, I got this far ... I would get so mad if the reed shifted (with no way to adjust) and would have to restart the entire process over again ;o(
- And finally, I would have to do a couple of thousand Suzuki reeds before I would have paid off the new wing to my shop
Your Harpsmith, Kinya
Hello Harp Techs, recently I ran into a new Harp Tech who had issues replacing "spot welded" reeds.
Many, if not all the Asian made harmonicas use this manufacturing process-pioneered by Suzuki Musical Instruments. As the population of spot welded reed harmonicas continue to grow, for aspiring Harp Techs, it would be wise to review the steps shown here on this Forum; you don't want to turn down new business ;o)
Your Harpsmith, Kinya

That is some nice workmenship as allways from you, and thanks for the info. have you ever filed off the reed and spotweled a new reed on?